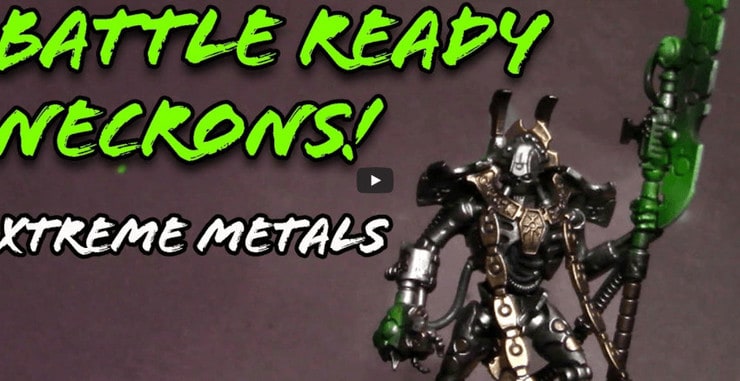
 Learn how to get your Necron Overlord battle-ready with this speed painting tutorial from Wyatt at Jack of Clubs Painting.
Jack of Clubs Painting is a regular here and today he’s giving us some advice on quickly getting your own Necron Overlord ready to throw-down.
Follow along with the video for a detailed tutorial to get these minis done fast! Or you can use our notes to check out all the highlights.
Get Your Necron Overlord Battle Ready With This Tutorial!
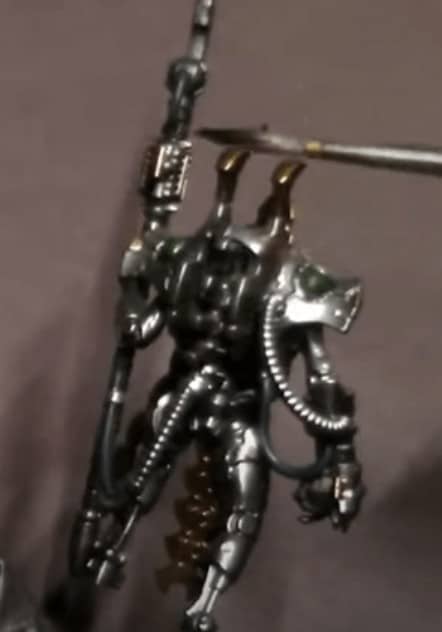
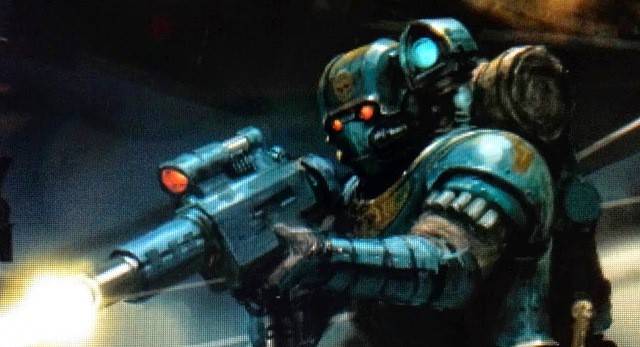
 First primer the entire model black. Once that is dry hit a full basecoat on the entire model with AK Metallic Smoke using small strokes with the airbrush. Make sure you get light and thin coats in this step. Next use Ak Chrome at a little higher angle and cover the model again with small quick strokes. It’s okay to not hit every crevice here, leave some of the darker silver for highlighting. Then get your Pro Acryl Bronze loaded ready for the brush. Get a nice base coat on any of the areas that you want to stand out and be a different color.
Base Coats
 The next step is to take Pro Acryl bright Neutral Grey and paint the line running over his head with it. Nothing fancy just a solid coat. Then take Pro Acryl Black Green and go over all the glowy bits, like the power orb. For the tubing, he mixes Pro Acryl Dark Green, Blue, and Black. Once you have all the tubing done, use the same black, and do full coat over his blade.
Wash
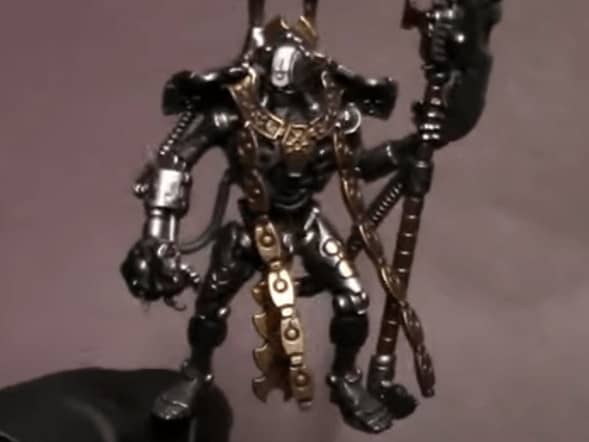 Once you have that done and dried completely, the model is ready for a wash using Mr. Weathering Color. Hit the whole model here but be fast and light. You don’t want the wash pooling in any one spot. This pops the details of the metal without dulling the metallic paint.
After you have it done, use the solvent for the wash and remove any excess with the brush. This is what your Necron Overlord should look like before moving onto the highlighting stage.
Highlights
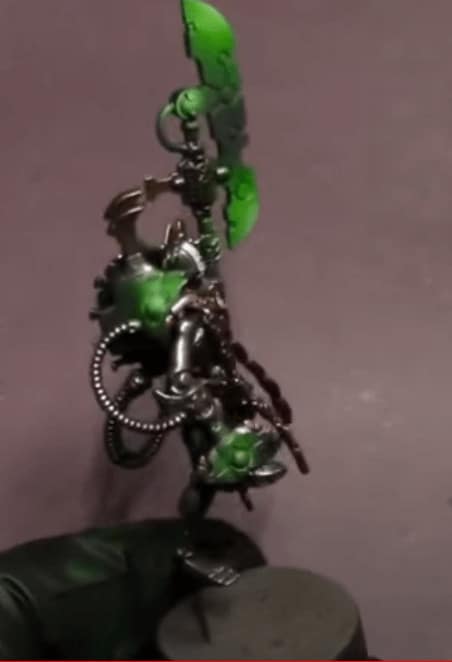 Load Pro Acryl Soylent Green into the airbrush for the start of the highlights. Hit little pop highlights anywhere you had already based green. These are just super quick sprays to give a glowing effect, keep very tight trigger control here. Next, load up Pro Acryl Bright Yellow Green in your airbrush.
This will be your main highlight color. Do the same thing you did in the last step, hitting all the glowing spots and the sword with very quick and controlled sprays. Last, add Pro Acryl Titanium white into the dregs of the green and do a final highlight of the same areas.
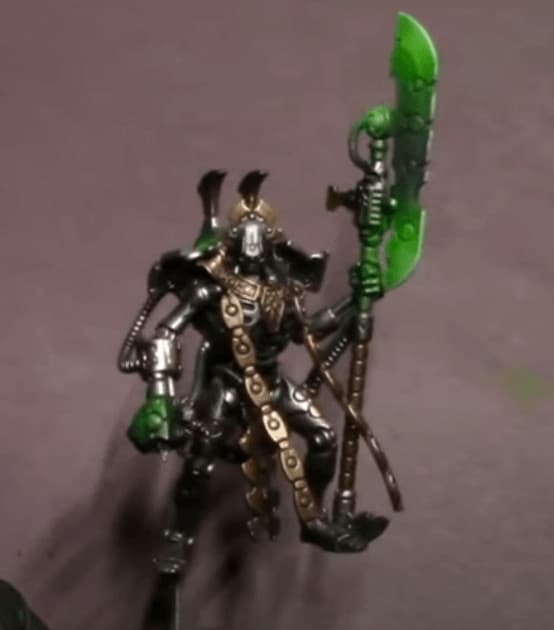 For the final Edge highlights, dip your brush into the leftover paint from the last highlight stage. Hit the eyes and draw in some glow lights. Then just hit the Halberd with some edge highlights with this color where you feel is right. And that’s it! Really simple, easy, and quick.
With that, the model is looking battle-ready and you can feast on your ten extra VP’s! If you want to learn more from Wyatt’s insight, watch the full video! And if you love his work, check out another great set of painting tips here.
Follow along with the latest from Jack of Clubs on YouTube or LIVE on Twitch four nights a week!
This post contains affiliate links, as an Amazon Associate Spikey Bits earns from qualifying purchases.
About the Author: Travis Pasch

Travis Pasch
Job Title: Head Writer & Editor
Socials: @paschbass
About Travis Pasch: Travis has been a Warhammer 40k hobbyist since the 1990s, playing the game since Third Edition. Through extensive traveling, he’s seen a lot of the miniatures hobby from across the world, giving him a unique perspective on the latest gaming topics and trends.
Travis’s brother even owns a commission painting studio, where he’s picked up a lot of good advice and techniques for painting Warhammer and tabletop miniatures over the years, as well. Travis joined the Spikey Bits team in 2019 and has been the lead writer since 2020.
Currently, he’s working on converting all his 40k Adeptus Mechanicus models and becoming a true tech enjoyer, complete with both sad and happy robot noises!