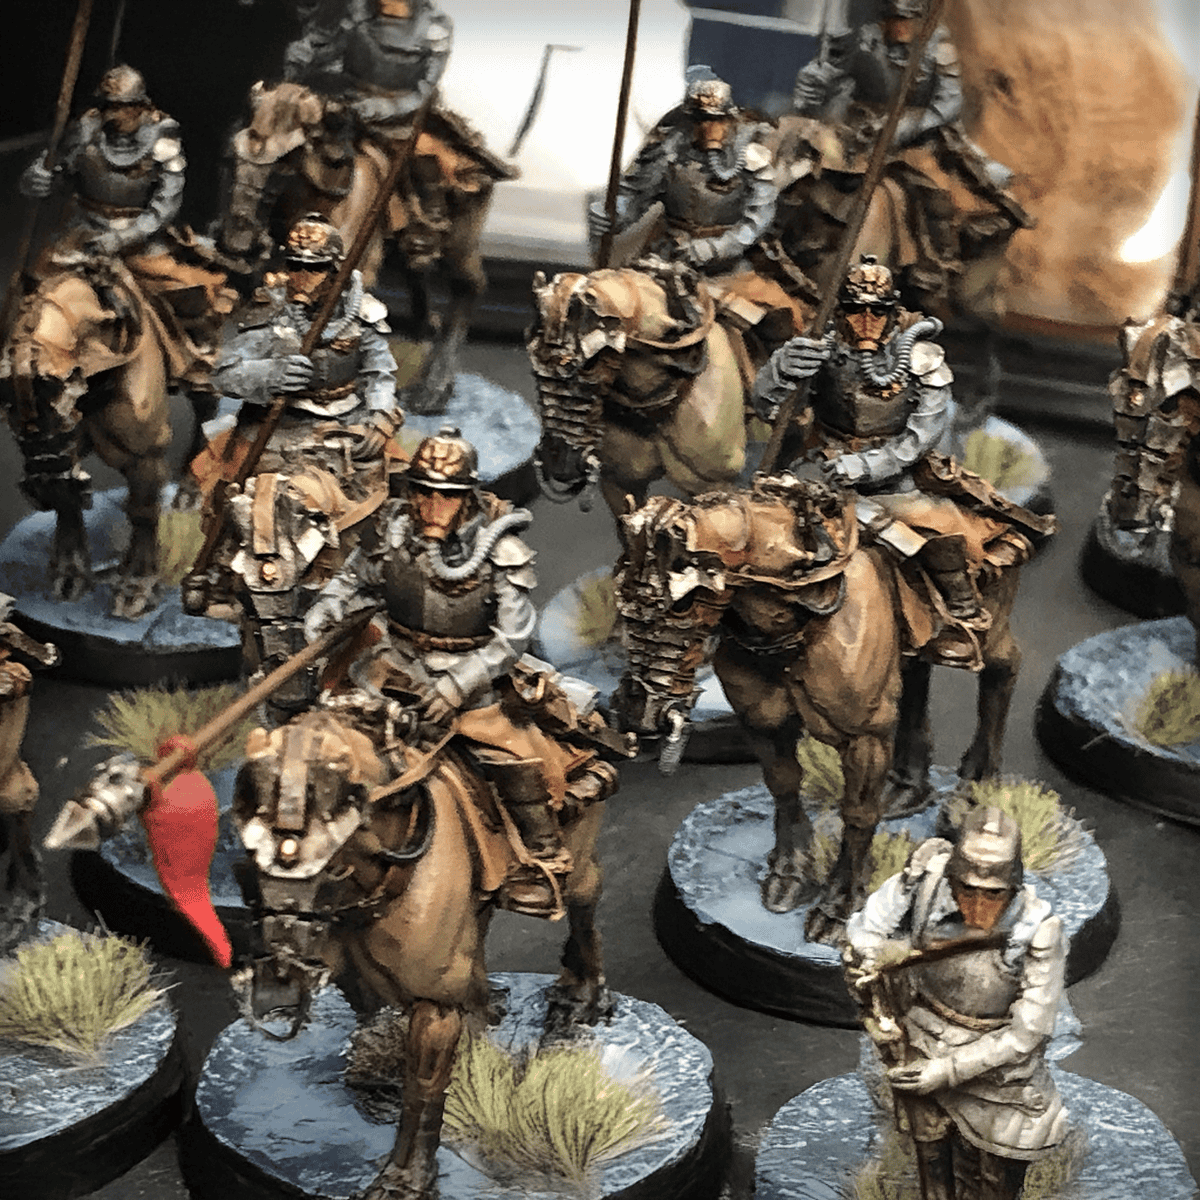
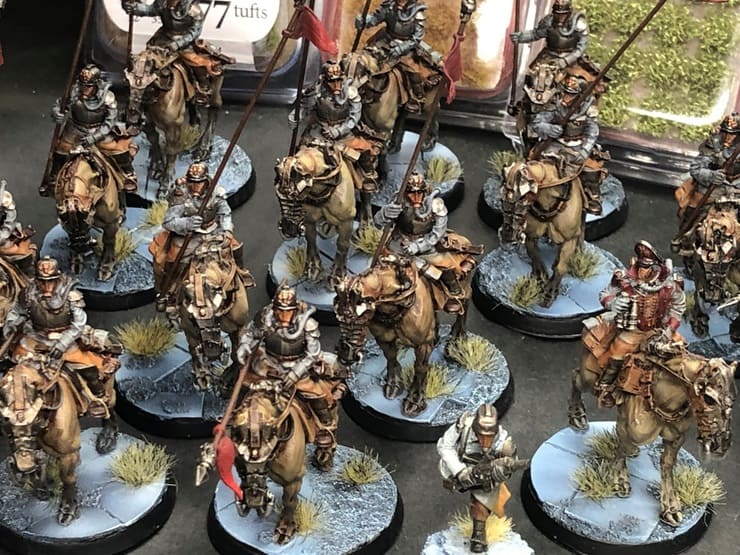
Bring Death Korps of Krieg riders and horses to life with fast painting techniques, from basecoats to eye-catching highlights and glazing with an easy paint scheme.
Updated January 14th, 2025, by Rob Baer with updated information and links to relevant content, as well as more content on how to paint the reins, leather, and other details.
If you’ve ever stared at a Death Korps of Krieg cavalry model and thought, “How do I make this horse look like it just rode through a grim, war-torn battlefield and not a toy aisle?” you’re in the right place. Painting horses can be tricky, but with a few tried-and-true techniques, you can turn those mounts into absolute stunners.
From setting the perfect base coat to mastering subtle highlights and glazing tricks, this guide from Rob will help you create steeds worthy of a Death Korps of Krieg paint scheme that shines on the tabletop. Let’s get those brushes moving!
How to Paint Death Korps of Krieg Horses
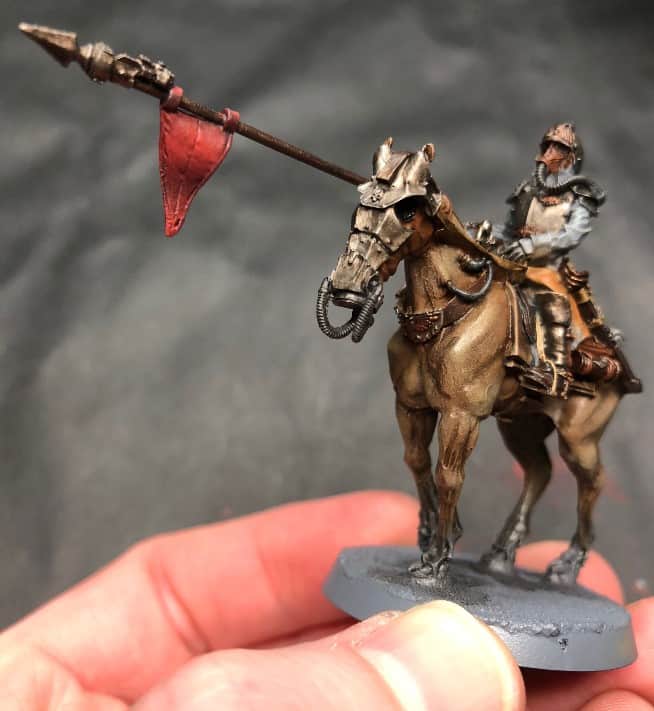
Follow these steps to bring out the best in these grim steeds and get them looking great with the new Army Painter Fanatic paints.
Keep in mind that Rob has had a Krieg army for a long time, so these are the old horses, but they would still work perfectly for the new models! You might just have to change up the scheme of the feet a little.
Step 1: Base Coat Magic
If you want to change any of the colors in this DKoK painting guide or use paints from other manufacturers, be sure to check out our massive article with paint color conversion charts for Citadel, Army Painter, Vallejo, and more.
Start off by giving the horse a solid foundation. The Army Painter’s Monster Brown (now Fanatic Paratrooper Tan) works perfectly as a base coat, applied with an airbrush for that smooth, even coverage. If you don’t have an airbrush, a Leather Brown spray does the trick, too.
The goal here is to build a solid base for later details, so don’t stress about perfection. Just make sure the coat is even, as any uneven patches might make the next steps harder to manage.
Step 2: Gloss It Up

Just remember to do this in a well-ventilated area unless you’re into accidental chemical aromatherapy sessions.
Step 3: Wash It Down
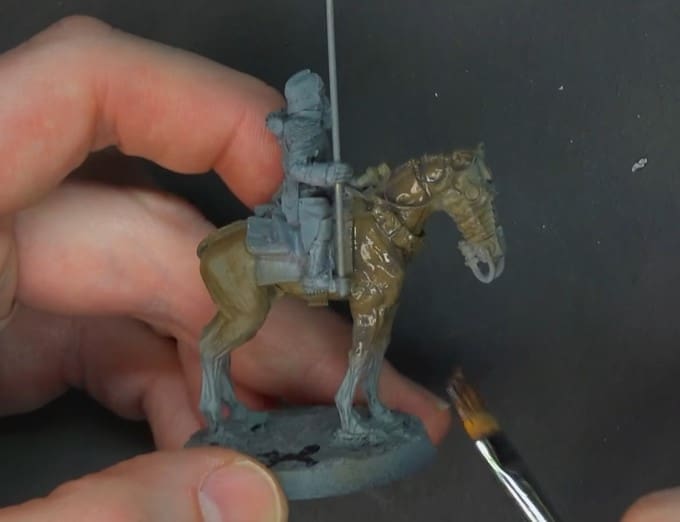
Step 4: Highlights That Shine
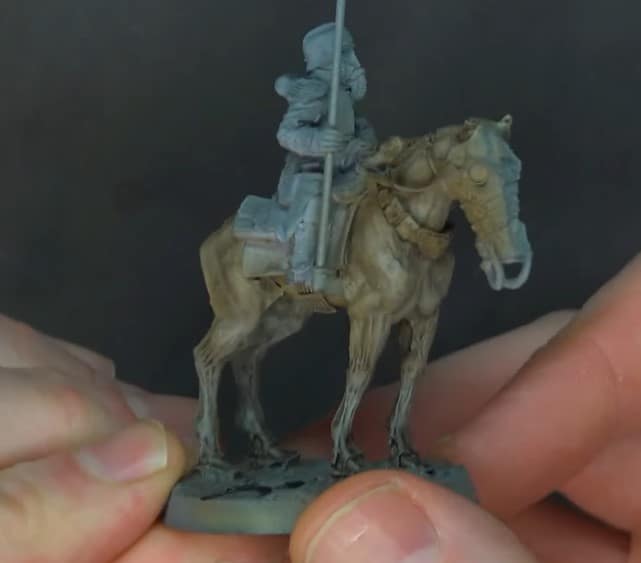
If you’re feeling froggy, mix in some Banshee Brown (Tomb King Tan in Fanatic) for a second pass to really make those highlights pop. It’s all about finesse here—your steady hand will make or break the look.
Step 5: Glazing for the Win
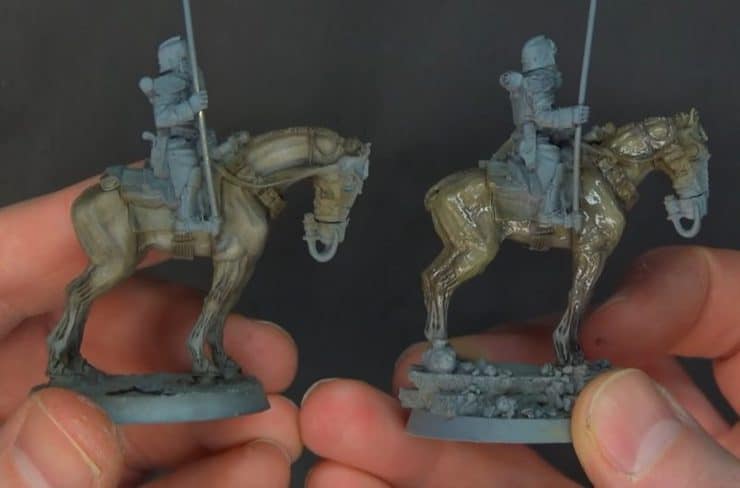
This light layer softens the transitions between your colors and brings a touch of depth to your shadows. Go easy, though; you’re aiming for subtle enhancement, not overwhelming drama. Let it dry fully before moving on with a coat of matte seal to preserve your new horse hide paint coat.
Painting the Details
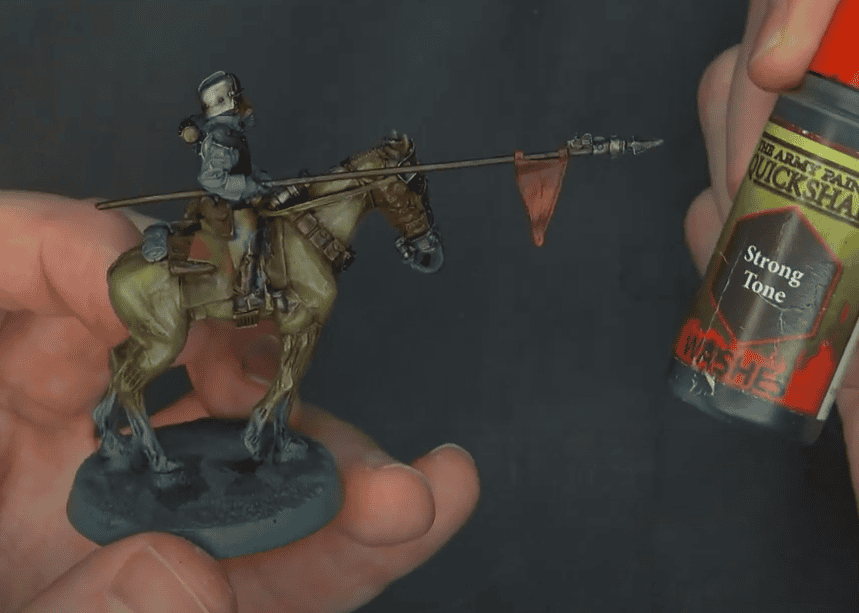
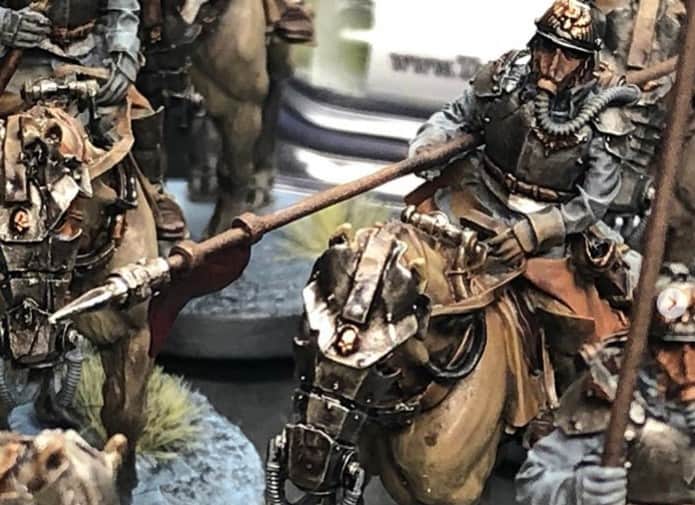
For the browns, it’s all about layers. The lighter tones, like the mask leather or pouches, get Strong Tone over a base of Fur Brown.
Easy, right? When it comes to the darker elements—think reins—Oak Brown is your friend. Add a simple wash of strong tone, and it’s ready to shine (or not shine, depending on your intent).
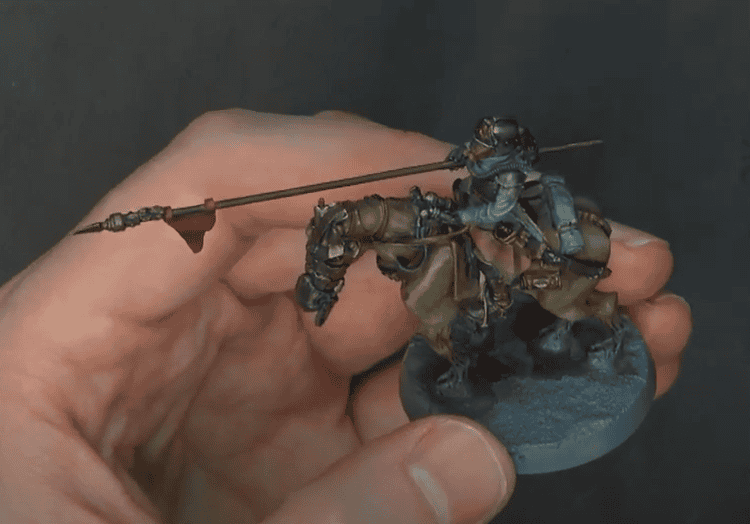
There’s no need to overthink it. With these tricks, you’ll bring your models to life (well, in the grimdark sense of the word). It’s gritty perfection with minimal fuss!
Extra Tips for Horse Painting Glory
If you’re itching to get creative, try adding some gradient effects to the horse’s fur. Maybe a fade from darker brown to a lighter shade near the legs? It’s small touches like these that really turn heads. Organic models like these are a great chance to experiment, thanks to their natural curves and flowing lines.
And don’t forget the riders! Painting your Death Korps of Krieg Greys is another challenge worth tackling. Matching their tones and details with the horses creates a cohesive look that screams, “Yes, I know what I’m doing.” In this article, we will show you how to paint greys and weathered metals specifically.
After that, paint the bases to match your army, and don’t forget the battlefield tufts! Our bases are painted with a basecoat of Wolf Grey, highlighted with Frost Blue, and cutback with some black “low-lights” in the recesses and shadows.
Final Thoughts on Painting Death Korps of Krieg Horses
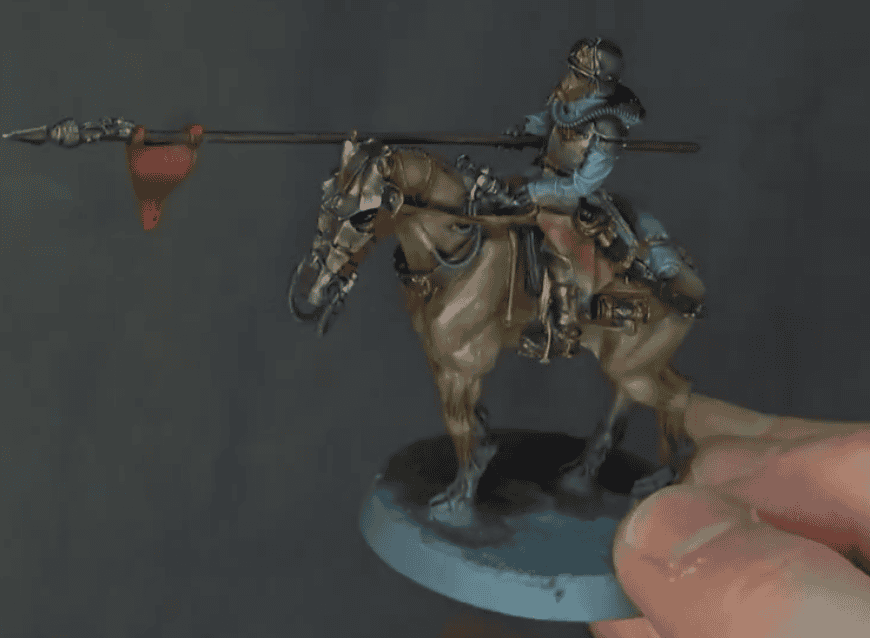
What’s your go-to approach for painting cavalry? Do you stick to tried-and-true techniques or like to shake things up with bold experimentation? Let the brushes talk, and don’t be afraid to share your own tricks for getting these miniatures tabletop-ready.
Painting Death Korps of Krieg Greys & Weathered Metals
What do you think about the new plastic Warhammer 40k Death Korps of Krieg Death Riders, will you be using this paint scheme to paint the horses?
