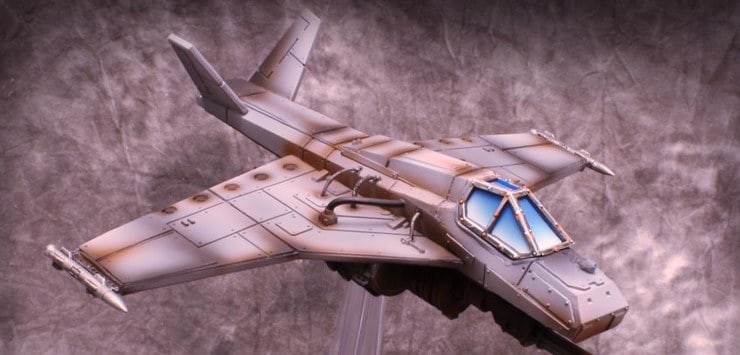
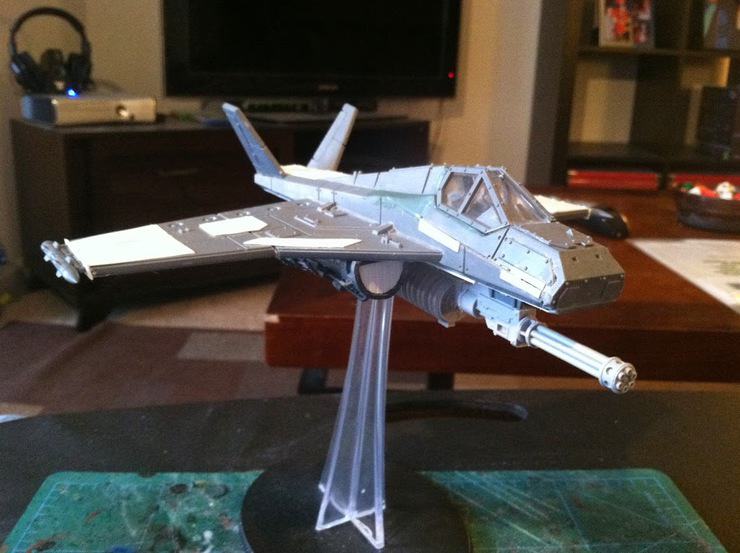
Today I have for you a blast from the past, the Sparrowhawk flyer tutorial.
This conversion is one of the first articles I ever did for the blog back in the day, and now I tend to use these conversions as ‘counts as’ everything
I think it’s also one of the coolest conversions I’ve ever done as well, which is kinda funny to me because I actually made two – I needed another one to do this “how-to” article!
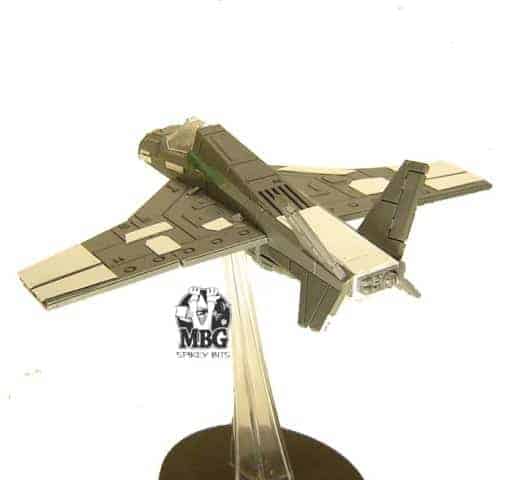
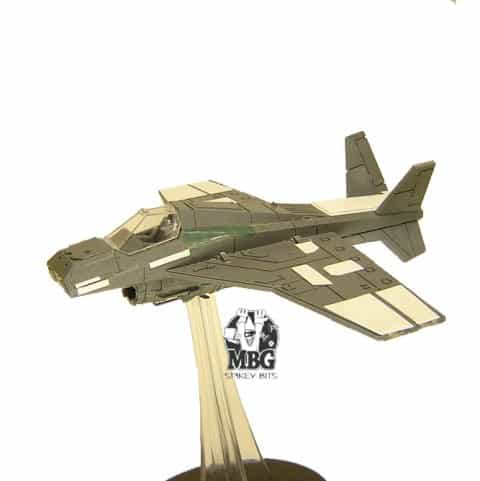
To me the best part about this model is that it can represent almost any flying vehicle in the Warhammer 40k universe.
Just add some Lascannons on the wingtips and you have a Lightning, or model both engines, one on each wing, and you have a Thunderbolt. Add a few Orky bits and you have a Ork Fighter or a Fighter Bomber. Make it a little pointer and it becomes a bit Chaotic.
I suppose you can even use it as a Valkyrie/ Vendetta, although it may get a little windy for the embarked troops.
All this for the price of a Valkyrie kit! (which depending on what you’re making may or may not be a deal…)

So here is a step by step guide for this conversion. The only part that is hard per ce is converting the cockpit assembly. After that it is all downhill.
So grab you tools and follow along with my guide, but remember to be safe and if you are a youngster get your parents help with this. Spikeybits is for the children.

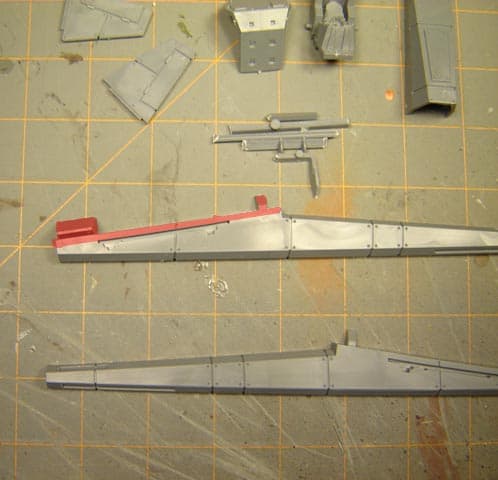
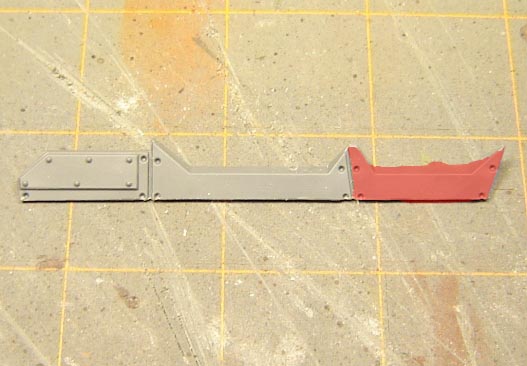
These are the parts you will need to start with. The tail fins you may not need right yet, but I think they were all around the same spot so I may have clipped them to save time.
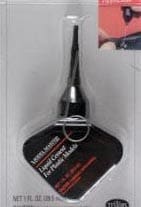
I used Testors Plastic Glue with applicator tip for almost all the assembly of this model. Just apply the glue like normal and then dab the wet glue with a paper towel and it will become tacky and adhere better.
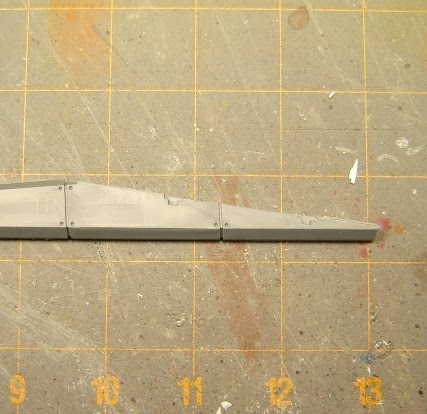
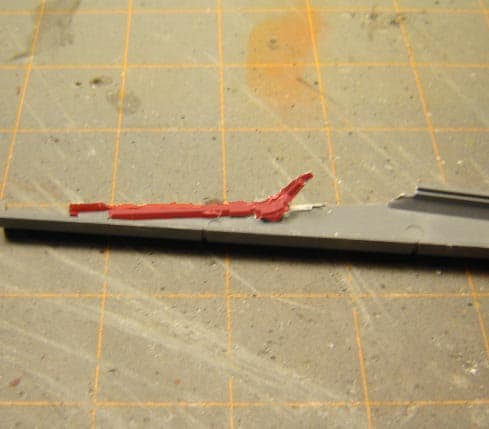
First you are going to need to remove the area highlighted in red on the left and right fuselage pieces. I used a bonesaw and just removed it all in one cut. The line that you need to cut down follows the recessed area that the wings normally fit into.It should look like the piece on the right when you are done.
Now turn over the pieces you just cut and remove the support structure highlighted in red above.You want the whole interior flush with the outer wall. You will be putting the cockpit assembly in here. I used side cutters and just snipped it off using the inner wall as a guide. File it down if necessary afterwords.

Another easy step is just to take the right and left front cockpit pieces and remove the area highlighted in red. I found that its easier to cut it from the inside, like the pic on the right. Again I used a bonesaw and sliced down the diagonal line shown with one cut.
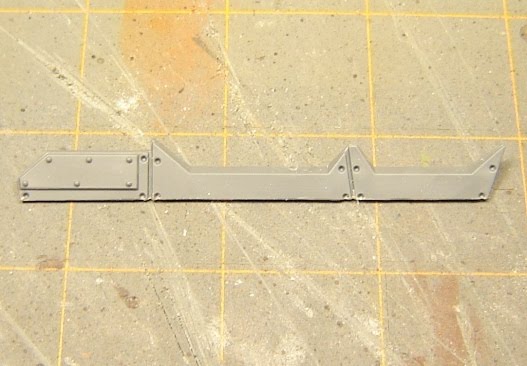
You should now have two of the pieces shown on the left. Now just cut off thier rear sections, again highlighted in red, and following the diagonal line shown.
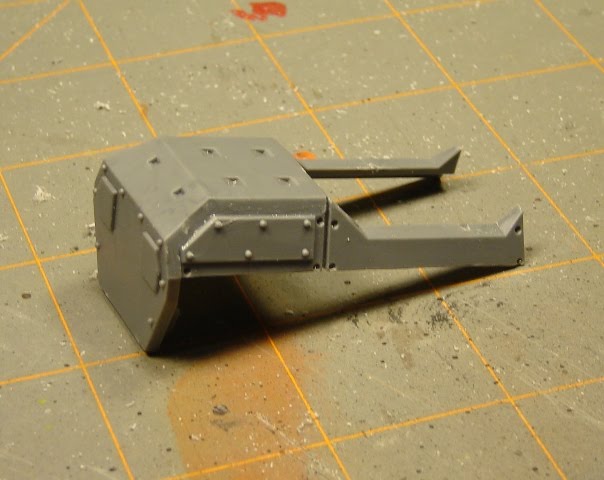
Now you are ready to start the cockpit assembly. Take the front nose plate and attach the two cockpit frames to it as shown.
Now attach the front pilots seat with controls to the assembly. You have to use a random piece of sprue to support the seat in the rear. I used regular super glue and zip kicker to attach the support bar so it would give the plastic glue around the rest of it time to set. You have to make sure the sides of the hull attach to the inside cockpit or else you clear glass will not sit right. I used a glue cap to prop the whole thing up while it was drying. As the whole thing starts to set be sure to dry fit your clear cockpit glass and make adjustments as needed. (P.S. this step is annoying but important.)
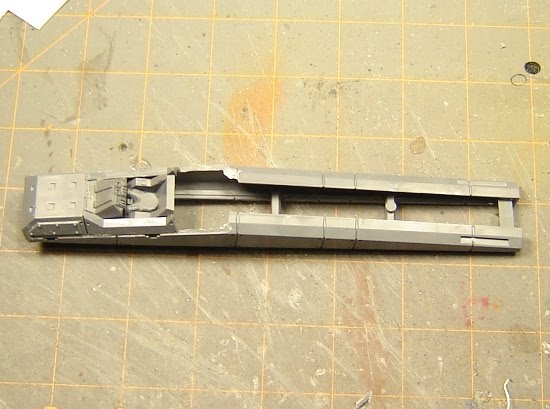
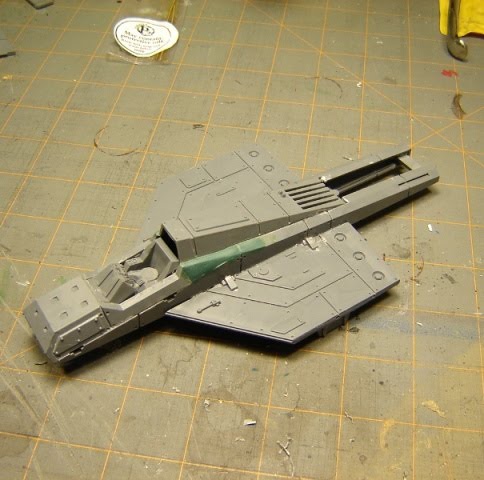
Once the cockpit assembly is dry, test fit the two long fuselage pieces to it. You can see how they attach to each other in the picture on the left. Now the tricky part is to figure out the measurement for the horizontal supports that will hold the fuselage together.
The grid squares on my mat are about one inch, so your supports will be between 3/4″ to 1″ wide. Cut them out of random sprue and attach the first one in the very rear. Keep the whole thing flush, don’t let one side bulge out or anything. Use the front cockpit assembly to line things up, but attach it last. I used glue and kicker the fuselage supports to give me quick strength. After those are dry and things are all lined up, use plastic glue to attach the cockpit assembly.

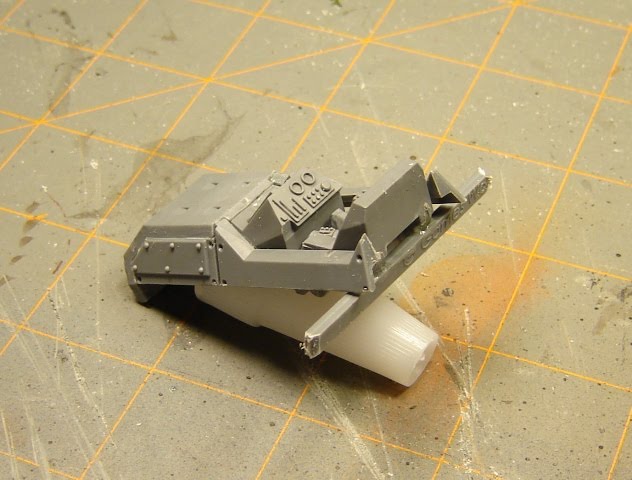
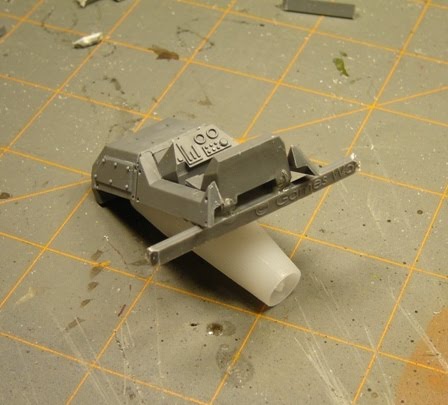
Attach a square of plastic card to the bottom as shown. Make sure you don’t cross the red line as the jet engine will go here. I think I used .20″ width card on this project, but feel free to use whatever will fit and look good.
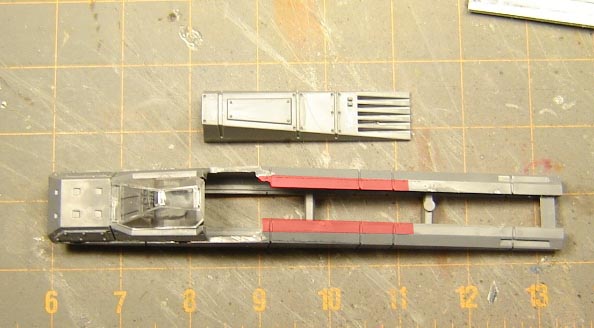
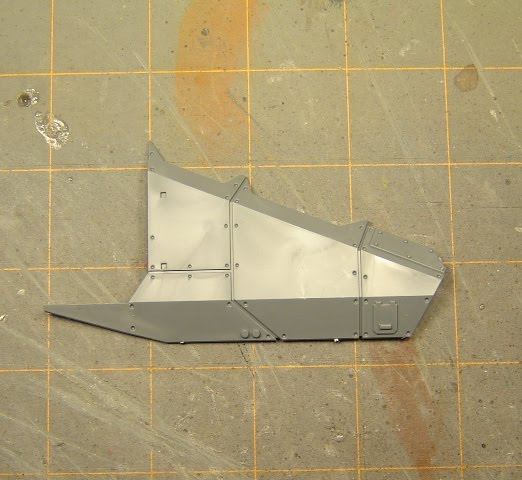
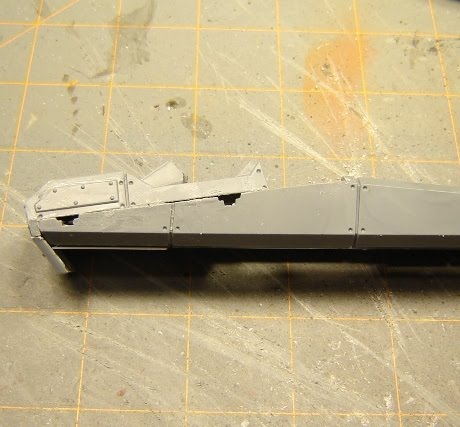
Now you have to make the top of the fuselage. Grab the Valkyrie engine block piece shown, and set it down next to your assembly. (you dont have to attach the front of the engine block) As you can see in the picture on the left some of the fuselage must be removed to accommodate the top. Make sure that your assembly is dry and mark out where you will need to cut. While you are doing all of this keep in mind he top of this piece you are adding has to square up with your cockpit glass. So multiple dry fits are needed here as well to make sure your glass will fit snug. Don’t forget the plastic frame as well that attaches over the glass- that will truly define where these two pieces touch.
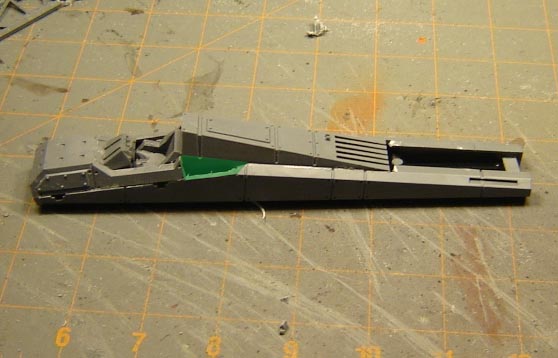
Again I used my bonesaw to get a straight edge when cutting into the top of the fuselage. You could probably used clippers if you dont mind using putty to make a straight edge later. As it stands you will have to putty in the highlighted area in green on both sides of the frame. You may want to add some plastic card to give you a bottom to add putty to in that area as well. Otherwise you will just lose the putty into the hull! More on this later, from here the rest of this conversion is pretty easy.
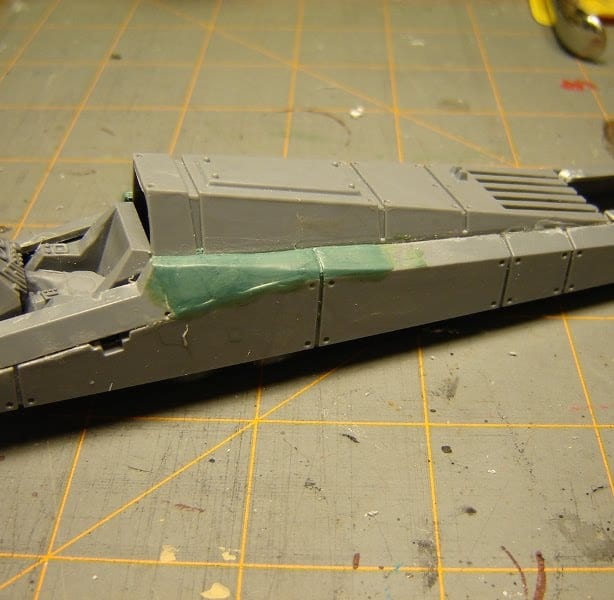
Before you start on the wings, mix up a batch of Kneadatite (Green Stuff) and fill in the gaps in the mid fuselage area. Just take it slow and follow the taper of the plane. I added in one of the panel gaps as well to make it blend in better. You can do as much or as little as you want here.

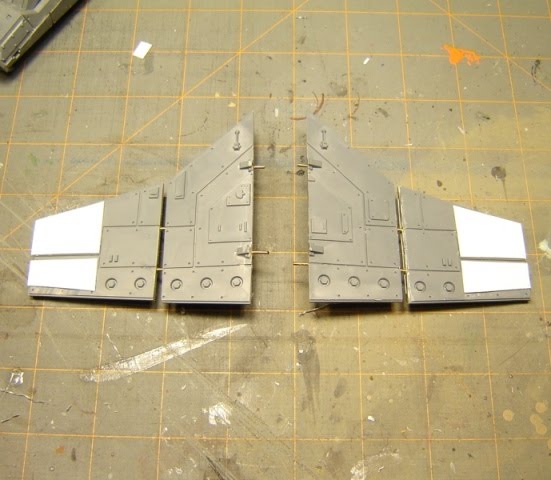
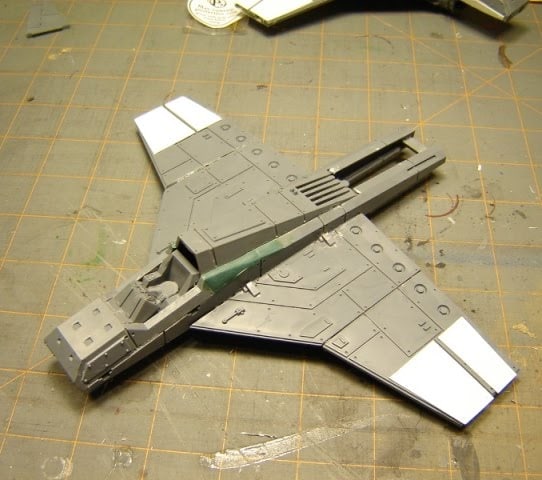
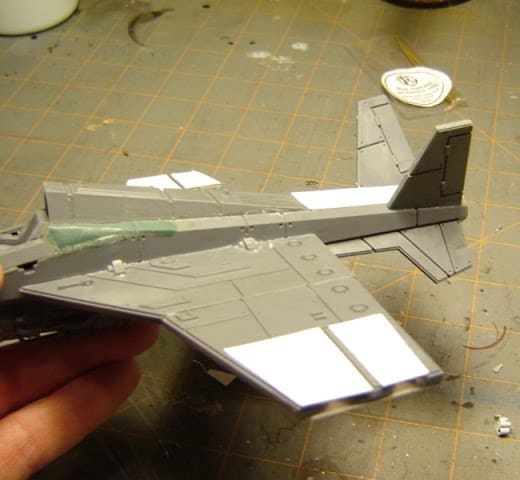
Grab your normal Valkyrie wing sections and cut them, again with your bonesaw, where they bend. You also have to trim the wing tip thrusters and the landing skid housing off as well. This is so the wing is flat like a jet fighter’s would be. I found that it is easier to trim down the wings before you glue the top and bottom halves together. After the glue has dried cut them in half using the bend in the wing as a guide. You may also have to make a secondary cut to square the left and right wing halves up. I used a combination of the bonesaw, clippers and 100 grit sandpaper for this. When it’s all said and done you should have the four wing sections pictured.

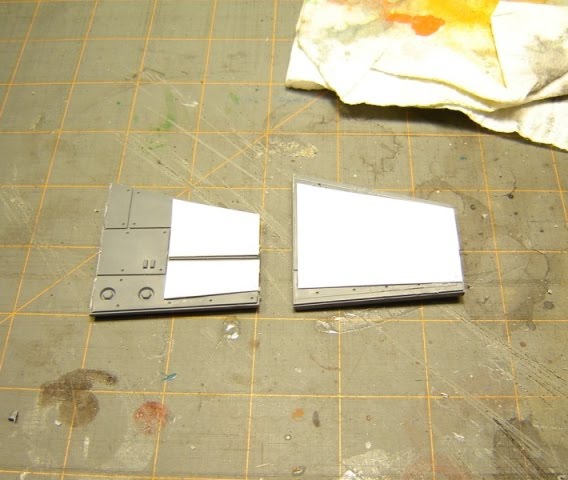
Now you have to cover up those unsightly gaps in wings with a little plastic card. I made a pattern so all the panels would look the same, and used a leather punch to add rivets to the plates so that they matched the existing stricture.
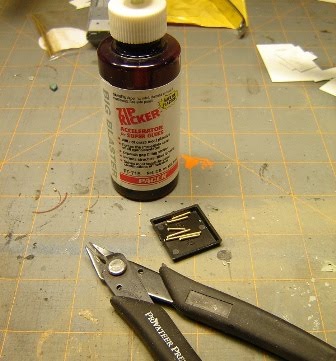
In order to give you wings the strength they need to not fall off, you have to pin the halves and then the whole wing assembly to the fuselage. A little trick I use for pinning is to cut the pins then put them in a upside down base. Then I hit them with some Kicker and leave them to soak in for a second. I apply glue to the holes I drilled and use my side clippers like tweezers to place the pins in the pre-drilled holes. Make sure your area is ventilated or do this outside cause this stuff will give you a headache, and it causes cancer in California.
You can see I used 2 pins per piece. Use the horizontal lines as a guide to drill your holes. Don’t glue the wings together yet.


Now you have to attach your wings to the hull. You will want to line up the bottom of the wing with the highlighted line in red. Once you figure out where the pins will attach to the fuselage drill your holes as normal. However make the rear hole a bit bigger so that you can adjust the taper of the wing to the bottom of the hull. Its very hard to line the two holes up perfectly so this gives you a little wiggle room to make the wings perfectly flush with the bottom of the hull.
Use plastic glue only attach closest wing halves on. As its starting to bond use kicker and glue to secure the pins to the hull. You have to flip the assembly over and glue into the hull from the bottom for this, but its pretty easy. Then add the wingtip halves on and your wing is finished.
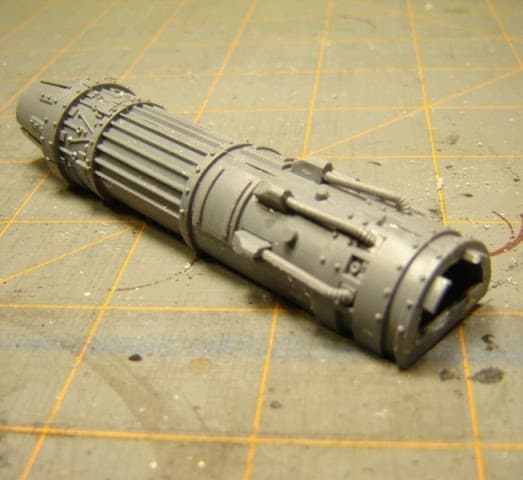
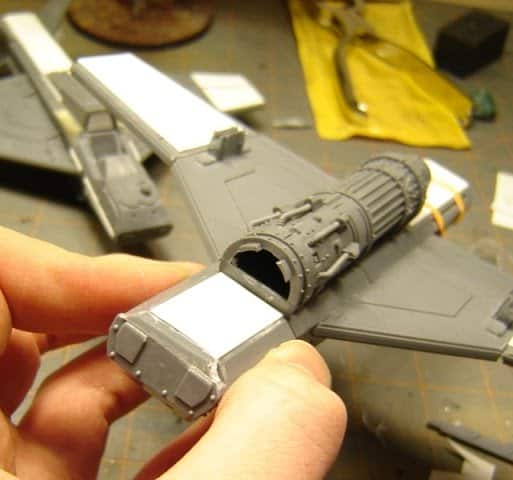
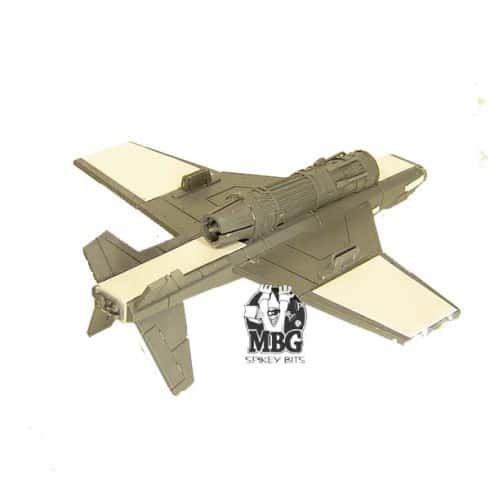
Assemble the engine as normal, except to not add the turbine bit to the end. Once its dry add it to the bottom of the plane as shown. The front lines up with the piece of plastic card you attached earlier. If your fuselage is too wide for the engine, just cut a strip of plastic card to attach it to. The rest of the fuselage will be covered with card from here on out.


So grab some plastic card and cut out sections to enclose the rest of the fuselage. Once those were dry I cut more sections and added rivets to them to make the whole thing blend together.
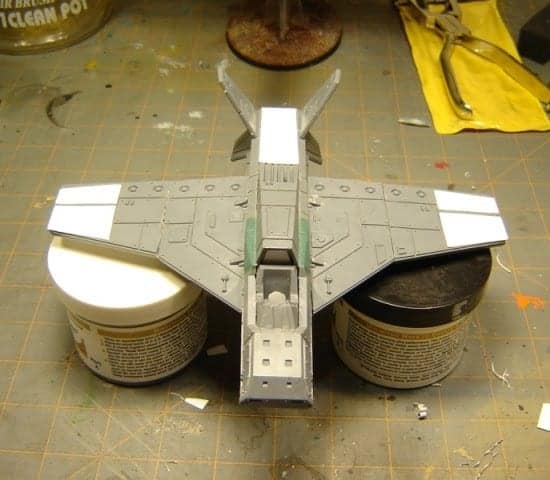
The last step is to add your tail fins. They attach just like normal although they are upside down from the placement on the Valkyrie. Now its best to let the whole thing dry for awhile. So find some way to suspend it with the weight on the wings. This way they should dry straight and it also won’t interfere with the drying of the lower fins and engine.
If you know what vehicle you are making you can add weapons and icons at any time. Don’t forget about the pilot and adding your canopy glass once you are done painting it.
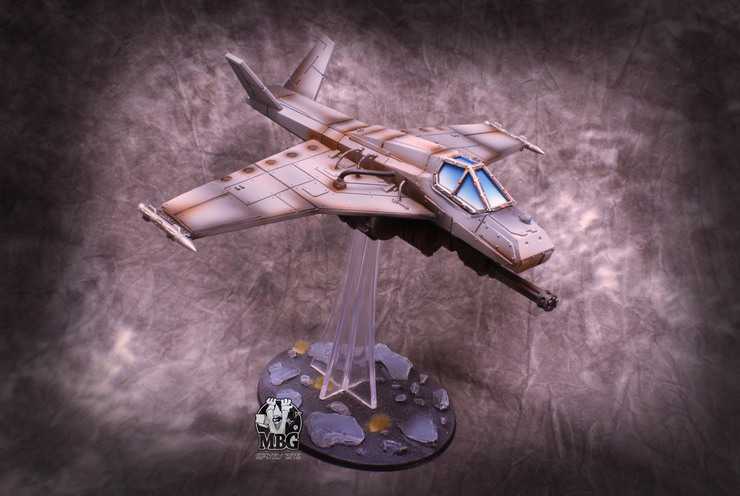
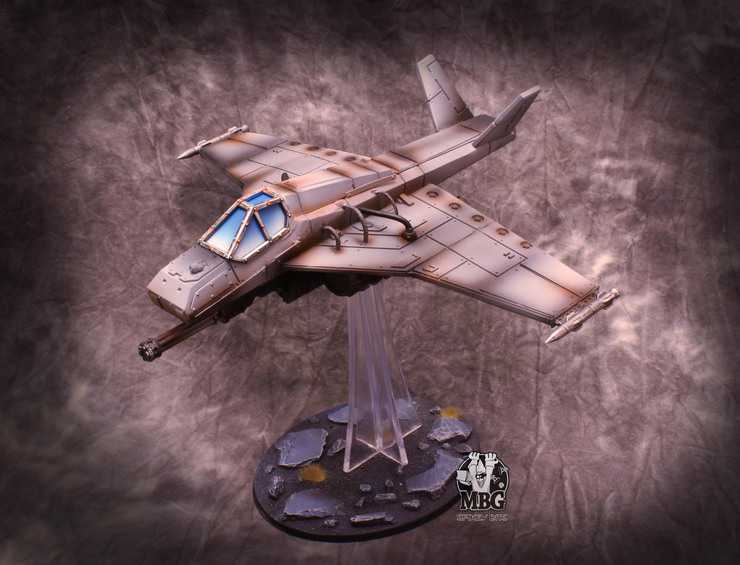
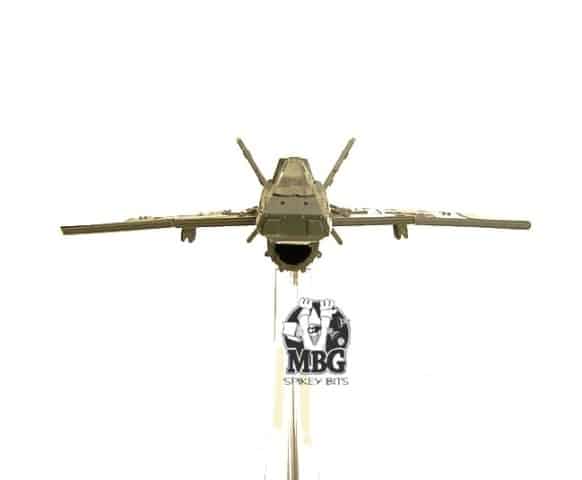
Here is some extreme close ups of my jet. I ended up adding more dakka and engines to the original design below but I think from these pics you get a sense of the overall idea.
Be sure to checkout over 200 other hobby tutorials and how to articles in our
HOBBY TUTORIAL CORNER