Want to print your own BITS or miniatures just like the pros? Check out how to 3D model your very own miniatures using free design programs.
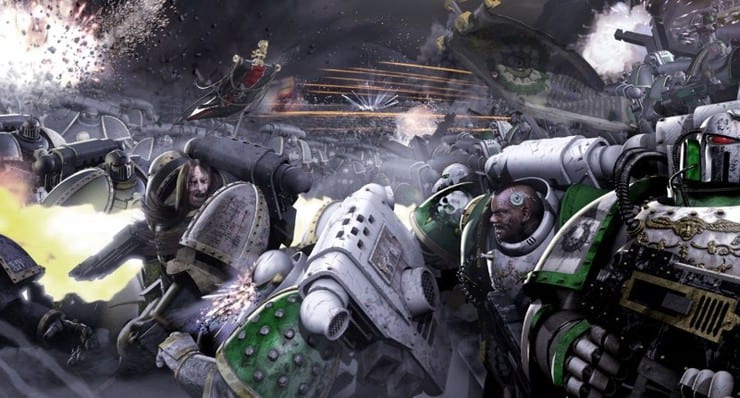
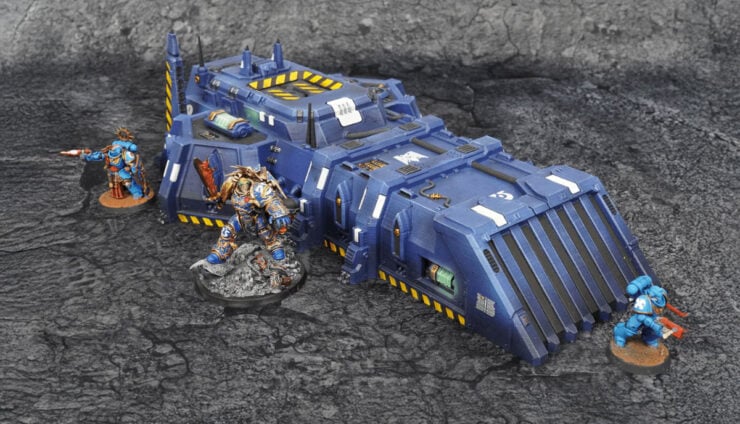
No one knows what the future of 3D printing will be for the tabletop, but today we’re attempting to give 3D modeling more exposure by rolling out some how-to tutorials, like this one, on how to create your own miniature or bits even like the Boarding Shield by Pop Goes The Monkey above.
Below is part two of our very first feature on how to 3D model your very own miniature using free design programs, authored by Shapeways Community Manager Andrew Simon Thomas. Looking for the first part? You can find it over here.
When you’re all done, even if you don’t own a 3D printer, you can order your miniature directly through Shapeways themselves.
3D Model Your Own Miniature tutorial– Part 2 (Steps 6-10):
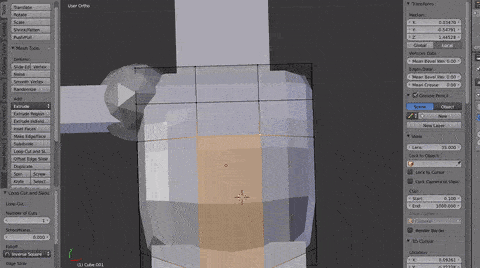
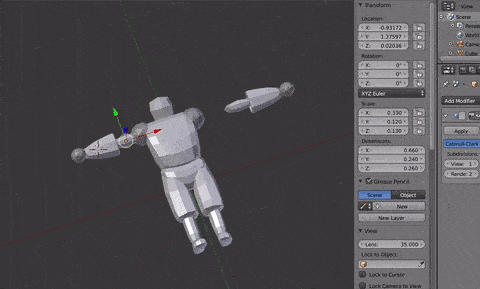
6. Refining the forms: Now add a subdivision modifier to the primitive that represents the chest. You can do that on the rightmost menu by hitting the wrench icon and and selecting “Modify” from the the dropdown menu. I choose subdivision surface. The number of faces on the primitive will increase, causing the shape to appear smoother. By selecting View you can adjust the level of smoothness, but for now I keep it at level 1.

Now, go into edit mode by hitting Tab on the keyboard and you’ll see the overall shape along with the subdivided version. A menu will appear on the left side of the screen with options on how you can edit the mesh, open the topmost Tools tab. In the 3D view, notice that each subdivision is averaging out the points between vertices, smoothing the form. This is a super useful way to add detail but keep the forms flexible as you iterate.

On the left side of the screen you’ll see that the menu has changed to a bunch of options related to edit mode. Click Loop Cut and Slide to add a new line into the model. Click once near an edge to add the loop, then move your slide it up and down with your mouse and click again to set the location. Notice that as you move it around, it changes the shape of the model based on the subdivisions. Add the new Loop cuts to the locations where you want the shape of the object to change. Think of the lines as defining where the top of a mountain, or bottom of a valley would go. Moving the lines closer to the edges makes the corner sharper, and moving it away makes it softer. This is an easy way to quickly get closer to the shapes of the body you want to make. Take your time with these and hit undo (control/command z) if needed.
Once the Loop Cut is in place (I add two on either side of the chest) I switch to selecting vertices and start selecting the points to move them around. Again, this changes the shape of the part.
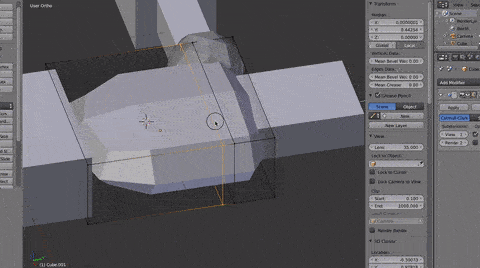
Through this process, I’m just adding loops to add more vertices to move. Keep number of cuts down for the sake of simplicity to change form, try to make the most out of each vertex moved, and only loop cut again once you have put all the available vertices where you want them to go. Loop cuts are powerful but be sparing with them, the more you add the more limited your control. You can always hit “undo” (Ctrl Z) if you didn’t get it right the first time. Switch between selecting vertex points, edges, and faces by clicking the icons on the bottom toolbar.
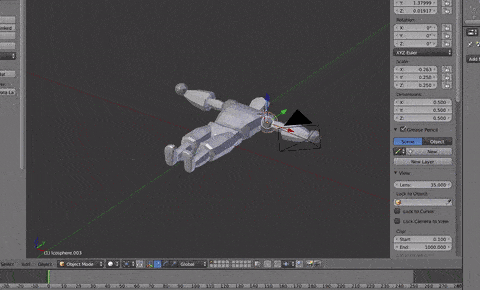
Next, move onto the pelvis.
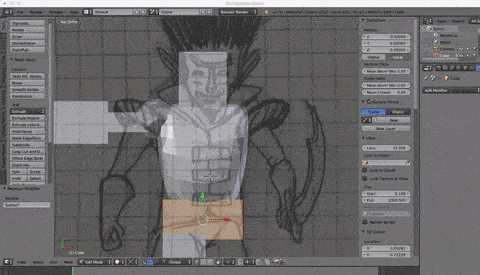
My goal with the pelvis is to make it clearly shaped like the hips, which I visualize as looking like a bag tipping forwards.
Each time I move to a new part I add the subdivision modifier, I move around the the vertices to change the shape and, as needed, I create new loop cuts to have more points to refine the form.

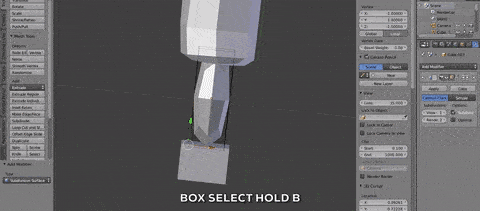
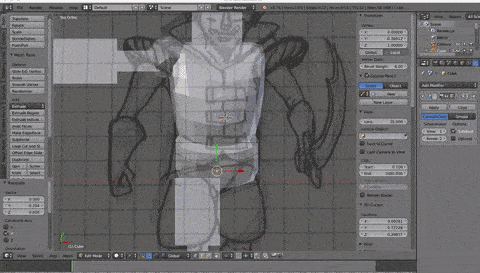
TIP: You can select or deselect multiple points by holding shift, and you can box select them by holding Shift and B.


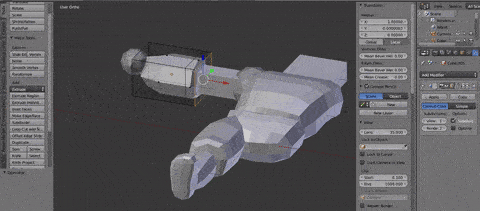
On the arm, I skip to the forearm to make his large gauntlets. I add a loopcut near the inner side of the glove to give it a harder edge.
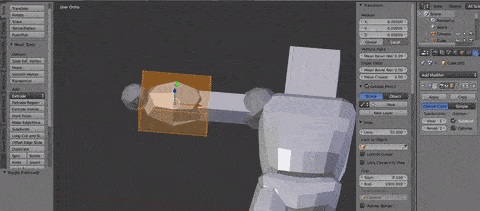
Then I select the face and click inset faces from the add section of the edit mesh menu to create a new face in the center of the other one. Once it is in the right spot I hit Extrude (under Add on the edit mesh menu) to push a new face inwards. This will give the the glove a sense of thickness and make it feel like the arm is going into it.
Finally, I tweak the neck so that it tilts forward towards the chest. I’ll add the actual head later in Sculptris.
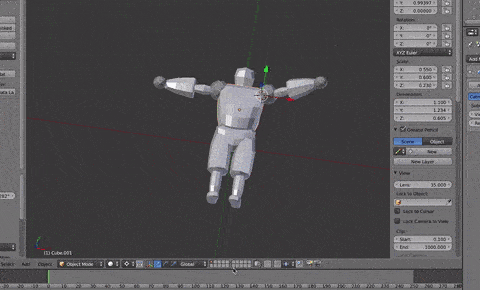
7: Duplicate and Mirror: Duplicate the arms and legs and mirror them to the other side. In the Object menu I select all the objects that make up the right limbs and select Duplicate Part ( can also use Shift + D), but leave it where it is. From the same menu, I choose mirror and select across the X axis.
Now that the parts of the limbs have been mirrored, I need to move them into the right place. I could do this by guess work, but if I want it to be perfect, I can do some very simple math. Selecting the objects shows me their location in the N menu. By comparing the locations values at the top of the N menu I make them the same number but opposite value in the X axis.To do this I simply copy value the X location of the right arm and paste it into the location for the left arm, but change the negative value to a positive so that they are in exactly the same place but on the opposite side of the X axis (change +1.25 into -1.25). I repeat this for each part that I mirrored.
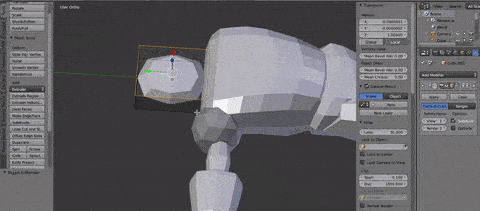
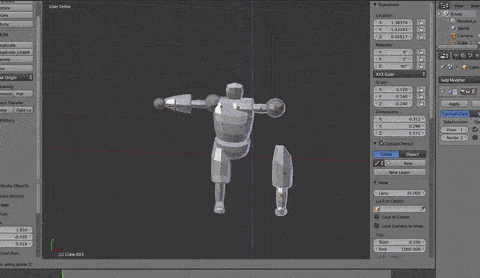
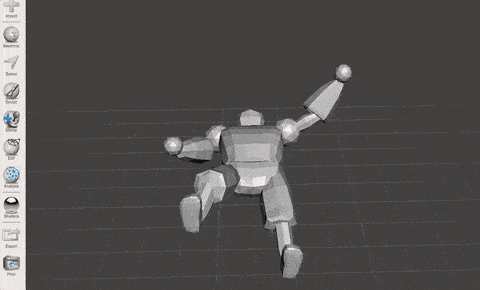
8. Posing the character: We’ve been working in a T-pose, but now it is time to give this dude some energy! I use that annoying little circle that moves everywhere (it is actually called the 3D cursor) to set the pivot.
I need to set the pivot as close to the “base” of the body part so that it rotates and seems to still be attached to the body. To do this we need to switch to rotate by the 3D cursor, use the dropdown right beneath the 3D view area. Then I click near the should to set the pivot point, and rotate in each dimension until I am happy with the results.
When I’m working on the legs I make sure to select all of the parts of the limb and work from the hips first. Only after I’m happy with the whole legs position I move to the knee and give it a bend. Next I move the foot at the ankle so that it is parallel to where the ground would be. Sometimes the rotation isn’t perfect, so I have to move the parts into place. That’s ok, I just switch back to the transform gimbal and slide the parts around.

9. Repairs, and prepare to sculpt: If you mirrored parts as we suggested in this tutorial, we need to get them all to be “right-side in” before you import your model into Meshmixer. This is because when we mirrored those parts, it also turned direction the face goes (called a Normal) inside out. If you didn’t mirror any parts, skip to just exporting.
For those that mirrored, select all the faces on a part in edit mode (Tab) and select the Shading/UVs tab on the menu. With faces selected under Normals you can click “flip direction” This should turn the selected parts a darker color. Do this for each of the parts you’d mirrored during your designing.
Once done select all of the parts you want to export, head to File and choose Export as an obj. Make sure you click the check box for “selection only”.

10: Import into Meshmixer: Next I need to solidify the mesh to make it easier to work with in Sculptris. To do this I import the repaired model into Meshmixer and go into Edit mode. I choose solidify and make sure I’m pleased with the settings. This will make it so that all the parts get combined into one large mesh, easier to sculpt. Once you’re done, export as an .obj again.
Check back soon for part three of how to model your own 3D miniature that goes over more of what you need to know to get your miniature 100% finished and printed out!