Do you hear the call of 3D printing? Checkout our very first feature on how to 3D model your very own miniature using free design programs.
No one knows what the future of 3D printing will be for the tabletop, but today we’re attempting to give 3D modeling more exposure by rolling out some how-to tutorials, like this one, on how to create your own miniature like the Iron Werewolf knight titan above.
The below step-by-step DIY guide is authored by Shapeways, Community Manager Andrew Thomas and teaches you enough to get comfortable with 3D modeling. Perhaps this will be the spark to branch out on your own creations (bits, anyone?) as well?
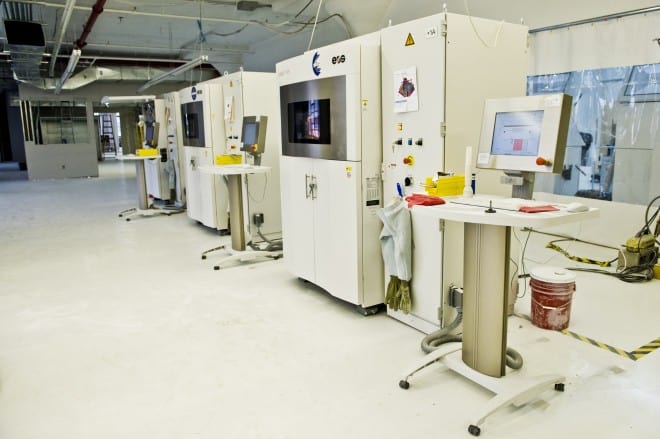
When you’re all done, even if you don’t own a 3D printer, you can order your miniature directly through Shapeways themselves.
3D Model Your Own Miniature tutorial– Part 1 (Steps 1-5):
First we’ll focus on planning and getting familiar with Blender. Later we’ll refine the design using Meshmixer, Sculptris, Blender (again), then uploading your file for printing. I’d suggest you download each program now using each of the embedded links.
Remember 3D designing is always a learning process. This tutorial is about learning these new tools and the process for making a miniature, but there are other tutorials out there that will teach you the ins-and-outs of the programs themselves. If you make a mistake, you can always use the undo button (control z for windows, command z for macs) and remember to save often in case you need to go back. Take it easy, be patient and have fun!
1. Look at inspiration: You likely already have a character created for your campaign, and if you’re a talented artist, you may have a drawing ready to go. If not, scan for cool source material in your favorite movies, shows, video games, or comics. Unless you plan to sell your miniature, all these forms of entertainment and and other artists’ work are all fair game, but it’s a lot cooler to use these as points of inspiration rather than just straight copying your favorite characters.
2. Start with a sketch: Draw a picture of your character. I drawn on gridded paper to help keep the proportions consistent. Draw out as many sketches as possible to help predict the maximum amount of design considerations before moving on. Don’t worry if drawing isn’t your thing. Try your best, and be specific about the look of the body, clothes, and gear. By making important design decisions early, you can avoid having to restart your design from scratch. You can always choose to depart from the original later on if you still want to.
Some artists will draw their character in a T-pose to copy, but generally I don’t find that necessary. I just like seeing a reference to keep things to the right scale

3. Open Blender and start by updating the user preferences: If this is your first time using Blender, don’t be intimidated by all the buttons. We’re only going to use a small small portion of what Blender can do. First, we want to change a few preferences to make things easier. Go to User Preferences and change the select to be the left button click. If you’re on a laptop (like me) make it so that we’re using the number keys at the top of your keyboard by checking Emulate Numpad.
Pssst– If you want to really dig in and learn everything Blender has to offer, check out Andrew Price’s free YouTube tutorials.
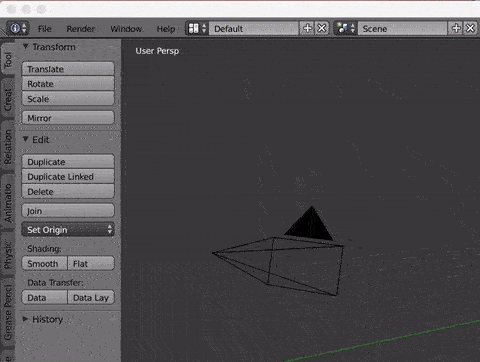
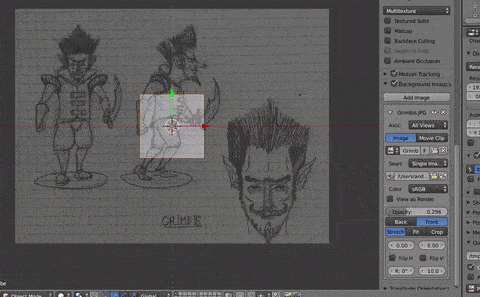
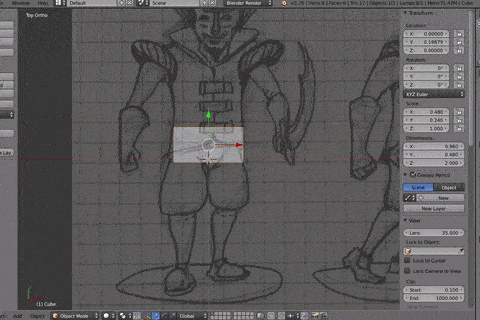
4. Import your drawing into Blender to use as a reference for your miniature.
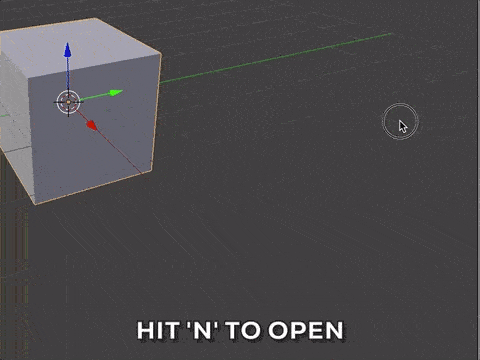
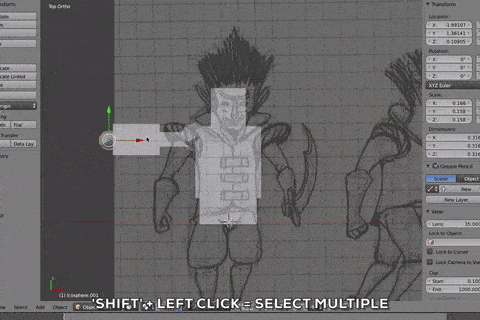
Hit N on your keyboard to open a new panel menu. We’re going to call this window the N menu for the rest of this tutorial as it’s pretty useful and we’ll be using it often. First scroll down, check and open Background Images, hit Add Image, click Open, find and double click your image file.
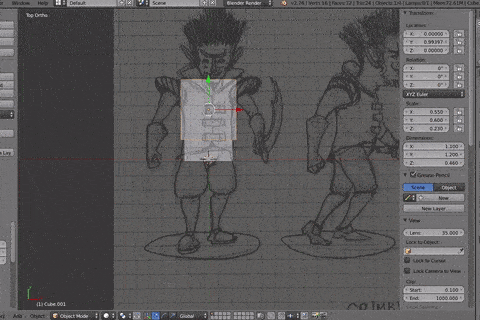
Now I need to put the image into the scene. To do this I go to the Axis drop down and select Top view, then hit 5 and 7, which makes the image visible in the background. Hitting 5 allows you to toggle in between perspective and orthographic mode (showing objects without perspective, making it easier to judge sizes and relationships of objects). Clicking 7 shows the image from the top.
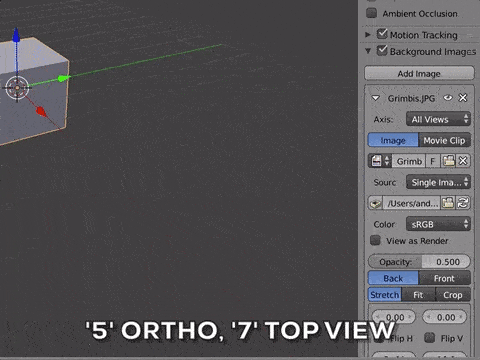
I also make the image transparent by lowering the opacity to 0.25. Then I select Front to ensure the image sits over the objects in the scene so both are visible.
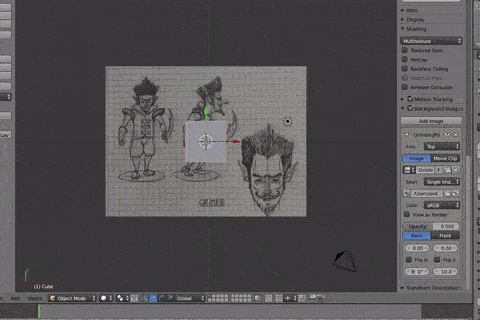
Finally, I slide the image over—you’re going to do this by using the number counters in the gif above. They’re the number counters directly under the sketch, fit, and crop buttons.
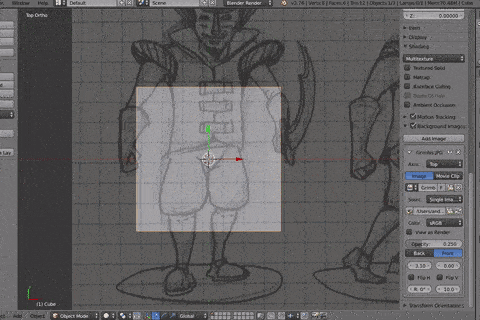
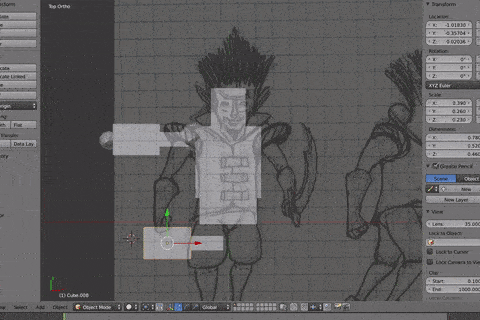
5. Thinking symmetrically: Time to start blocking in all the body parts. Start just with the forms that are in the center of the body and work outward. I go up from the pelvis, up to the chest and then the head. For the limbs, only work on one side of the body, I chose the right side but it doesn’t matter which as long as it’s consistent—we’re going to mirror that side later.
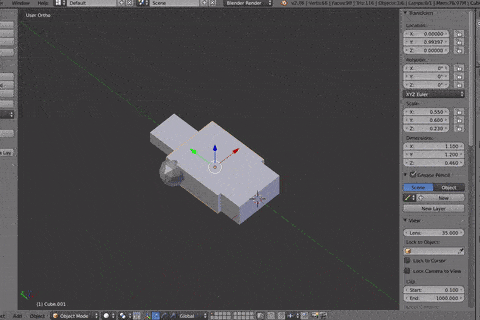
Start by Blocking in the major shapes: Using the sketch as a guide, I take the default cube that blender opened with change it by using transformations to have it fit the sketch.
There are three ways I can transform an object: move, scale, and rotation.
To scale, I have two options. With the first option, you can hit S on your keyboard and move your mouse to scale in all dimensions or hold the center mouse button to choose just one. The other option I prefer to use is to scale each dimension on the top of the N panel menu. I like transforming this way because it gives me some values to know exactly how much I alter it. You can transform the location (move) and rotation in these ways as well.
Let’s start by sculpting the pelvis. To do so, I scale the X and Y and then move the view (hold the middle mouse button, or MMB, and scroll (see this page for instructions on how to emulate an MMB with 1- or 2-button mouse designs), so that I can see the other side of the cube and change the Z dimensions.
Now for the chest. I duplicate the box we used for the pelvis by pressing Shift and D. Then I click without moving my mouse. I want it to stay perfectly in line with the other box so all I need to do is move it straight up by clicking the green arrow on the transform gimbal and dragging up. Then I scale each dimension it to fit the chest area.

Next I repeat the process for the head. I make sure to scale it down so that it is about the depth of his neck. I’ll add the skull later while sculpting.
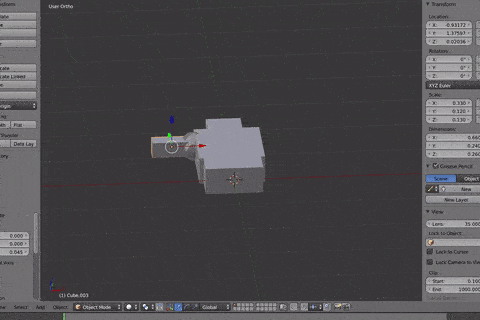
Next I’m going to make just one of the arms. I hit Shift and A to open the menu to add new objects into the scene. I go to Mesh, choose an isosphere (one of the present options called primitives) and it loads at 0, 0, 0 in the scene. I scale it down to the appropriate size for his shoulder.
The isosphere, the cube, and other shapes are called primitives, they’re the simplest shapes we can use but we’ll be changing them to be a little more complex with just the primitive shape, using cubes and spheres. I scale the sphere down and move it upwards to become his shoulder.

Now I duplicate the chest, move and scale it down to create the upper arm. Remember to always rotate the view with the middle mouse button to check the size and location from all angles, sometimes it’s hard to really know just from one view.
For the lower arm, I’m going to make it a bit larger because it will turn into his gauntlet gloves down the road. An important key to remember- make the primitives the max size they need to be, because as you make detail you’ll generally be shrinking the shape.
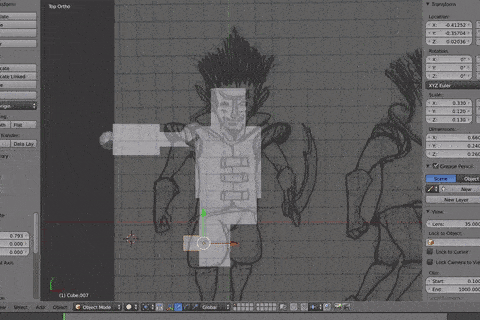
Now I’m going to select both parts of the arm and duplicate them. To select multiple objects hold Shift and left click (deselect the same way). Duplicate the part by hitting Control C for Windows or Command C for Macs.
I’m going to rotate the larger block and turn it into the thigh. Rotate by hitting R and dragging the MMB or by imputing the degree of rotation in the N menu. Once they are rotated 90 degrees, I move them into place based in the image.
Finally, I duplicate the lower leg, move and scale it to be about the size of his shoe. I now have nice block man ready, which will be worked on in the next part of this tutorial.
Check back soon for part two of how to model your own 3D miniature that goes over more of what you need to know to get your miniature 100% finished and printed out!