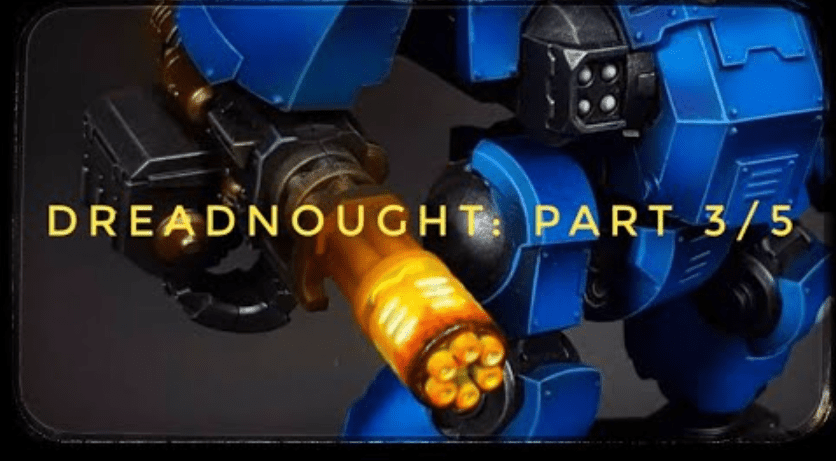
 Elminiaturista is back with how to paint a hot metal Dreadnought Cannon in this awesome miniature painting tutorial!
Elminiaturista has some amazing hobby content and if you need some sweet painting tips, you should follow him to get up on all your painting and conversion techniques! He also has a great Patreon where you can get one-on-one coaching to get even better!
This time around he paints up some hot cannons, and the way he does it will take your minis to the next level. He’s doing this in multiple parts (the entire dread that is), but even just this video alone will get your minis to a great standard. Let’s get into the tutorial!
https://www.youtube.com/watch?v=5UKu04Uu2kE
How To Paint a Hot Metal Dreadnought Cannon: Miniature Painting Tutorial
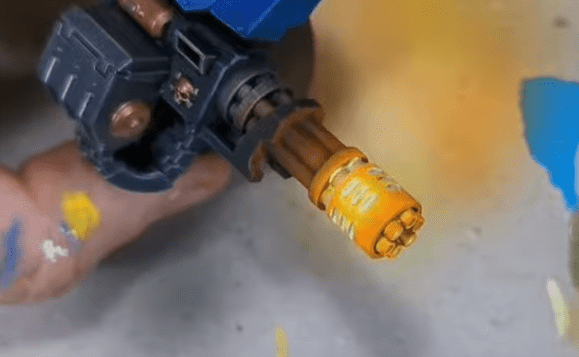
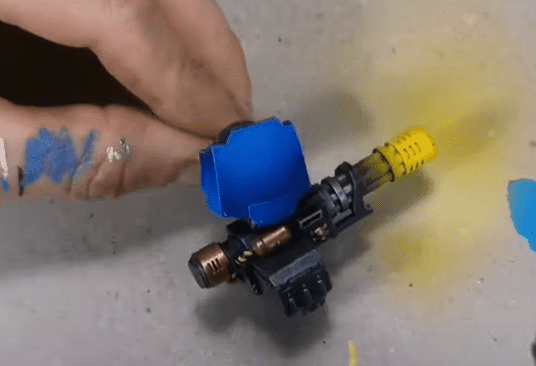 Since this is a multipart video, he already has the armor painted. So first up, he starts by spraying the whole cannon barrel black other than the last little section which he keeps silver. Next, he loads the airbrush with white and highlights the areas he wants to be brighter in the end, and makes sure to get to pure white at the very end.
To finish this step off, he loads in a yellow to the airbrush and tints all the white and some of the black areas.
Step 2:
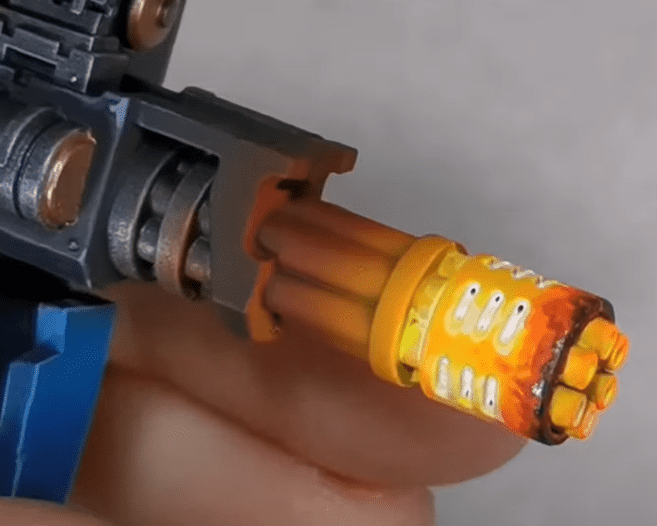
 Next, he adds some orange to the mix and airbrushes the areas where the barrel would be less hot, but not cool. Then he mixes Fluorescent Orange and Yellow together and applies them with a brush to the vents on the gun to intensify the effect. Where it is hotter he uses more yellow, where it is cooler he uses more orange.
He then also does this on the rest of the barrel to add to the effect. He does this in a few layers so it does take some time.
Step 3:
 Once he’s happy with that he then goes to a watered-down white and adds that to the very hottest parts of the barrel. As he moves to the cooler areas he then adds in some yellow to the mix and just keeps using the technic to add to the effect. Just be sure to not blend the white too much or the effect will be lost. You want parts to sort of stand out here.
Step 4:
 For this stage he breaks out the red and mixes that with the yellow for a darker orange, he then does something similar to the steps above, but where the cannon isn’t quite as hot. This can be blended slightly more than the white. He does this in places like the very tip of the barrel and more towards the base of the cannon.
Then just like the white, he makes it darker and darker the further he gets from the light and heat source. To finish this step off, he goes and feathers the colors together to give it a more organic feel.
Final Step:
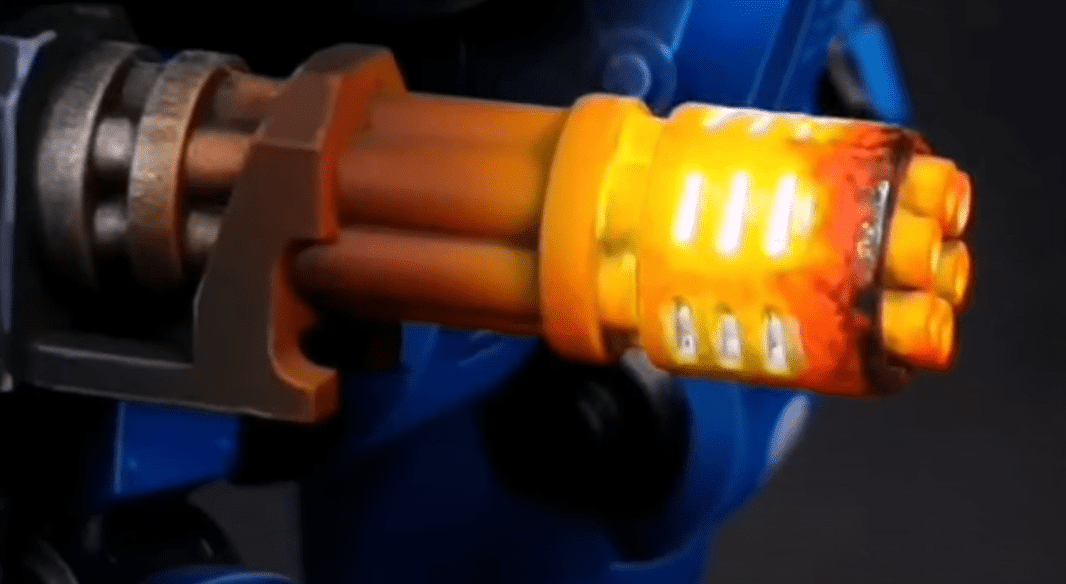 The final stage is going to use black and just lightly paint the metal reflections at the end of the barrel. There you have it, a fairly simple way to get an awesome gun!
Follow Elminiaturista on Patreon or YouTube
Have you been looking for a way to paint Dread weapons?
Let us know in the comments of our Facebook Hobby Group, or our new Discord server, and make sure you enter the latest monthly giveaway for FREE today!
Get ad-free access to the site, a monthly crate of miniatures, and support some of the best creators out there for as little as $6 a month on Patreon!

This post contains affiliate links, as an Amazon and eBay Associate Spikey Bits earns from qualifying purchases.
About the Author: Travis Pasch
Travis Pasch
Job Title: Head Writer & Editor
Socials: @paschbass
About Travis Pasch: Travis has been a Warhammer 40k hobbyist since the 1990s, playing the game since Third Edition. Through extensive traveling, he’s seen a lot of the miniatures hobby from across the world, giving him a unique perspective on the latest gaming topics and trends.
Travis’s brother even owns a commission painting studio, where he’s picked up a lot of good advice and techniques for painting Warhammer and tabletop miniatures over the years, as well. Travis joined the Spikey Bits team in 2019 and has been the lead writer since 2020.
Currently, he’s working on converting all his 40k Adeptus Mechanicus models and becoming a true tech enjoyer, complete with both sad and happy robot noises!