 Discover the best sizes of 40k magnets and how to magnetize your Warhammer models effectively, and learn tips, techniques, and troubleshooting for seamless games!
Updated February 13th, 2025, by Rob Baer with new information and links to relevant content.
Magnetizing Warhammer 40k models is one of the best ways to keep your army flexible without breaking the bank on extra miniatures (save some hobby cash to get the codex and different gray shame). Picking the right magnet size, though? That’s where things can get tricky. Too small, and your parts fall off mid-battle. Too large, and your models stick together like they’ve been caught in a Black Templar embrace.
Getting the balance right means knowing which sizes work best for weapons, limbs, bases, and even larger war machines. This guide breaks it all down—what works, what doesn’t, and how to avoid common mistakes. By the time you’re done, swapping loadouts will be as easy as rolling dice (hopefully not ones that betray you at a crucial moment). Let’s get started.
What Are 40k Magnets, and Why Bother?
40k magnets are small, powerful neodymium magnets that keep your model parts in place while allowing you to swap them at will. Rather than gluing on one weapon and hoping you never regret your choice, you can attach magnets so that your model can switch between different loadouts in seconds.
Games Workshop gives us a decent number of options—plasma guns, flamers, missile launchers, power swords—but committing to one permanently can feel like picking your favorite child. If you plan to try different tactics or frequently change army lists, magnets are the way to go.
On top of that, magnets aren’t just for weapons. They’re also handy for making bases more stable, attaching models to transport trays, or even giving vehicles swap-out parts.
Choosing the Right Magnets for Your Models
 Let’s get to the crucial question: what size of magnets for miniatures? The answer depends on what you’re magnetizing. Here are the most common sizes for Warhammer 40k magnets and how to magnetize miniatures for games:
Weapons and Small Joints
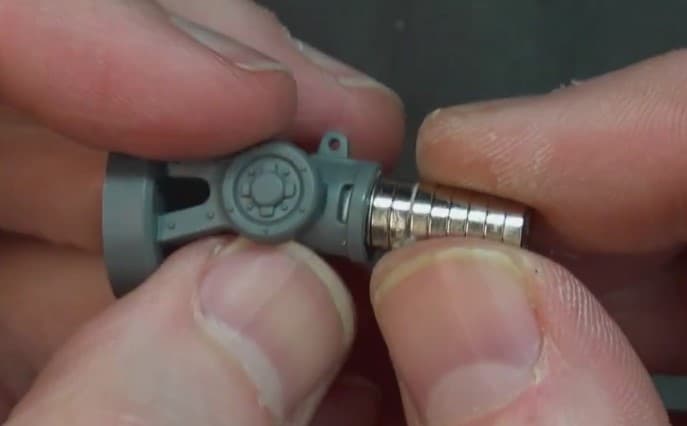
 For things like guns, swords, and arms, 2mm x 1mm (diameter x thickness) is the gold standard. These are small enough to be discreet but strong enough to keep an arm from flopping around mid-game. If you’re working with bulkier bits—like Dreadnought arms—you might want 3mm x 1mm for a bit more grip.
Vehicles and Large Models
If you’re magnetizing a tank turret or a big monster’s wings, you’ll need something beefier. 5mm x 2mm or 6mm x 2mm should do the trick. The goal is to keep everything secure without needing the jaws of life to swap out parts.
Bases and Transport
For keeping models steady on metal trays, 6mm x 2mm or larger works well. If you’re attaching bases to a display board, you might even go up to 8mm x 3mm for extra security.
The trick is balancing strength with size. Go too small, and your pieces fall off mid-game. Go too large, and pulling parts apart feels like a strength test. Here is a quick chart for the majority of your magnetizing needs (we use Magnet Baron for all of our magnets):
| Model Type | Part | Recommended Magnet Size |
| Infantry | Shoulders & Backpacks | 1/8″ x 1/16″ or 1/8″ x 1/32″ |
| Wrists, Weapons, Heads, Hands | 1/16″ x 1/32″ | |
| Tanks | Turrets | 3/8″ x 1/16″ (main turret & barrels) |
| Sponsons | 3/8″ or 1/4″, depending on method | |
| Knights | Torso | 1/4″ x 1/16″ (legs), 3/8″ (torso) |
| Arms | 1/4″ (arm socket), 1/8″ x 1/16″ (weapons) |
The Step-by-Step Guide to Magnetizing Warhammer 40k Models & Magnets
 Time to get hands-on. If you’ve never magnetized a model before, don’t worry—it’s not rocket science. Here’s what you need and how to get started.
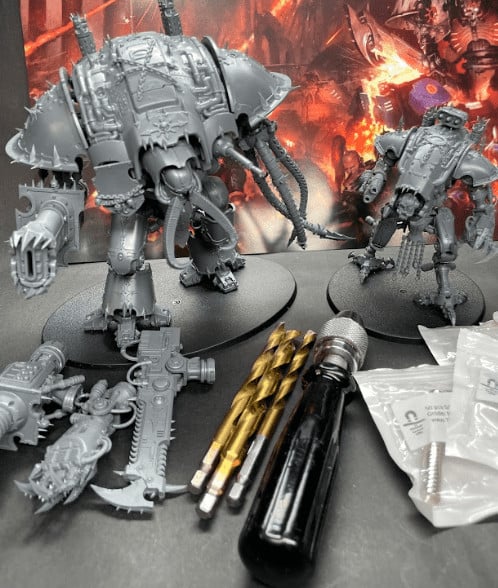
What You’ll Need
- Hand Sized Pin Vice: For larger projects like Knights, Forge World kits etc.
- Pin Vice For Miniatures: We like the army painter one, but there are a ton to choose from
- Drill Bits For Magnets (small quick release set) Larger Bits (for vehicles etc.) quick-release set
- Wowstick Motorized Drill: makes pinning and drilling out barrels a breeze and helps with magnetizing miniatures, but you still need a pin vice to bore out pilot holes over 1/8″ in diameter.
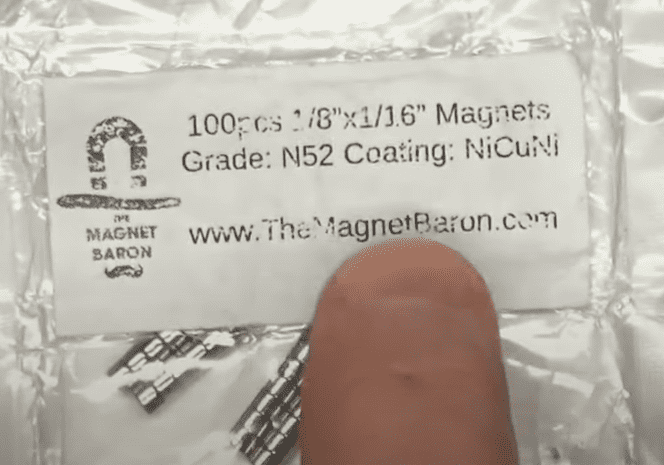
- We get all our magnets for hobbying from The Magnet Baron. Use coupon code Spikey10off to get 10% off your next order with them!
Planning Your Magnetization Process
 Before you start drilling, think about how your model needs to move. A poorly placed magnet can make an arm stick out at an awkward angle or cause a weapon to spin like a windmill. Dry fit everything before committing.
Also, take polarity seriously. If you install a magnet the wrong way, it will repel instead of attach—turning your weapon swap into a frustrating game of push-away.
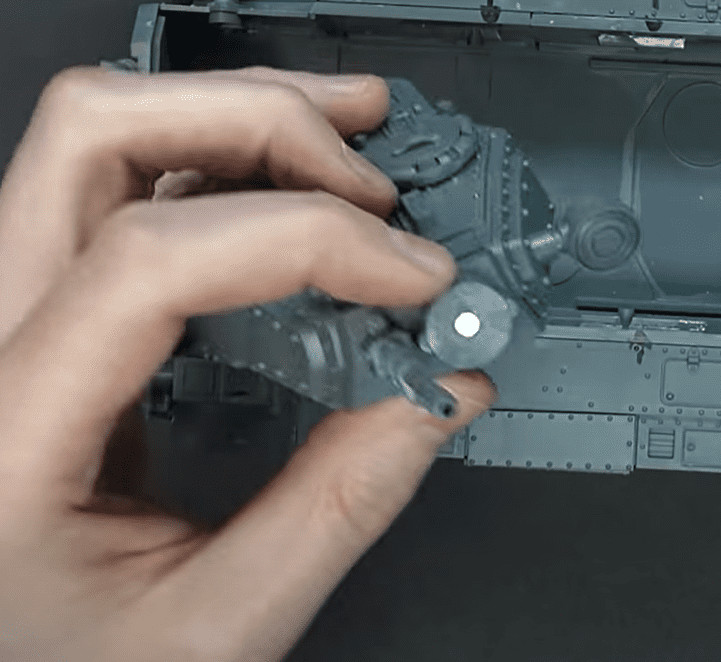
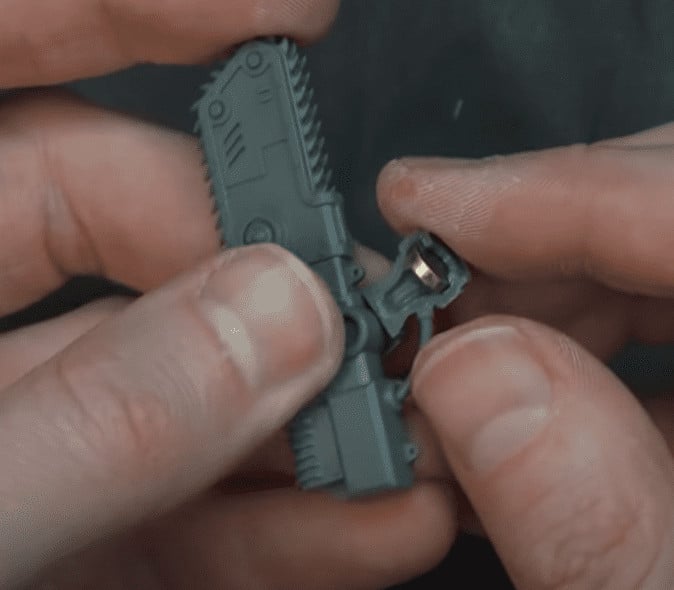
Step 1: Mark Your Magnets (Seriously, Do This or Regret It Later)
Before you even think about gluing anything, grab a sharpie or a bit of paint and mark one side of your magnets. This might feel like an unnecessary extra step, but trust me—it’s a lifesaver. If you don’t, you’ll end up playing a frustrating game of “Will This Magnet Repel Everything I Just Glued?” Spoiler: If you get it wrong, it will.
Step 2: Drill the Hole (But Don’t Go Full Power Drill Mode)
Now, using a pin vise, carefully drill a hole just a hair deeper than your magnet’s thickness. The goal is to have the magnet sit flush with the base rather than sticking out awkwardly like a bad dental filling. Go slow, check your depth, and make sure you don’t punch through the base entirely—unless you’re aiming for that “floating magnet of doom” aesthetic.
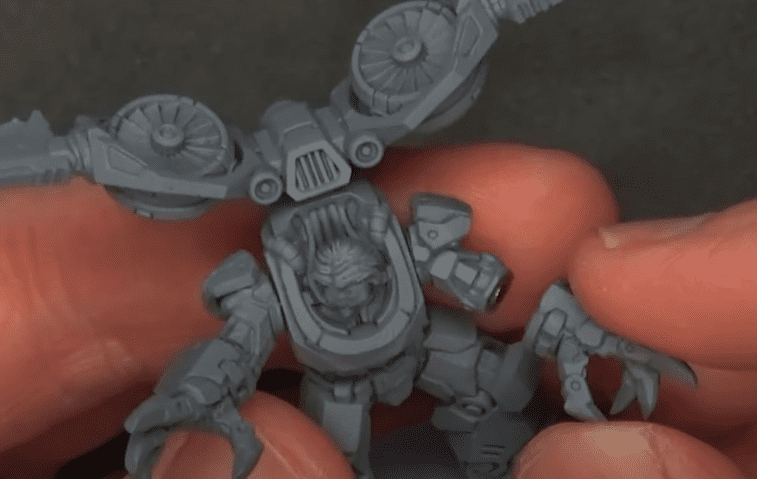
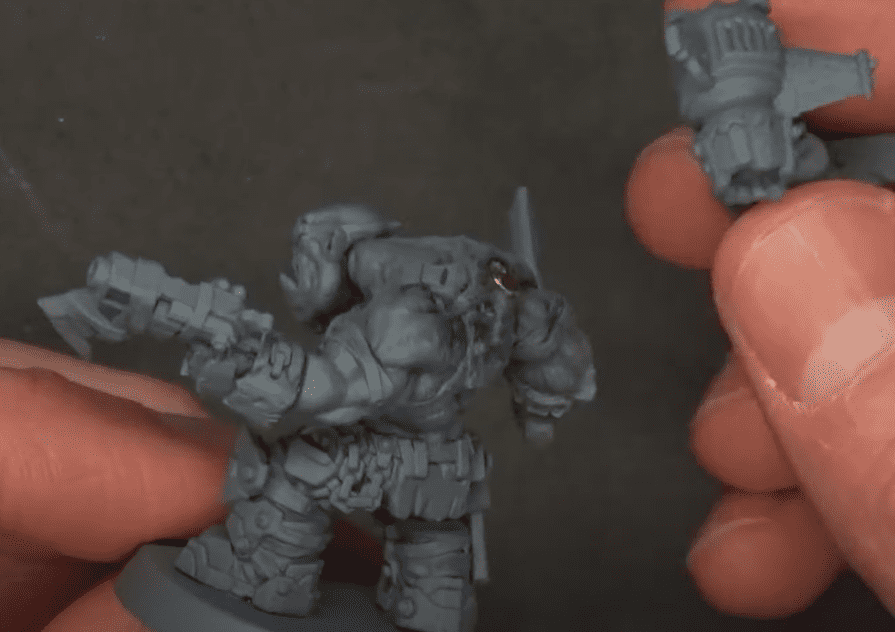
Step 3: Glue in the First Magnet (Precision, Not Panic)
 Time for the commitment phase. Apply a small dab of super glue into the hole, then carefully place the magnet inside. Tweezers can help if your fingers are not built for microscopic precision. Once it’s in there, let it dry completely. Don’t poke at it. Don’t test it. Just let the glue do its thing before moving on. Rushing this step will only lead to regret and potentially gluing yourself to your own mini.
Step 4: Attach the Matching Magnet (No Guesswork Allowed)
Here’s where your earlier Warhammer 40k magnet-marking skills come into play. Grab the second magnet and let it naturally snap onto the first one. This guarantees the polarity is correct. Now, apply a small drop of glue to the exposed side of the second magnet, press the weapon, limb, or whatever part you’re attaching firmly in place, and wait for it to dry. If you skipped marking your magnets, well, this is where you might find out the hard way that things are repelling instead of clicking together. Don’t be that person.
Step 5: Rinse and Repeat (But Keep an Eye on Polarity)
If you’ve got more parts to magnetize, go ahead and repeat the process. Just remember to check polarity every single time. Nothing kills momentum faster than realizing halfway through that you glued half your army together with mismatched magnets. A quick check before gluing saves a world of frustration later.
Now stand back and admire your work—your miniatures are now modular, transport-friendly, and future-proofed for whatever loadout changes come your way.
Advanced Techniques: Getting More from Your Magnets
 Magnets aren’t just for swapping weapons. If you want to take things to the next level, try these techniques:
Using Magnets for Weapon Loadouts
Some models practically beg to be magnetized. Take Space Marine Dreadnoughts or Tau Battlesuits, for example. These mechanical war machines come with a whole arsenal of weapon options, and if you glue on just one, you’re locking yourself into a single loadout forever. And let’s be honest—who wants that kind of commitment?
Instead, slap some magnets on those Warhammer 40k arms and give yourself the power of choice. One game, you might want your Dreadnought storming into battle with twin Autocannons, the next, maybe a Power Fist and Heavy Flamer for up-close destruction. With magnets, you’re not stuck making a permanent decision—you get to swap weapons depending on the mission, your opponent, or just because you feel like mixing things up.
And let’s not forget the added bonus: no more buying multiple models just to field different weapon options. One Dreadnought, endless possibilities. Well, at least as many as Games Workshop puts in the box
Magnetizing Bases for Stability
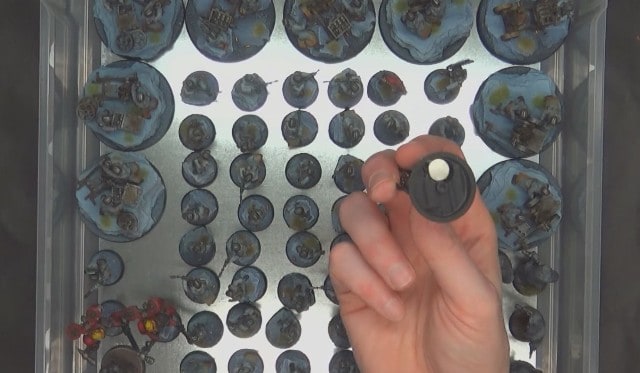 Ever had a model fall over mid-game and knock over half your army? Attaching a magnet to the bottom of the base and using a metal movement tray solves this issue. It also makes transporting large armies much easier.
Fixing Loose Connections
If your magnets aren’t holding strong enough in games, try one of these fixes:
- Use a larger magnet if there’s room.
- Increase contact area by making sure the magnet is flush.
- Add a second magnet stacked on top for extra strength.
Troubleshooting Common Issues
 Not everything works perfectly the first time, so here are some quick fixes for common problems.
What to Do If Magnets Aren’t Sticking
- Make sure the hole is deep enough for the magnet to sit flush.
- Check polarity—you might have installed one backward.
- Use stronger glue if the magnet is shifting.
Adjusting for Weight Distribution
If a magnetized part keeps drooping, you may need a larger or stronger magnet. Another trick is using a small pin along with the magnet to help stabilize heavier pieces. Now, check out some other tutorials for more in-depth guides!
The Ultimate Tutorial Guide to Magnetizing Imperial Questoris Knights
 Learn how to magnetize a 40k Imperial Questoris Knight and future-proof your expensive miniatures with this titanic tutorial. Read the whole tutorial here!
How to Tutorial: Magnetize Resin & Plastic Bases For Miniatures
If you liked this article, here is another great tutorial on how to magnetize resin and plastic bases for miniatures with all the sizes you’ll need and tips to make it easy! There are some major differences between magnetizing your miniatures and your resin/plastic bases, so we’ll show you how to do both here!
Final Thoughts
 Magnetizing Warhammer 40k models is one of those things that seems intimidating at first, but once you get the hang of it, you’ll wonder why you didn’t start sooner. It saves money, makes your models more versatile, and keeps you from regretting those hard weapon choices with magnets in games. How to magnetize Warhammer 40k models doesn’t have to be hard!
Start small with a few basic weapons, and soon you’ll be magnetizing tanks, monsters, and entire armies. Just remember: mark your polarity, use the right size for Warhammer 40k magnets, and don’t rush the process.
Now, go forth and make your models as flexible as your ever-changing battle plans. Happy gaming!
Get Your Magnets Here 10% OFF Use Code Spikeybits10
What do you think about the list of magnets for games and magnetizing your Warhammer 40k miniatures?