We’re back with another airbrushing article and this time we’re painting 12 Myrmourn Banshees and Lady Olynder, Mortarch of Grief.
I wanted to also touch base a little bit on priming as that is something that took me a little while to figure out. As always this builds on my previous Nighthaunt articles (bringing my army to over 1600 points) on track for over 2000 painted well before my year deadline!
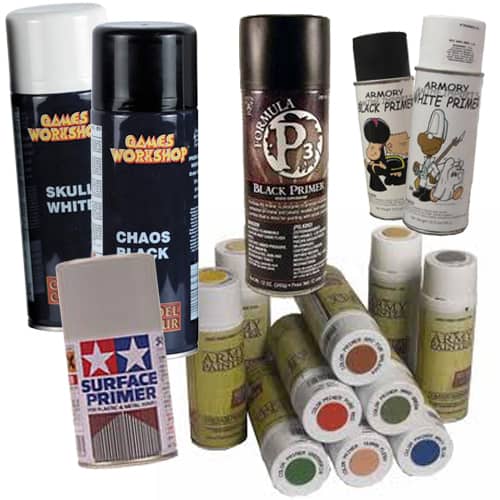
Priming:
I kind of glossed over priming in the past but there is something to be said about it in that there are many ways to prime and no one way is the right way. When I first started painting, I used the cheapest Krylon primer I could find in a rattle can that was black and used that and for the most part, it did what I needed it to do quickly.
I did find that I was limited in temperature range (see Michigan weather) and that sometimes I lost some detail if I was a little heavy handed on my spraying. Once I got my new airbrush I switched to using Vallejo White and Black primer for my models and I certainly think it is better than the rattle can stuff I was using. I seem to get better coverage (especially with the black) with good detail. The white on the other hand was a different beast, and it kept drying on the tip of my airbrush and clogging. It was frustrating to have to keep stopping to clean out the airbrush and then continue.
After hitting the internets, I saw this primer video from Next Level Painting that goes over some tips for Airbrush Primer & Thinner and he mentions adding Thinner to your white primer to get it to spray better. After trying it out it actually worked, it did still need two coats as he mentions in the video, but it was well worth it to do that than keep stopping to clean out a clog or dry tip.
Editor’s note: If you would like some tips on using rattle cans, we got you covered too.
Airbrushing:
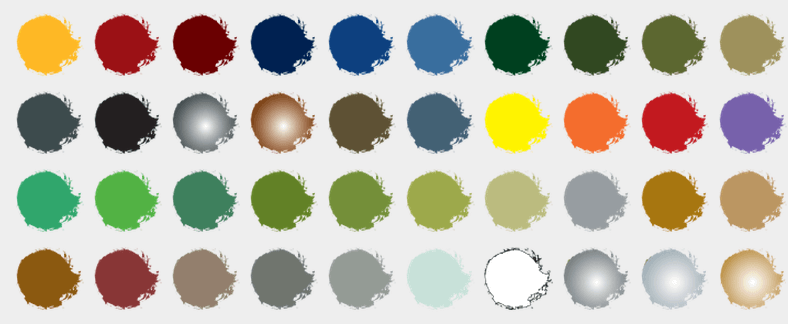
Just like I said in my last article you could do these entire models with just a couple of colors and they would look great. However, as I mentioned before I like to pick out a lot of the details of the miniature, so I am again breaking it up into two parts. First the parts I airbrushed (which you could do for the whole model and call it good) then picking out the details with a brush. For the colors, I wanted to do a bright blue color for the Banshees like how some bridesmaid dresses might be, and then a dark grey-blue for Lady Olynder like a take on a wedding dress without it being completely white. Then we would tie these models in with the rest of the army’s color scheme of the green ghostly energy.

I did all this at once starting with the Banshees dark blue then hitting the brighter areas with the lighter blue. After a quick clean out, I did the same for Lady Olynder’s Robes with the darker blue-grey and the where I wanted more light with the Russ grey. After that switched to the Green Energy colors I have been doing for the rest of the army and followed the same pattern of having the darker green be where the “other color” meets the energy and as it travels away from that going into the yellow-green and then the off white.
Then I hit everything with their respected shades, making sure to more heavily shade the area where the energy meets the robe colors so that it was darkest and the most muddled there. Once that dried, I went back and with a very controlled spray (so low psi and controlled trigger) I did a very light airbrush of the blue, grey-blue, and the green again trying to stay out of the recesses and moving from the darker colors to the lighter. Finally, I took the lightest color on the list and did a very fine mist-like spray over the most raised edges of the models to do a sort of highlight.
I was happy with the results and to be honest more than a little thrilled at how much of the model I was able to get painted with the airbrush.

Airbrush Tip I learned:
I am getting better at the consistency issues with the airbrush paint and seeing how much flow improver I need to add to get the consistency I want. One thing I started doing was using a couple of brushes to put paint from the pot into the airbrush cup and then washing the brush and letting it dry while I use another one. What would happen when I was using the same brush is after washing it out and then moving onto a different paint pot, I would bring along some of the water and sometimes it would thin out the paint in the cup too much. So, it helps to have 3-4 brushes on hand you can use to shoot out paint into the cup, wash them out, and then let them dry before using them again.
Brushwork
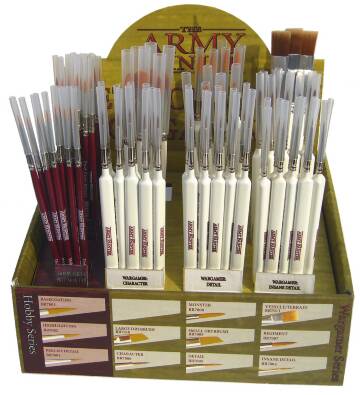
Next, if you’re a glutton for punishment like I am, I like to pick out the details on the models to make them stand out. (Again, don’t feel like you need to buy all these paints and paint with what you have I am just pointing out how I picked out the details)

Also, something to note is that I painted the roses and the bones last, so that when I painted the Banshees bases, I could dry brush the whole thing without worrying too much. Which was nice because the bases took almost as long to paint as the models themselves did! There is so much detail on the banshees bases that I wish GW did that for all their models moving forward. Using the same shade and dry brush for the whole model let me just basecoat everything on the bases and then wash and drybrush at once to finish them up.
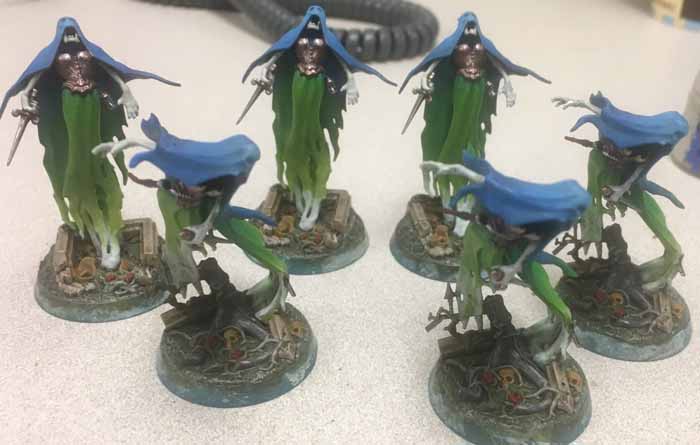
These pictures don’t show it but I ended up finishing the edge with a base color of Castellan Green.

On the Paint Table
To be honest, I am getting a little sick of the ghosts, so to prevent myself from falling into a painting rut I am going to start on the bases of the painted models I have as well as begin diving into bits and pieces of things I want to put on my display board.
- Azyrite Ruins Set (love this kit)
- Burned out 3-D printed Trees
- Lots and lots of bases
Finished Models
- 20 Chainrasp Horde: 160 Points
- 6 Spirit Hosts: 240 Points
- Guardian of Souls with Nightmare Lantern: 140 Points
- Knight of Shrouds on Ethereal Steed: 140 Points
- Lord Executioner: 80 Points
- Spirit Torment: 120 Points
- Lady Olynder, Mortarch of Grief: 240 Points
- Black Coach: 280 Points
- 12 Myrmourn Banshees: 210 Points
- Total 1610
![]()
More AoS How-To For Noobs!
If you are currently publishing hobby content and would like a shot at getting featured on the site, or getting on our publishing schedule, we would like to hear from you! Please email Rob at spikeybits.com with examples of your work!