Paint Lightning EASY! Checkout this tutorial for painting lightning bolts on everything!
I just finished up a commission for a Knight Castigator, and finally was able to film my lightning bolt technique for you all!
So I matched the video up with my How To Tutorial below from a few years ago to make what I hope is a great 1-2 how to paint lightning bolt punch.
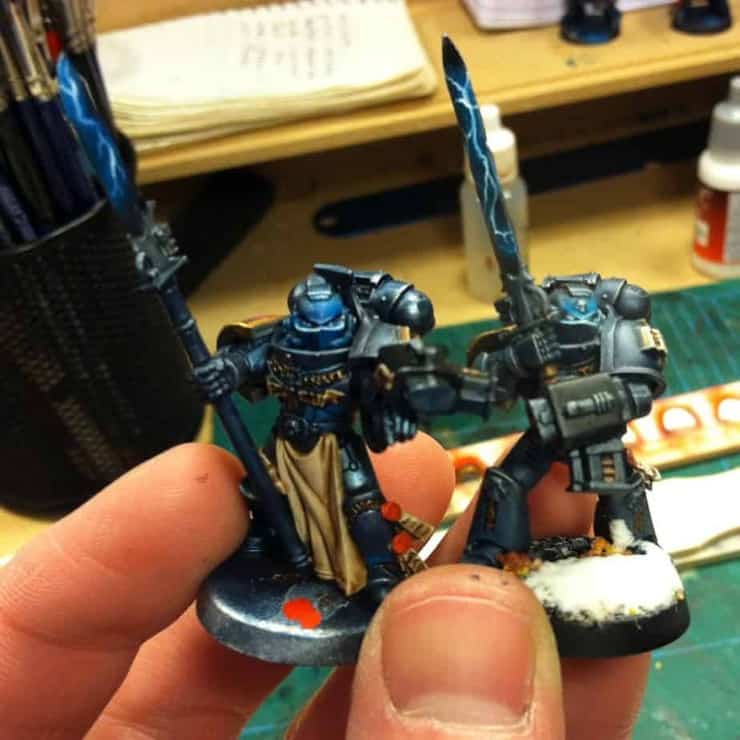
Originally I painted up these Grey Knight Purifiers for some lower point games of 40k, and really wanted the blades to stand out.
So after a couple of tries I came up with this quick method that produces a good looking effect in minimal time.
All you need is a fine detail brush, a few different paints, and a semi-steady hand. Access to an airbrush would help too, but it’s not necessary.
Step One

This part is pretty easy. Over a black base-coat on the weapon, make a semi loose squiggle of a turquoise equivalent. On this I used one of the reaper master series turquoises because the Reaper Paints seem to be easier to airbrush with for me.
If you don’t have an airbrush, no worries. Just water down some Hawk Turquoise or the new fun layer paint Sotek Green, and do the same thing. It may take a coat or two, but it’s not entirely unreasonable to achieve.
Step Two
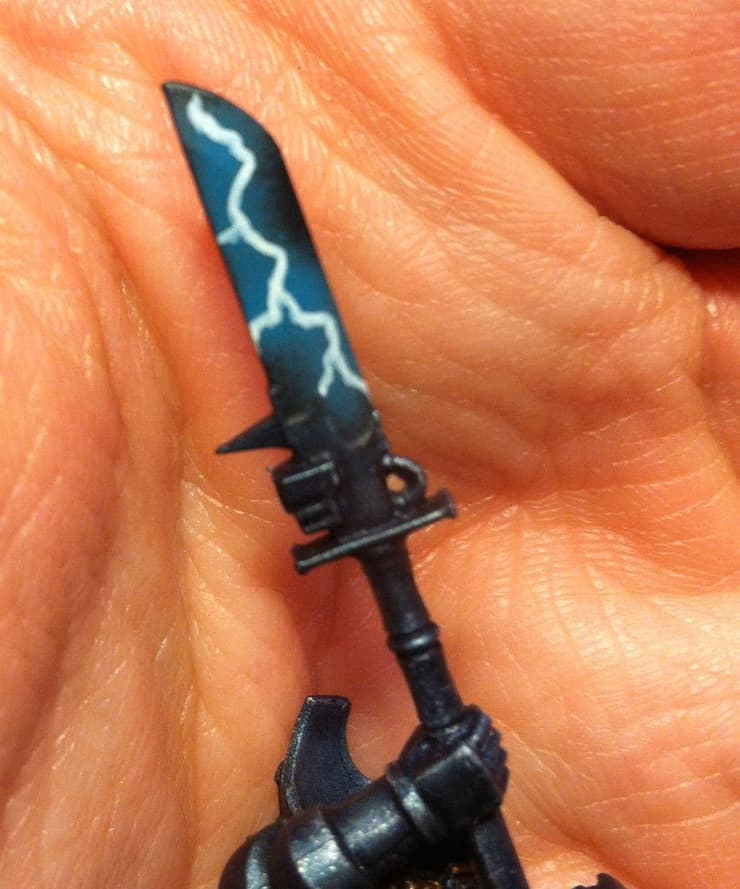
After that take a fine detail brush and make some lightning streaks with a white paint. For this I used the new base paint Ceremite White that everyone’s talking about, as it does coat very well.
I can imagine all the Black Templar painters out there that will be rejoicing over this color!
Make sure to cut the lines sharply like a bolt of lightning would look, with some shooting off to the sides of the blade.
Step Three

I watered down some of the “old” Asurman Blue wash, and carefully painted it around the blade avoiding the spots where the bolts of lightning came together, as well as another few random spots of white.
What this does is shade the rest of the blade together, and leave a “highlight” of white where it was not painted on.
Step Four
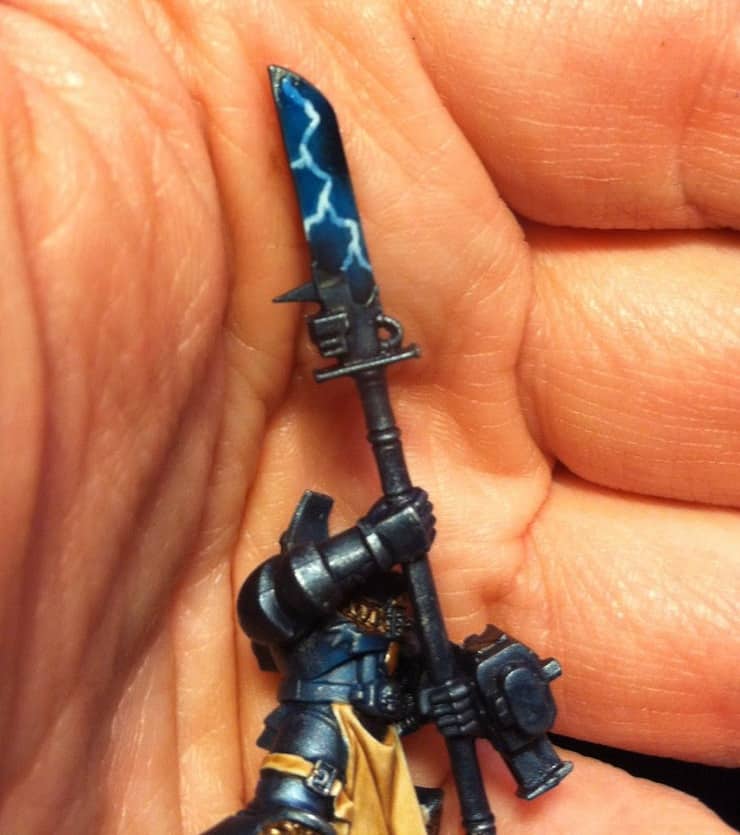
Next I took the same wash mix of blue, and coated the entire blade.
What this does is layer down the previous coat, and shades the white left out (from above) for the first time.
If you are happy with the results here, you can end the washing. If there happens to be some areas that seem like they need more shading you can do another coat.
I had to do an extra shade for some of my blades, as I applied the white a little heavy in some places.
Step Five
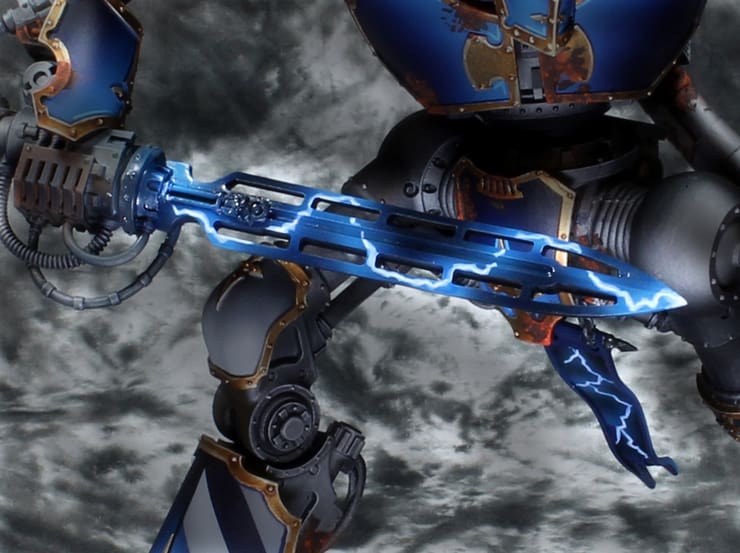
All that is left to do is after matte coating the whole model, go back and give the blade a coat of gloss varnish. I haven’t finished this particular model yet, so I can’t show you that effect on this blade.
But check out the ones to the left, I’ve already glossed.
So that’s it. This is what I think is a quick and easy method for pimping out your blades. Which could come in handy if you are painting up say 40 Purifiers!
If you liked this post, be sure to checkout my other series of step by step articles here: Airbrushing and How-To’s – MBG