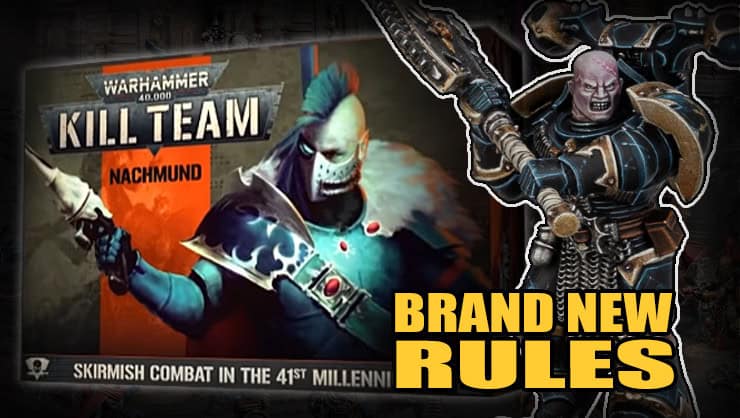
With the new Kill Team Nachmund box coming soon, you know GW wouldn’t leave us without plenty of rules previews. They have plenty for both the Corsairs and Chaos, so either side of the box you want to play, there will be something for you.
Warhammer Community unveiled a bunch of rules and even some datasheets. Also, there is a new dataslate balance update from GW, and you can download the whole thing here!
It has changed for a lot of the newer teams, so worthwhile to check out if you want to see what’s changing with the game. For now, let’s check out the box, then get into the rules!
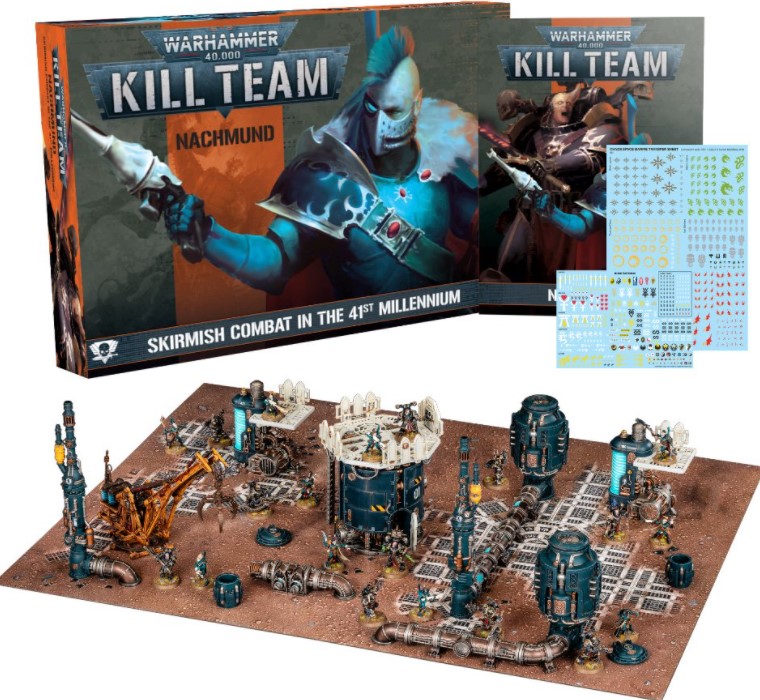
Nachmund Box
Kill Team: Nachmund sees the Aeldari Voidscarred Corsairs take on the might of the Chaos Space Marines. This box is packed with new rules, missions, terrain, and miniatures that make up two full teams of special operatives equipped with a variety of weapons and wargear.
We’ve seen quite a few previews of this new Kill Team box, so it’s great to finally see it releasing!
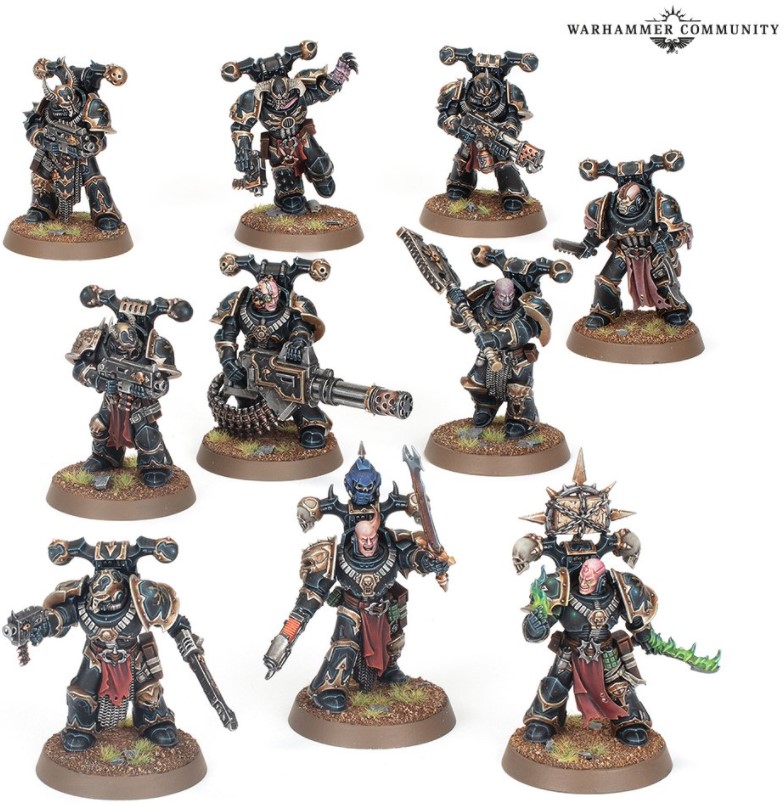
The Heretic Astartes build on a classic kit but come with even more options, including the devastating reaper chaincannon. Your operatives can also gain a massive advantage by pledging themselves to the Dark Gods.
New kits are always great, but with the new models come new rules in Kill Team which are sure to make some games of it more interesting.
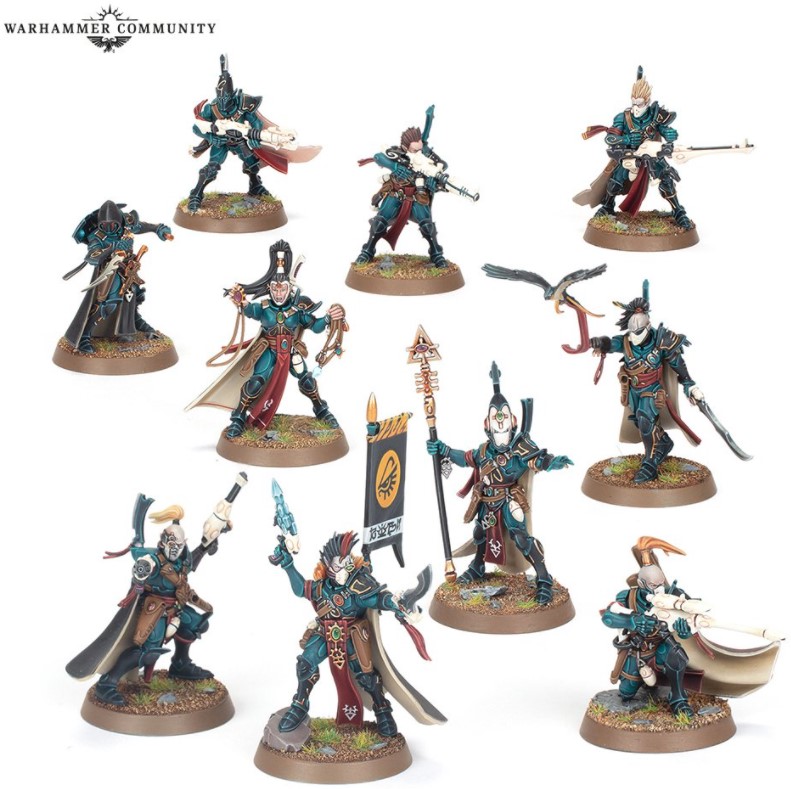
The incredible new Voidscarred Corsairs come with a wide range of options, from deadly wraithcannons to vicious hekatarii blades, to arm all the different operatives you can field in their kill team – but they’re especially good at being super sneaky.
The new Eldar in the box have a ton of character and look pretty unique. These are sure to be some fan-favorite models after they start circulating.
All The New 40k Kill Team: Nachmund Rules So Far
The first thing they showed is a bunch of rules for the different Gods of Chaos.
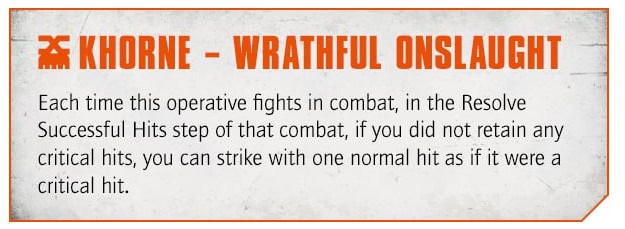
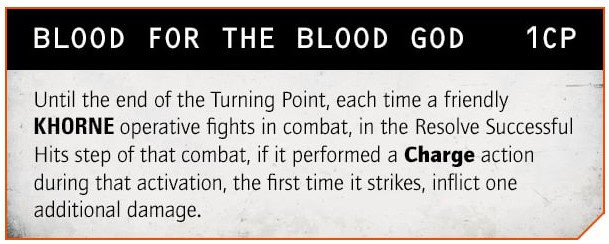
The Mark of Khorne is ideal for any of your operatives that really like to get stuck in – especially the vicious knife-wielding Shrivetalon.
Getting free critical hits on all of your operatives can be really sweet! Then, for 1 CP, you get to just inflict another damage for free (well, for 1cp)!
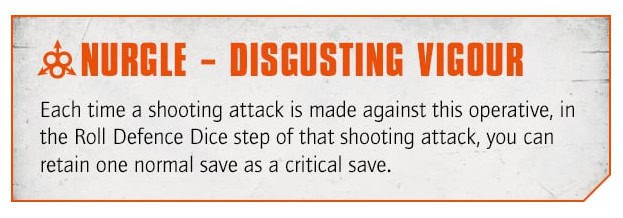
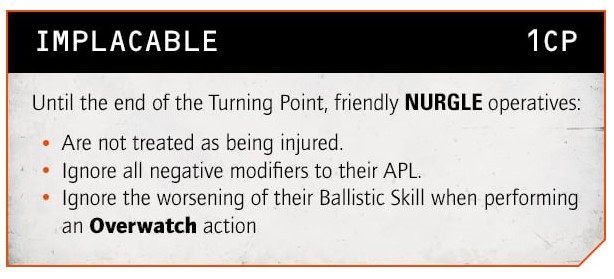
Spread the blessings of the Grandfather with the Mark of Nurgle. Legionary operatives are already pretty hardy, with a 3+ save and 12 (or more!) wounds, but Nurgle makes them even tougher to put down. These pustulent partisans can shrug off even critical hits at range – perfect for blunting a Corsair’s Rending shuriken weaponry.
 Click Here For 50% Off & Free Shipping!
It makes sense that they are tougher and with the new strat, you can turn your operatives super tough!
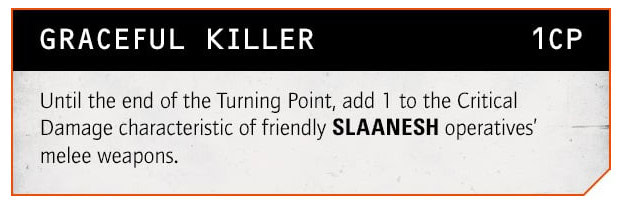
Want to add some speed to your operatives? Slaanesh is waiting to embrace you with open arms – and tentacles, and crab claws, and other appendages. Give your soul to the Dark Prince for extra swiftness, and allow your operatives to bound across the warzone with sinuous grace.
Slaanesh will be the fastest of the choices, and they will also be able to deal some more damage in combat, which you can get into faster than ever!
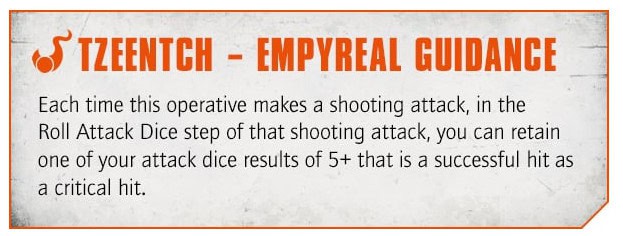
Just as planned, we end with Tzeentch. With the insight granted by the Mark of Tzeentch, your operatives will be able to tap into the power of the warp and seek out weak spots in enemy armour – great for landing those vital critical hits.
Tzeentch always knows what’s going to happen, so changing the dice rolls is a very fun way to show how that works. Then, for 1 CP, giving your operatives a 4+ invuln is pretty sweet.
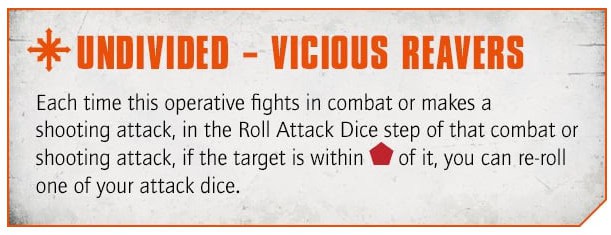
Fortunately, you can always take Legionaries with the Mark of Chaos Undivided. These operatives have withstood the maddening temptations of any specific deity, and fight with the luck of the damned.
If you don’t want to pledge to any one god, this is the way to go! Especially considering you’ll be getting a ton of rerolls!
Balefire Acolyte Rules
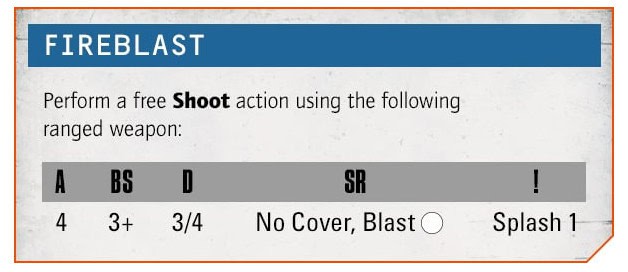
Balefire Acolytes are budding sorcerers, offering flexible psychic support with a choice of three different powers. Malign Influence is a boon to friendly* Legionary operatives, making their weapons far more deadly, while Life Siphon allows you to heal your allies by sucking the souls from your foes. These are both solid choices in the right circumstances – but you know what’s always a welcome addition to the battlefield? A big ol’ Fireblast.
The stats are solid for a shooting attack – about the same as a boltgun – but cast your eyes downward at those special rules. No Cover means you can incinerate enemies who are trying to hunker down – even sneaky Aeldari who think they’ve dashed safely into cover. Blast will help you take out clustered foes, as every operative within 2” of your victim also suffers this attack. Splash 1 is the flaming cherry on top – for each critical hit you retain, both the target and every operative within 2” takes an extra mortal wound.
Not the craziest stats ever, but when you start looking at all the special rules, this is pretty sweet! You’ll ignore cover while also having blast and Splash. So the acolyte could easily cause some serious chaos!
The Anointed Rules
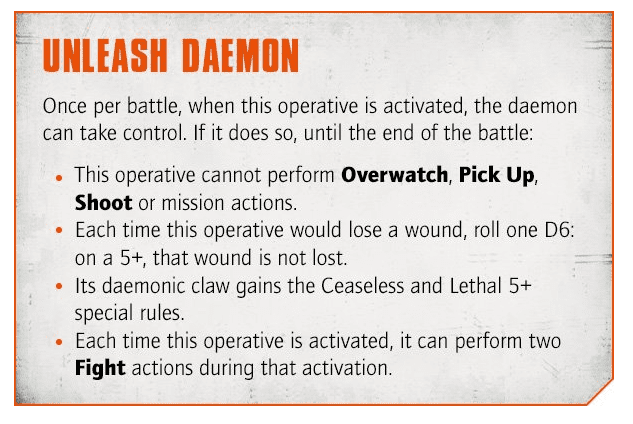
Having given themselves completely, body and soul, to the worship of Chaos, the Anointed are filled with infernal power – and daemons. They’re riddled with them. Giving up their bodies to possession isn’t just a fun activity for the weekend – they can let their daemons take control in the heat of battle.
When you’re close enough to see the fear in the eyes of an enemy operative, it’s time to take the kid gloves off. The Anointed’s already strong daemonic claw becomes truly horrifying, adding the Ceaseless trait to make their melee attacks incredibly reliable. The claw already has Rending, which makes critical hits more effective, and Lethal, which triggers those crucial crits on a five or six.
While you won’t be able to perform most actions, unleashing the daemon will turn this operative into a combat monster. Especially considering you get to fight twice!
Corsairs Rules
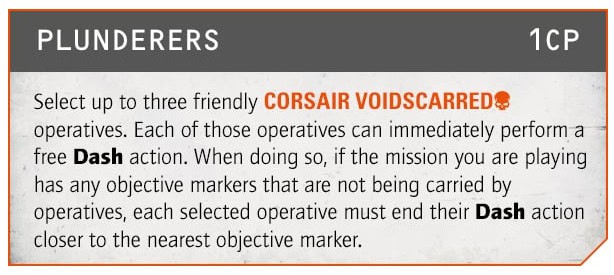
One clear benefit is the ability to move, shoot, and then move again. The Corsairs are fragile under fire, and relish any chance they can take to duck back behind cover – or out of sight entirely – with a jaunty wave.
The formidable flexibility of this free Dash allows you to keep your options open. Imagine positioning one of your Corsairs to unleash a volley of shuriken fire at an exposed target. If the hapless Legionary is still on his feet when the dust settles, your operative can make a quick jump to safety… but if he’s been incapacitated, the Corsair can greedily surge towards an objective instead.
Being able to make free moves after shooting is always strong, pretty much no matter what.
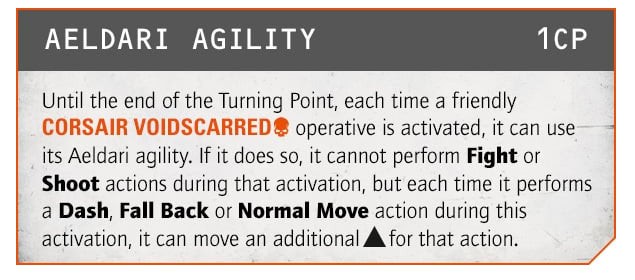
This extra mobility also makes objective play a doddle, especially when combined with certain Strategic Ploys. You’ll have plenty of time to Pick Up a briefcase full of booty and zoom back to safety with the Aeldari Agility Strategic Ploy, which boosts both your Normal Move and your free Dash by ▲. It might not seem like a lot, but every inch counts in a hectic industrial killzone.
With the free movement and this, you’ll be able to get to objectives faster than pretty much anyone! They might be squishy, but they can move so fast!
In the later stages of a battle, when your kill team has split up to swipe whatever objectives they can, the Plunderers Strategic Ploy lets you give multiple operatives a push in the right direction. Combined with their own free Dash, Corsairs can slide into position for crucial Tac Ops objectives that require both their Action Points, like Plant Signal Beacon.
Corsair Shade Runner Rules
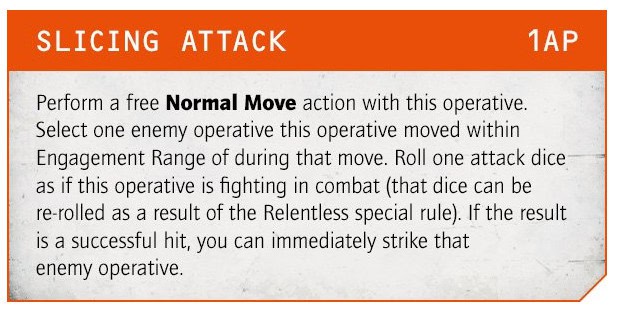
The blink pack gives Shade Runners the Fly keyword. They don’t soar with the fancy wings of a Swooping Hawk, instead streaking across the battlefield in an insubstantial blur. Fly allows them to pass through obstacles and other operatives, and ignore vertical distances up or down terrain features instead of running and jumping like an ordinary pirate. For just 1AP, she can both move and attack* with her cruel Hekatarii blades, which do a massive 5 damage on a roll of 5 or 6, or 3 on a regular hit. As the rule states, you can even re-roll that attack because the blades have the Relentless special rule.
Being able to move and attack for only one AP is pretty sweet. Then, having the Fly keyword and dealing pretty massive damage will make this operative quite frightening. Then, you even get to reroll the attack, so should be pretty strong.
Chaos Datasheet
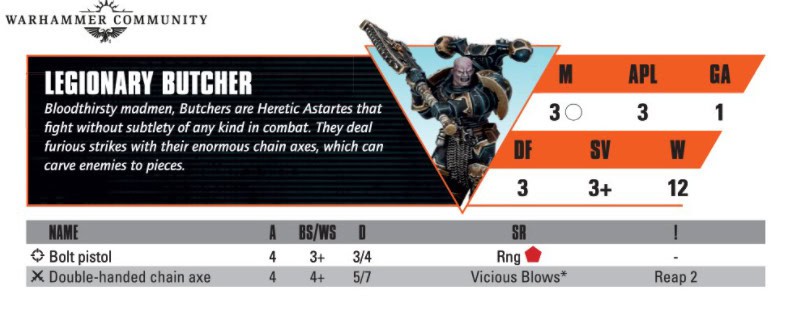
As you might expect from Warp-infused super soldiers, these Heretic Astartes are capable of putting out some eye-watering damage. None show this off better than the Legionary Butcher, owner of this rather impressive two-handed axe, who can potentially kill as many as three (three!) enemy operatives in a single activation. This recipe for slaughter begins with a Mark of Khorne, one of the heretical upgrades available to the Legionary kill team. You then start the Turning Point by activating the Blood for the Blood God Strategic Ploy and Charge the Butcher into as many foes as he can reach.
This guy can deal some serious damage! Especially if you pair him with the Mark of Khorne, you will really cut through the other teams quickly.
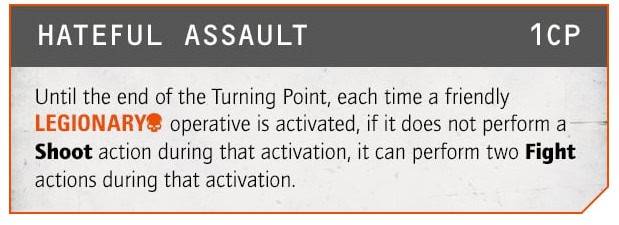
Play the Hateful Assault Strategic Ploy to Fight twice and eviscerate anybody standing next to your unfortunate victim. And even if there’s a crowd of targets around the Butcher, his Devastating Onslaught ability forces each enemy operative to Fight without the support of their comrades.
Fighting twice with an operative like the one above will really turn into a combat machine!
New Terrain Rules
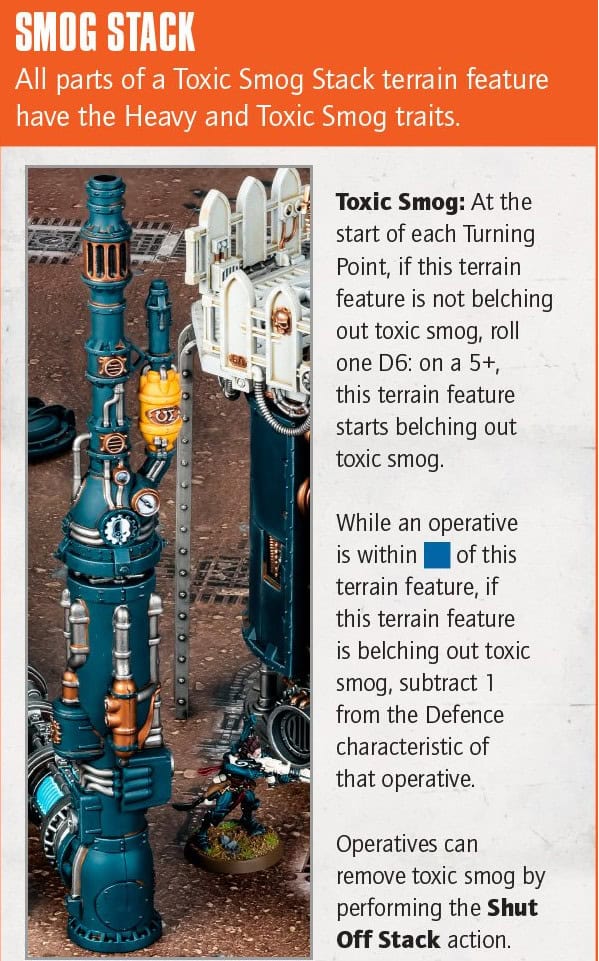
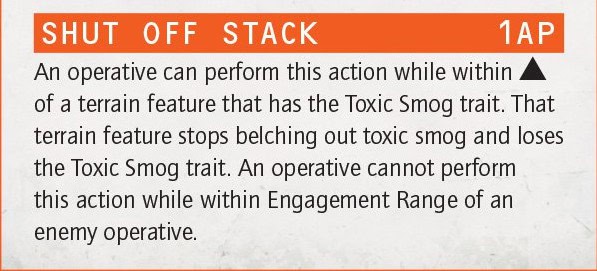
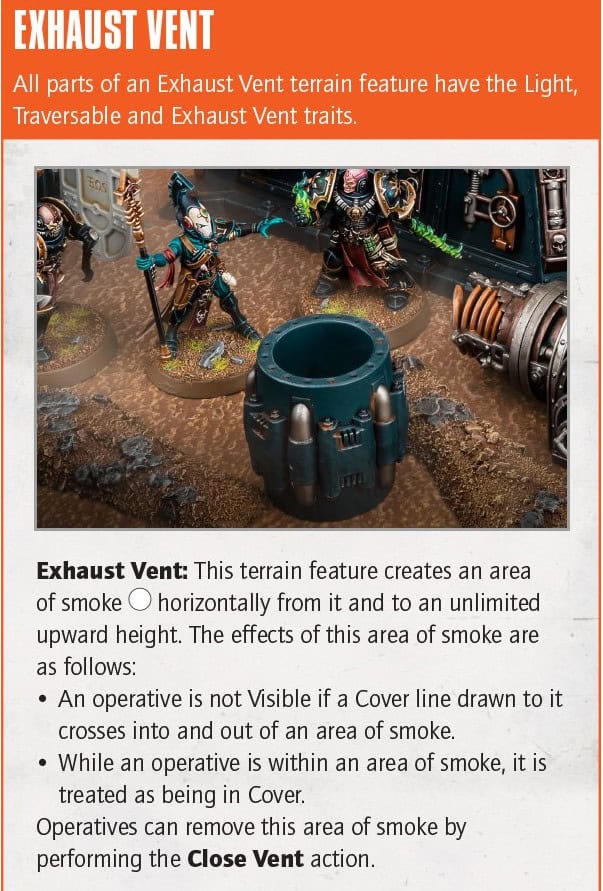
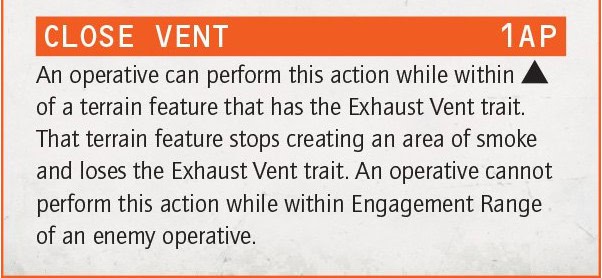
Want to get one over on the Ruinous Powers? Try baiting the murderous, axe-swinging Butcher into a smog cloud with a weaker operative – then shred him with shurikens once the fumes have stripped away a critical Defence point. Or if melee’s your preference, a teleporting Corsair Shaderunner can slice him up without lingering in the smog.
It’s always cool for the skirmish-style games to have interactive terrain, and this one will force operatives to try and turn off the smoke if they really need to get to this area of the board.
Not every industrial cloud is a choking hazard – Exhaust Vents pump out harmless fumes. Not only is charging through a plume of smoke extremely cool and dramatic, but it’s also an easy way to grant Cover to vulnerable operatives. Standing right in the cloud offers protection without compromising mobility, letting canny commanders use Exhaust Vents to sneak their close combat troops up close in (relative) safety.
This is a cool way to get some extra cover for your operatives and hey, who doesn’t want to charge through a cloud of smoke?
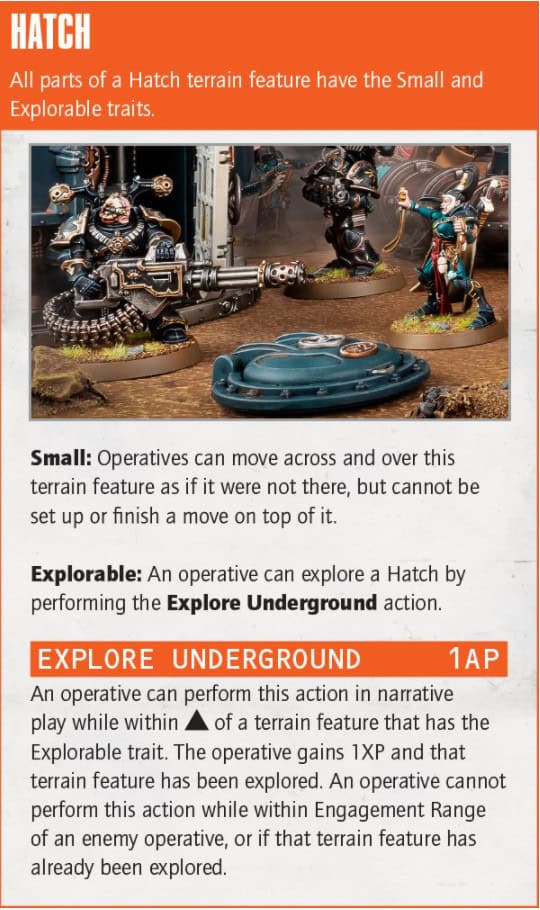
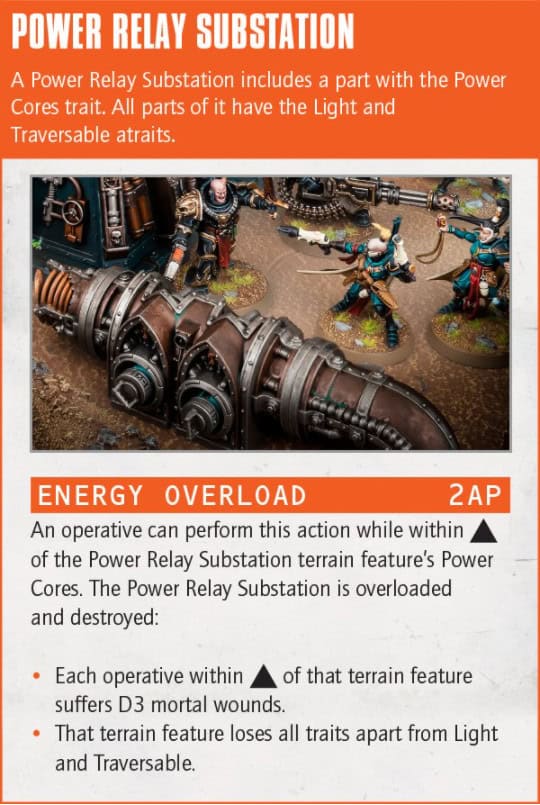
Exploring an underground vent might not always be the best option because who knows what will be in there. Still, getting basically free XP is pretty cool.
Are you excited about the new Kill Team rules from Nachmund?
Let us know in the comments of our Facebook Hobby Group, or our new Discord server, and make sure you enter the latest monthly giveaway for FREE today!
Get ad-free access to our hobby videos, a monthly drop of miniatures, and support some of the best creators out there for as little as $6 a month on Patreon!
