Come see one hobby noob’s modular adventures as he (hopefully) learns how to magnetize his model’s weapons to have all the options!
One thing that has always terrified me was the idea of drilling into my expensive tiny plastic things, gluing in magnets, and then painting over them. I was positive I would mess it up and or hurt myself by drilling right through the model into my hand.
Luckily with AoS, I did not need to worry about it with the models I was building, but recently I bought some Chaos warriors that could use either hand weapons or shields. Not wanting to limit how I can use them, I decided to talk to some friends that play 40k, as magnetizing is much more common in that system. After taking the plunge, I am incredibly happy I did, and it turned out to be a lot easier to do then I anticipated. It is time-consuming, but with a little elbow grease, you can weapon swap your base troops weapons choices around.
This was done with Chaos Warriors, but you could generally follow this method for any sort of space marine, imperial foot troop, etc. The larger models you might need to get a bit craftier, but the idea is the same: you find where the arm, tentacle, bug part, etc. joins the larger piece of plastic that is the base model. Before assembling the model, you drill into the base model a hole big enough to fit the size magnet you want. Then depending on the model, you will either put another magnet into the arm, tentacle, bug part, etc. by drilling into it with a smaller drill.
Or in my case, you go even cheaper and use a chunk of metal, more on that below.
* My local FLGS stocks Rare Earth brand magnets, which are supposedly the ones to get for this as they are super strong. They sell them individually, but you can buy them in bulk from most online stores, should your local FLGS not carry them. *
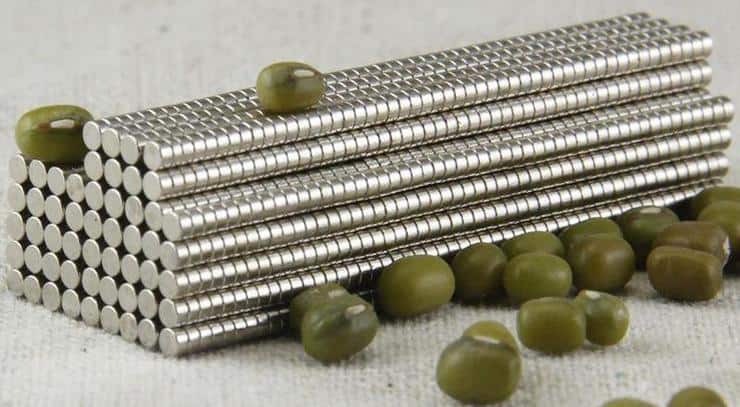
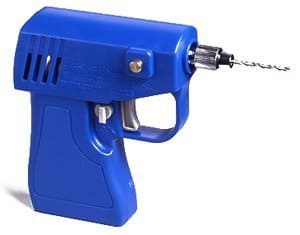
Step 1) Purchase the size magnets you want to put into the model and drill into the base. For me, I went with a 1/8th by 1/16th magnet as I did not need a huge one for these size models and the arms are thinner. I then took a drill bit and drilled into the chaos warriors body where the arm socket goes to make room for the magnet, making sure I matched the drill bit to the size of the magnet. *Use a cordless or hand drill to give you more control of the drilling, a too powerful drill and you will go right through the model and nobody wants that. *
Step 2) Clean out any remaining plastic in the hole with a damp paper towel or cloth and let it dry. After that dry fit the magnet in to make sure it is the way you want it, once it is to your satisfaction put some super glue in there and glue it in. *Note check the polarity of the magnet as well to make sure you are gluing it in correctly!* Try not to get any glue on the outside part that is going to be your connection to your arm bit.
Step 3) This part you can choose to use another magnet, or in my case because I am cheap a piece of metal. If you are using a magnet you can skip this part, otherwise, go into your garage and find some smaller nails (or buy a couple for like 11 cents each from the hardware store). Then take some stronger hand cutters and break each nail into little pieces about 1-2mm thick. I would trim the nail head off as it was too large and then cut about 5-6 pieces off each nail before using another one for ease of cutting. While cutting I found it was helpfully to have my hand over the nail when cutting it otherwise the piece would go flying and I wouldn’t be able to find it. Once you have enough pieces for what you are doing you are ready for step 4!
Step 4) Find a drill bit that matches the size of the nail, a little bigger is fine but you just want to make sure its not going to destroy the plastic bit you are drilling into. Then before that take a hobby knife, box cutter, etc. and score the place you are going to drill into. This will give the drill bit a place to grab onto and drill into the bit. Finally starting slowly drill into the bit and go as deep as you metal (or magnet) piece is. If you go a little bit deeper that is ok, just don’t go too far or through the model, so slow and steady wins the race here. Dry fit the piece of metal or magnet, and when you are happy glue it in being careful to not get any glue on the connector part. * If you use a metal piece instead of a magnet don’t worry if it is bigger then the hole you drill just make sure a good portion in the hole. *
Step 5) Skip this if you are using two magnets, otherwise, you should have a piece of metal glued into bits you want to swap in and out. You’re going to again go to your hardware store (if you don’t have one of these already) and get a fine metal file, and then file down the bits of metal (NOT THE MAGNET) while they are glued in. You will get a smooth piece then that is flush with the plastic it is glued into. Your bits are now ready to go!
Step 6) This part is optional, I did not do this because the magnet is hidden at the connection point, and after painting, you will hardly notice it. However, some pieces might require a little bit of liquid green stuff to cover where you drilled and placed the magnet’s (or piece of metal). Make sure it is thin over where the connection is because too much and you will lose some of the attraction. Once you cover it and it dries, use a file to smooth everything out. After that you are ready to prime and paint, again just make sure to go a little lighter on the paint and primer here for connection reasons.

There you go as simple as that and you have swap-able weapons for some foot troops that will let you configure them differently depending on what you run! For my part, the warriors let me use them with shields for a more defensive objective holding unit, or if I go more aggressive I can equip them with the other hand weapon.
Either way, now that they are magnetized I can do what I want with them!
![]() Check out more “newbie” tips for the Hobby
Check out more “newbie” tips for the Hobby