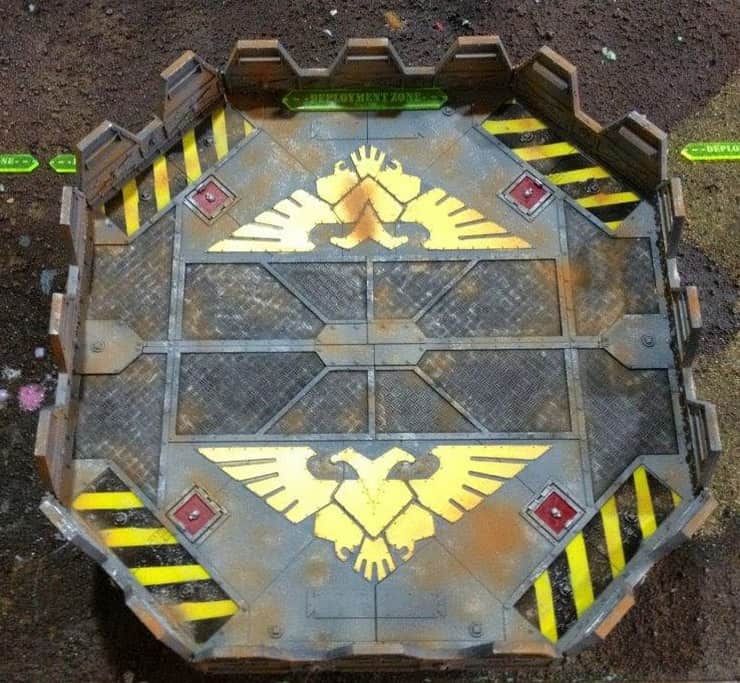
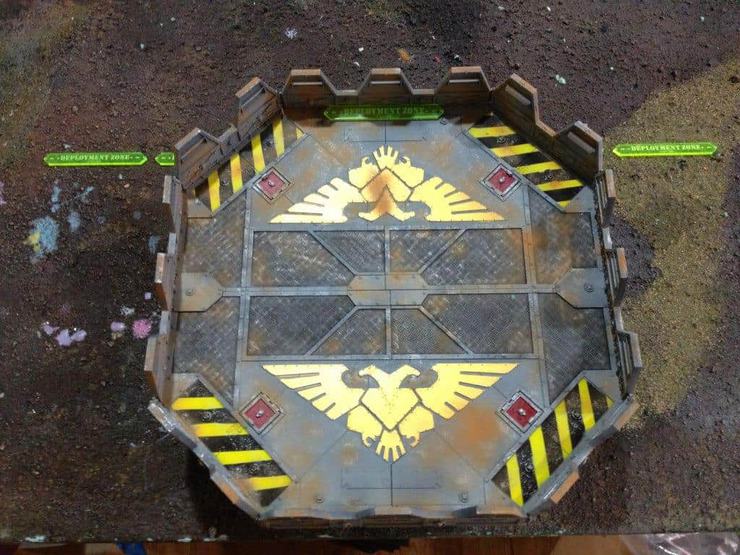
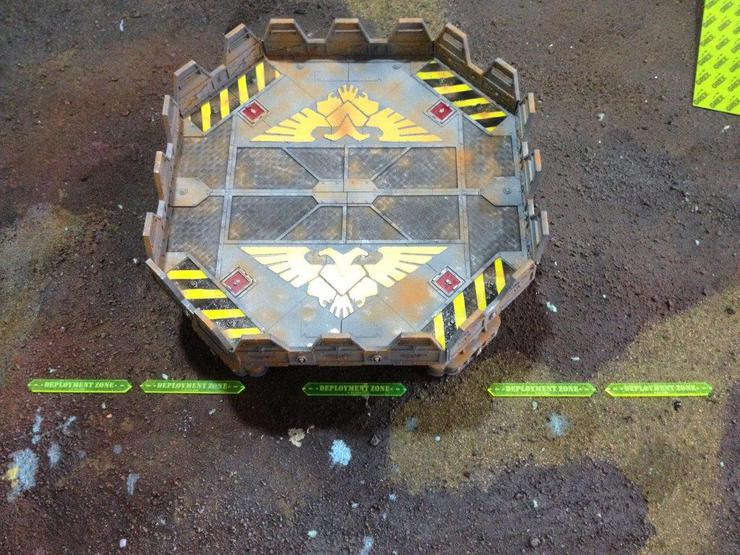
The Tau are here! Come see some great tips and tricks for using their favorite fortification, the Skyshield Landing Pad!
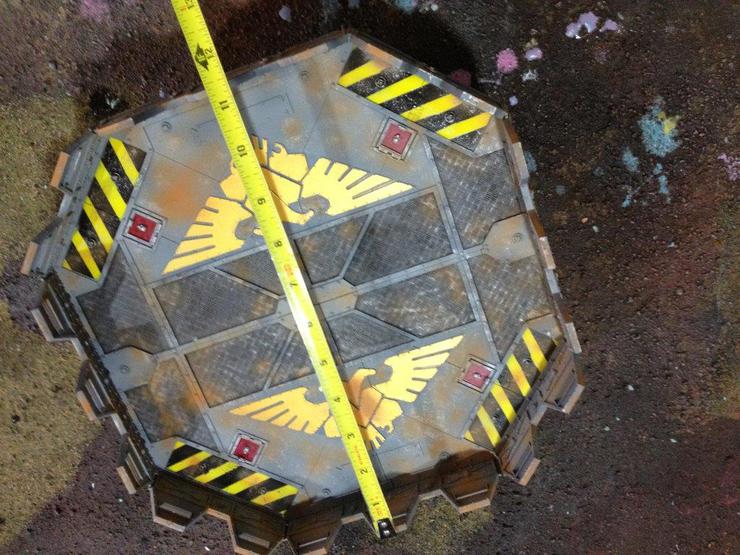
First off, the Skyshield Landing Platform is big. Really big. It is nearly 12 inches across with the sides raised and with the sides down runs about 15 square inches! That’s a lot of real estate. Where this might be a hindrance is specifically in tournaments. Nearly all tournaments follow the ‘Narrative Terrain’ set up rules by having the table’s terrain already established before the players arrive at the table.
This has players set up their fortifications after terrain has been set up by the tourney organizers. Most of the time, with a Bastion or an Aegis Defense line this isn’t a problem. But with the Skyshield, setting it up where it will still remain 3 inches from other pieces of terrain can sometimes be problematic.
In two of my games, I didn’t have a problem finding an open piece of table that would fit the Skyshield. But in one of my games, with a little bit more dense terrain, the Skyshield wouldn’t fit. Luckily, this particular tournament had a provision where a judge would come by request and re-arrange terrain in order for me to field my Skyshield. I can’t say if this would be standard practice at other tournaments. Something to be aware of in any case.
Skyshield Summary:
For those not aware of what the Skyshield Landing Pad is and what it does, here is a quick summary. For the full stats refer to the Warhammer 40K Rulebook pg.115 and the associated FAQ. At the time of this writing, the Skyshield model retails for about $50. The model itself is easy to assemble (not as easy as an Aegis Defense Line, but still pretty easy) and looks fantastic once it is painted up. In game, the fortification will cost you about 75 points and functions as unique terrain, which like the Aegis Defense Line, cannot be destroyed. It has two configurations.
’Unfurled’ it allows units to deepstrike on top of it without scattering (whether it allows opponent’s units to do this as well, is up for debate, but going by RAW, they can). ’Shielded’ (sides up), it offers a 4+ invulnerable save against shooting attacks. This can be very handy, especially with those pesky Heldrakes flying around with AP3 Flamers.
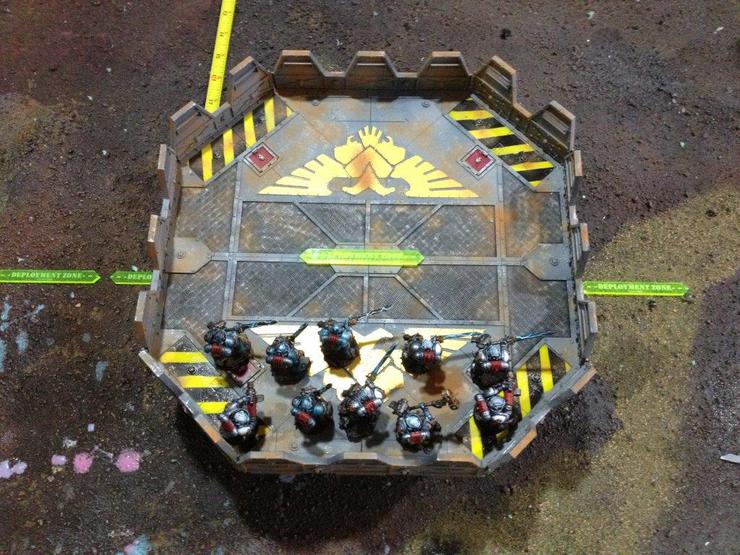
1. Wholly inside your deployment zone (FYI, all pictures are using standard 6th edition Dawn of War deployment for illustration purposes). This has the obvious advantage of allowing you to deploy your forces wholly onto the Skyshield. If you’re deploying forces that aren’t going to be doing a lot of moving and have a long reach, like LongFangs, Havocs, or Devastators, then this is the deployment for you. It offers a commanding view of the tabletop with good angles of fire and keeps these fire support units somewhat safe with the 4+ invulnerable save.
2. Wholly outside your deployment zone. Now in all deployments this still has the Skyshield butt up right up against your deployment zone. If you start your forces right behind it and aren’t expecting a first turn barrage of fire, or are reasonably certain of getting the first turn, you can march your forces up onto the Skyshield with just a difficult terrain roll. A decent run roll and they’re occupying the center of the Skyshield.
This can be useful for forces that have a shorter range and when you need to command the middle of the tabletop. However, this is the riskiest of the 3 deployments. And when you see some of the issues we’re going to go over below, you might not want to do this.
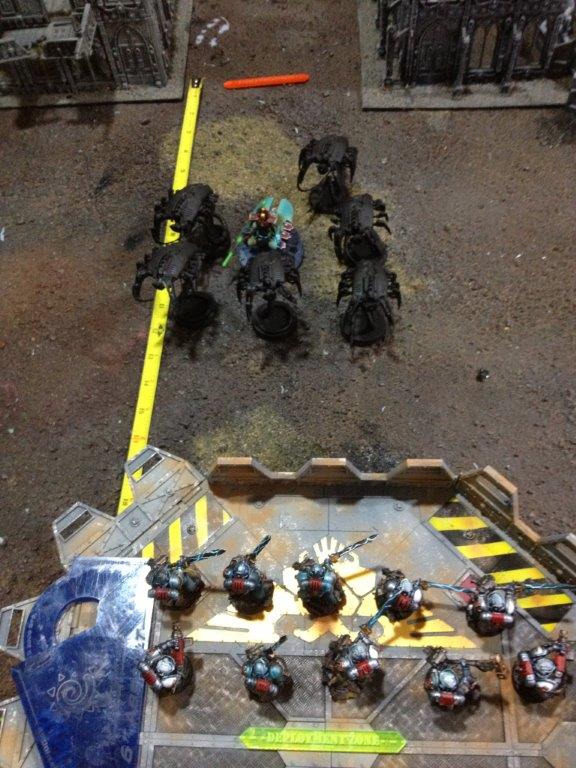
3. Partially inside your deployment zone. This seems to get you the best of both worlds. You can deploy directly onto the Skyshield in order to avoid turn 1 fire and you can still move forward onto it to command much of the mid-table. This is best for units that can move and still put out a lot of fire, like Grey Knight Strike Squads. Static units like Devastators, aren’t being maximized with this deployment.
SKYSHIELD and LOS.
The reason I wanted to cover deployment options with the Skyshield, is because I ran into some interesting issues using it this past weekend. And they weren’t issues I had foreseen. They had to do with drawing line of sight from units on top of the Skyshield to units below. Because of its size and height the Skyshield presents some interesting LOS challenges to occupying units.
For both of these examples I used a friendly unit of Grey Knights occupying the Skyshield. They are facing off against a unit of Necron Wraiths accompanied by a Destroyer Lord (a very popular heavy hitting melee unit). I used the wraiths, not only because they just happened to be one of the forces I faced this weekend, but also because they happen to be some of the tallest units in the current edition of 40K.
Even most Daemon Princes stand shorter than some wraith models. Also, the Wraiths are some of the fastest models on the tabletop.
In both cases, I assumed that the Wraiths would run during their first shooting phase. I used 3 inches for their run distance. I also maximized the Grey Knight shooting, giving the unit psybolt ammunition and allowed their psycannons to fire as if they had not moved.
Making these assumptions, the Grey Knights can kill 1.9 wraiths on average a turn. That’s not a whole lot, given that the wraiths will most likely be able to assault on the 2nd turn. Of course, there are mitigating factors. For instance, the Necron player may elect to have his Destroyer Lord with a 2+ armor save take the brunt of the fire, thus shutting down many of the wounds. And it also matters who goes first. Obviously, if the GK player goes first, that’s one less round of shooting. But that’s not what I really want to show you. These are just things to keep in the back of your mind while looking at these pictures.
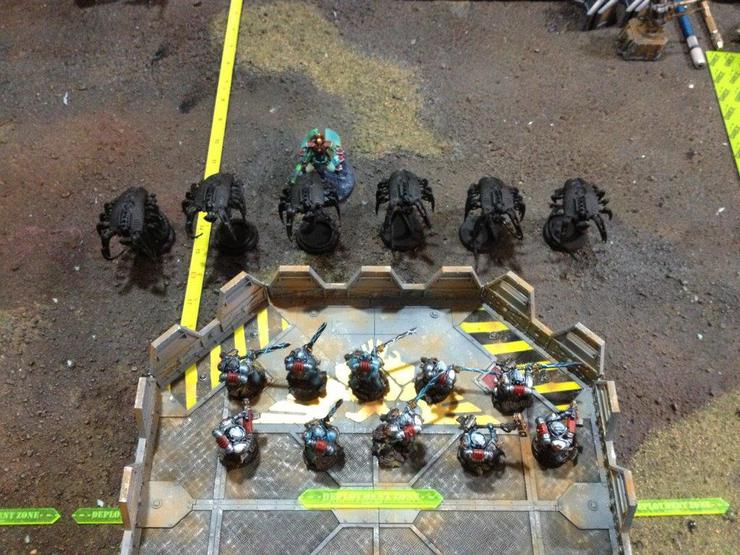
For our first example, The Skyshield is entirely within the GK deployment zone and the GK player deploys his strike unit hugging the edge of the Skyshield Landing Pad in order to maximize the range for shooting.
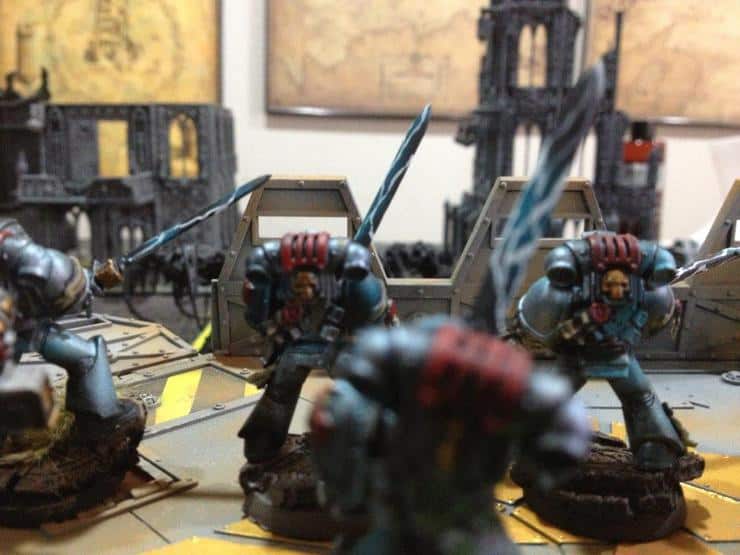
Here’s the LOS at the start from the model’s perspective. No problem seeing everything, but the Necrons are well out of range. Now, keep in mind, if the GK were Devastators or Long Fangs with different weapons, that would be a whole other tale.
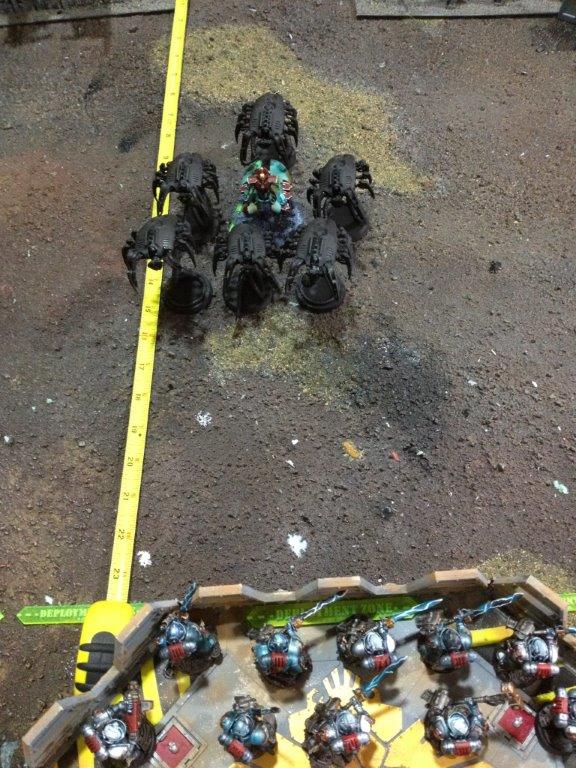
Necrons move 12 inches then run 3. Here’s what that looks like.
So far, so good. Wraiths are closing very quickly, but we knew that. The back row of Grey Knights can still see the back row of Wraiths and the front row of Grey Knights can still see the front row of Wraiths. The whole Necron squad can still be shot at. Watch what happens when the Necrons move again. They move in close to the Skyshield to prepare to assault.
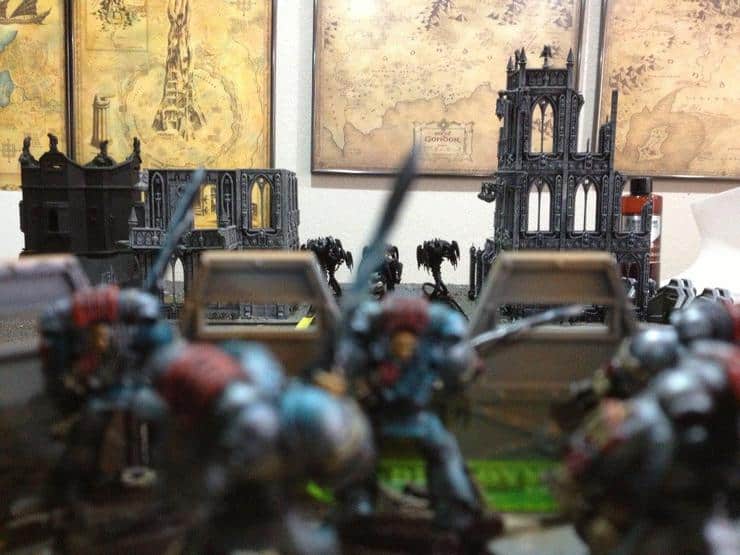
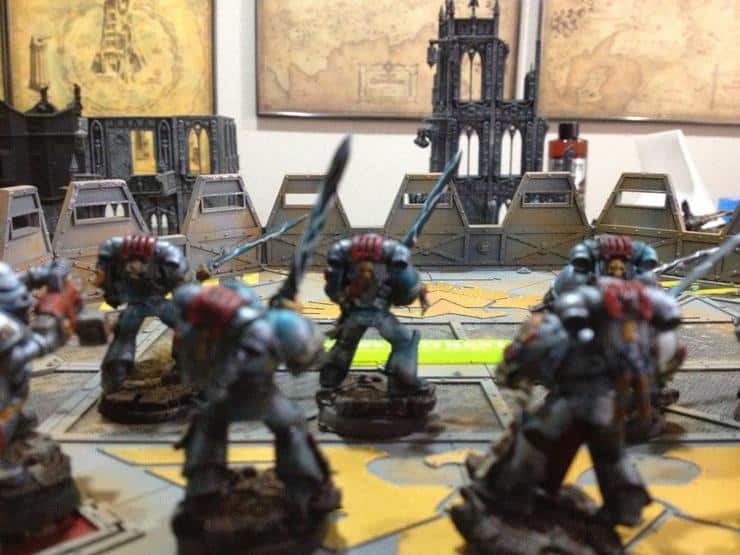
Here’s the LOS from the Skyshield. Note that the back row of Grey Knights can’t see any Necrons at all! Only the first rank can see the Necrons and that’s only because they are hugging the edge of the Skyshield.
Here it is from the Necron POV.
Okay, so why is this important? Well, you can only assault units that you can see. The Necrons can still see some of the Grey Knights so their assault is unhindered. However, when the Grey Knights respond to the charge with overwatch fire, only the front rank has LOS, therefore only the front rank can Overwatch fire. Ouch!
Here’s a more severe case, where the Grey Knight player has been a little more cavalier in his deployment choices and a little sloppy in his movement phase. The Grey Knight player starts with the Skyshield deployed halfway in their deployment zone. (Faith in the Emperor’s finest!)
LOS from that position. (hard to see, but you can see the Necrons off in the distance).
The Grey Knight player elects not to run in their shooting phase for whatever reason. Maybe Necrons went first and the Grey Knight player actually has some shots. In any case, he moves 6″ forward.
But due to some iffy positioning, isn’t hugging the edges of the Skyshield like in our first example. After all, there’s only about an inch and a half between the first rank and the edge of the Skyshield, what harm could that do?
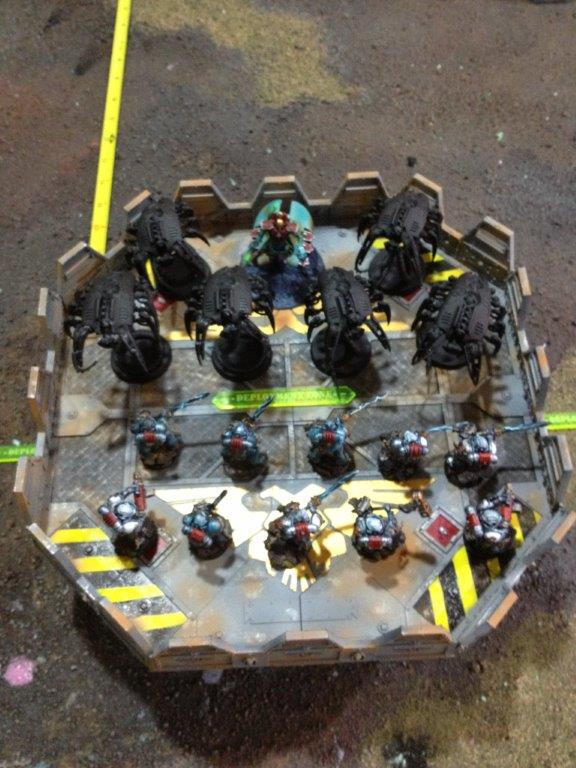
And we’ll move the Necrons 12 inches up from their deployment.
LOS from that position. So far so good. All the Grey Knights can see at least 1 Wraith, so everyone can fire and all the Necrons can get hurt. (Activity question: Can the Necrons claim cover from fire coming from the Grey Knights in this position?)
But watch what happens when we run the Necrons just 3 inches forward.
Uh, oh. Major problems. The majority of the Grey Knights can no longer see the Wraiths at all!
In fact, in this particular example, only the 2 Grey Knights, the two guys on the edges of the front rank can see Necrons.
This is really bad news. Because the Grey Knights can’t put out the firepower that they need to whittle down the Necrons, but the Necrons can still see at least one Grey Knight and can therefore still assault on their next turn.
The Grey Knight player can do two things now. They can hug the edge of the Skyshield, knowing that they will get assaulted, but at least be able to bring the majority of firepower on the Necrons for 1 more turn. Or they can back up. Here’s what it looks like if they back up.
LOS from the backup position of the Grey Knights. Very bad news. The Grey Knights can’t see a thing. So no shooting at all. But at least the Wraiths can’t see them either, so the charge has been denied until the next Necron turn.
Sadly for the Grey Knights, there’s no rule against moving where you have no LOS and the Wraiths and Destroyer Lord move as Jump Infantry. (Keep in mind, that if the GK player moves forward to hug the edge of the Skyshield, though they will get to fire, the Necrons have enough movement to jump right over them and assault them from behind or from the front.
So, in this example, unless the GK player has some really great shooting and the Necron player has some terrible saves, the GK player is getting assaulted no matter what. But if he hugs the edge of the Skyshield, he’ll at least get overwatch from some of his guys in addition to normal fire during the shooting phase. If the Grey Knight player backs up, he loses his normal shooting in exchange for full Overwatch fire. Not a good trade.)
So while the Skyshield offers some great benefits, particularly to far reaching static support units with long-range weapons. It can also offer some interesting challenges. As always, the drawbacks shown here could be mitigated with overlapping fields of fire and units on the ground supporting the units on the Skyshield. Just don’t expect to put a few units on the Skyshield unsupported and have them hold off all attackers like some kind of 40K Alamo.
Because once units start getting close, the LOS issues start to come into play. If you’re facing off against a Skyshield and you notice that your opponent isn’t hugging the sides, then keep in mind these LOS issues that you can use to your advantage. You can mitigate a lot of the fire coming your way, while strategically using LOS to target enemy forces and keep enough in your field of view that you can still assault.
