 Kenny from Next Level Painting is back to help us to end the debate of glazes vs. washes, how to use each in this tutorial.
Today Kenny helps us decide when to use each technique and how to use them. This video is all about getting your units to a battle-ready standard with easy-to-use techniques. If you want to see how to take your models to the next level, be sure to check out his Patreon here!
Or if you want to see his previous tutorials, we have hundreds of them cataloged on the site as well.
Today he’s going to be using techniques from his awesome 101 painting curriculum, which is a set of three easy lessons to get your minis on the tabletop fast and looking good!
Get your paints and brushes out and let’s go!
How To Use Glazes Versus Washes
 Glazes and washes are almost the same things, but they aren’t different products. They are techniques! The Army Painter has some great paints that make this easier, but basically, a glaze is an opaque color that stays where you put it. A wash is a technique that pushes opaque colors all over the minis.
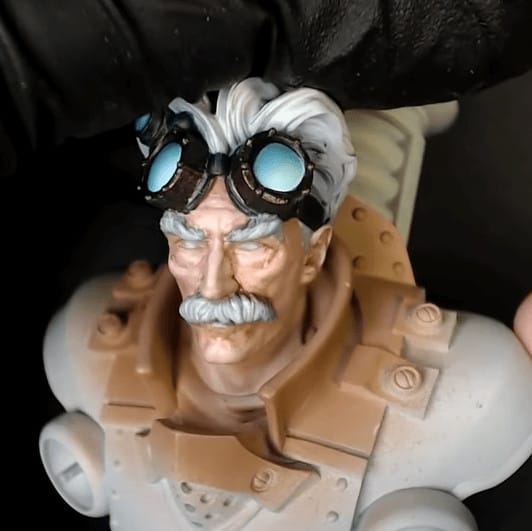
So today, he’ll be taking “washes” but using them in the glazing technique. This is the model he will be using today and showing how you can get amazing skin tones using this technique.
Step 1
 He starts with the Ruby wash from Secret Weapon Miniatures. He takes this and traces the shadows that would naturally occur. Instead of putting it all over the face. He traces things like the ears, near the nose, above the mustache, and finally near the hairline. Anything that is a natural shadow.
Step 2
 Let the glaze basically dry before moving on, it will stay wet for a while so you can manipulate it for a while. Then, take Parchment from Secret Weapon and Cotton Candy in a mix predominate on the Parchment, and feather in the new color and feather it into the most aggressive shadows.
This is the thinnest of thinnest paints here, just cut in everywhere you want to be even deeper shadows. This is a subtle technique, so be patient! Then, go back to the Ruby and really increase the shadows where you feel it needs it. Just blend this and make sure to do more layers than not enough.
Step 3
 Now, add in a little more pink into the palette and keep cutting in the details deeper and deeper into the face. Basically, you will have three different layers of color by this point. Anywhere you want to be darker, yet more lively, this is where you want to add this color.
To then reinforce these highlights, go back to the Parchment/Cotton Candy, and push this into the areas like below the eyes and near the ears. You don’t want brush lines here, try to keep everything organic.
Step 4/Finishing it Off
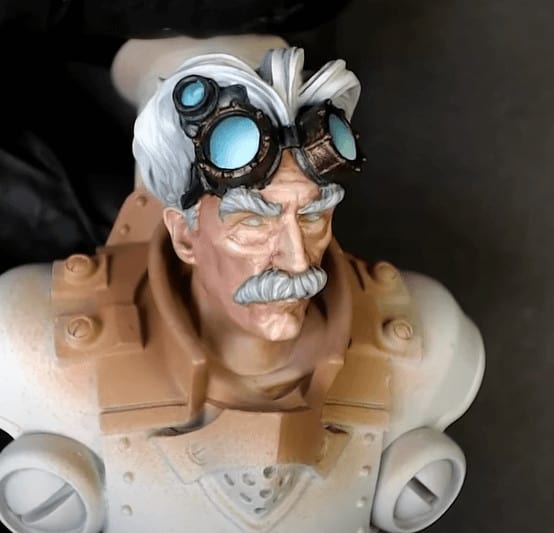
 He finishes it off with a Flesh Wash mixed with the Ruby from before. He hits the deepest parts of the shadows, giving a little brown to the skin. This will just really make the skin feel realistic, but in a low-stress style without much hassle.
If you want to see how to take it to the next level with all his tips, check out Kenny’s full videos on them on his Patreon!
Join The 101 Painting Curriculum From Kenny
This post contains affiliate links, as an Amazon Associate Spikey Bits earns from qualifying purchases.