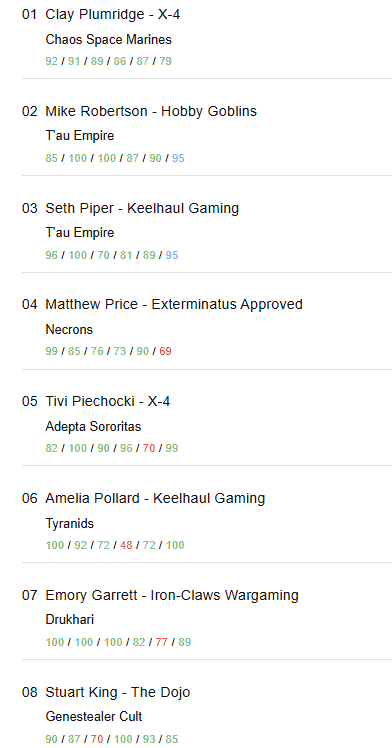
Clay Plumridge’s 6-0 Pactbound Zealots Chaos Space Marines took the Mayhem GT army lists crown over two 5-0-1 T’au Empire finishers.
Four of the top four tables in round 6 of the Mayhem GT ran T’au Empire, which should have made the whole event feel like a Greater Good cake walk. But somehow only half of those T’au lists actually made the podium. The other two got dragged out into the parking lot by Sisters and Tyranids in the final round.
Meanwhile, Clay Plumridge’s Pactbound Zealots Chaos Space Marines list never had to sort out the T’au problem at all. He just ran 6-0 with three Defilers and a four-character chaos core, never paired up with any of the surviving Retaliation Cadre or Mont’ka lists, and won it all.
So yes, the headline at Mayhem 5 is “T’au held four of the round 6 top-four tables again.” But the crazy part is that the only list to go undefeated did it without ever playing one of those T’au armies, and the two T’au lists that did make the podium got there by drawing each other.
Either way, if you’re trying to figure out the top Warhammer 40k army lists worth studying after the Mayhem GT 5, these are the three rosters to pull apart.
Mayhem 5: Top 3 Warhammer 40k Army Lists
Updated on May 21, 2026, by Rob Baer with the latest winning armies
- Clay Plumridge’s 6-0 Pactbound Zealots CSM took the Mayhem 5 crown with three Defilers: anchored by Abaddon, Huron Blackheart, and Cypher across a fifteen-unit chaos core.
- Four T’au lists held the round 6 top-four tables but only two made the podium: Walter Sellars and Riley Morris got blown out 60-99 and 52-100 by Sisters and Tyranids in the final round.
- Pactbound Zealots’ triple-Defiler line outperformed every non-T’au list in the room: Clay went 6-0 without ever playing one of the surviving T’au lists.
Use these winning armies to sharpen your own lists alongside the latest balance dataslate updates and points changes.
Thanks to Best Coast Pairings, we can walk back through the whole event with real pairings and battle point data. Click this special promo link to save $20 on a year’s BCP subscription. And if you want to take your game to the next level, consider applying to Team USA to compete at the Warhammer World Team Championships.
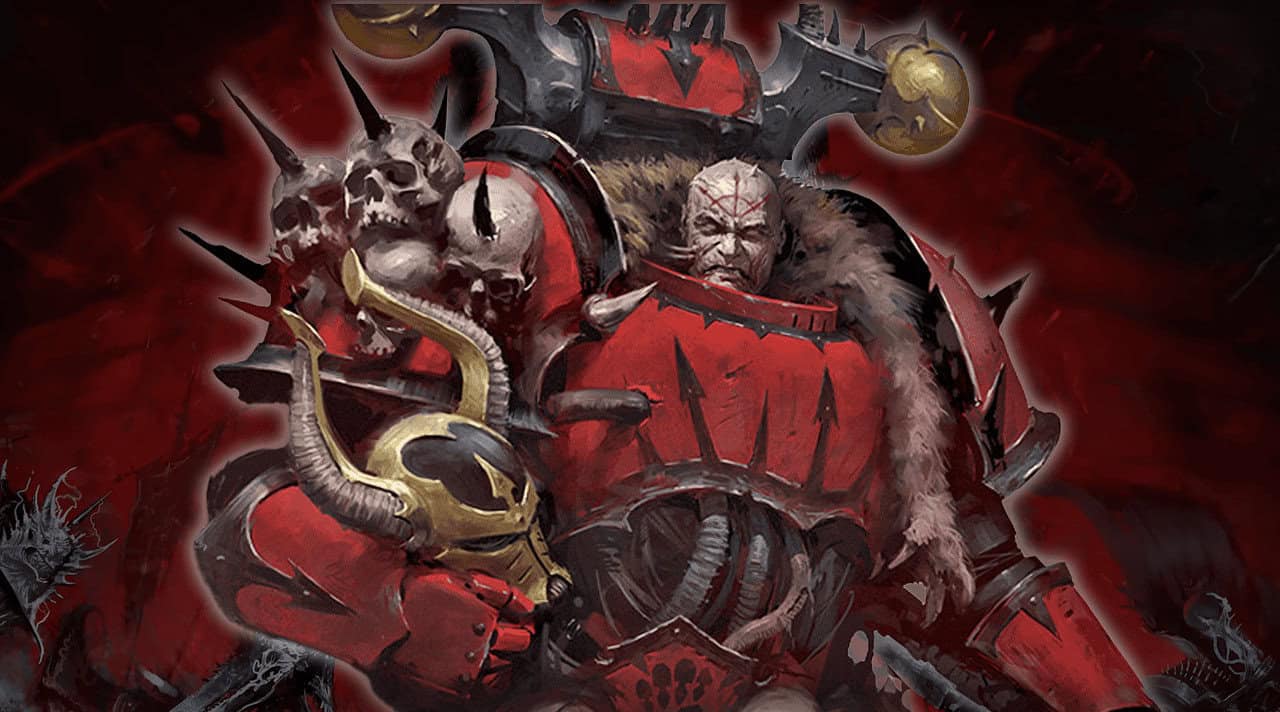
Clay Plumridge’s Pactbound Zealots Ran the Table
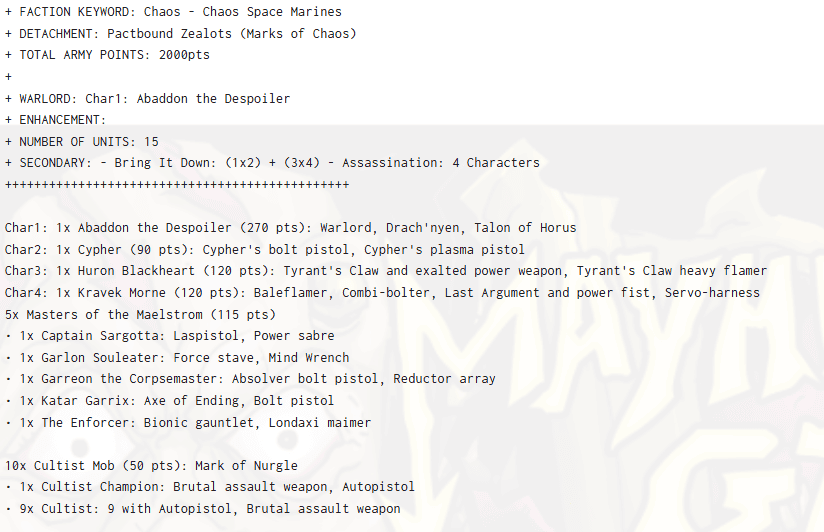
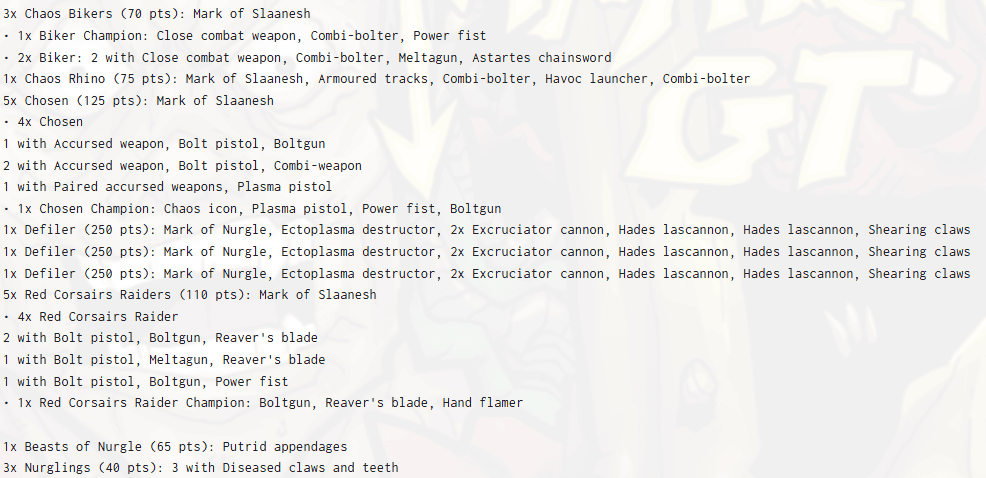
Plumridge’s winning Chaos Space Marines tournament list is what happens when a Pactbound Zealots player decides that one Defiler is cute, but three Defilers and four named characters are even better. The army uses everything the detachment rewards, which is a chaos-character anchor in the midfield, while heavy hitters do the actual damage from a longer range.
The character core is doing an absurd amount of work in this list. Abaddon the Despoiler, Huron Blackheart, and Cypher all show up on the same roster, joined by a Master of Possession to round out the chaos leadership package. That’s a four-character core that can split across multiple objectives without ever leaving a board zone soft.
Two Cultist mobs hold the midfield while a Possessed squad and a Chaos Terminator block bring the close-range threat. A Chosen squad sits behind Huron’s pressure axis, ready to push wherever the character core opens a lane.
Then comes the artillery line, which is where this list stops being clever and starts being mean. Three Defilers anchor the long-range damage output, and the battle cannons plus reaper autocannons mean Plumridge doesn’t have to commit characters into a brawl just to keep scoring pressure on the table.
How Pactbound Zealots Stack Defilers and Characters in the Same Game Plan
Plumridge finished 6-0, and the run never really hit the kind of round where the matchup got close. That’s the trick with a triple-Defiler list with Abaddon and Huron in support, because the long-range firepower keeps the scoreboard moving while the character core absorbs the punch most armies throw at the midfield.
The detachment helps a lot here, too, because Pactbound Zealots rewards committed melee characters with the kind of strength and AP profile that makes Abaddon, Huron, and Cypher feel like three different problems at once. Add three Defilers parked in the back arc, and your opponent is being asked to deal with too much at the same time.
That’s how this list went 6-0 without ever needing to roll into one of the surviving Tau mirror lists. The character core just kept making the trades cheaper than they should’ve been, and the Defilers turned every back-objective hold into a sketchy proposition overall.
Mike Robertson’s Retaliation Cadre T’au Brought the Alpha Strike to a Round 6 Draw
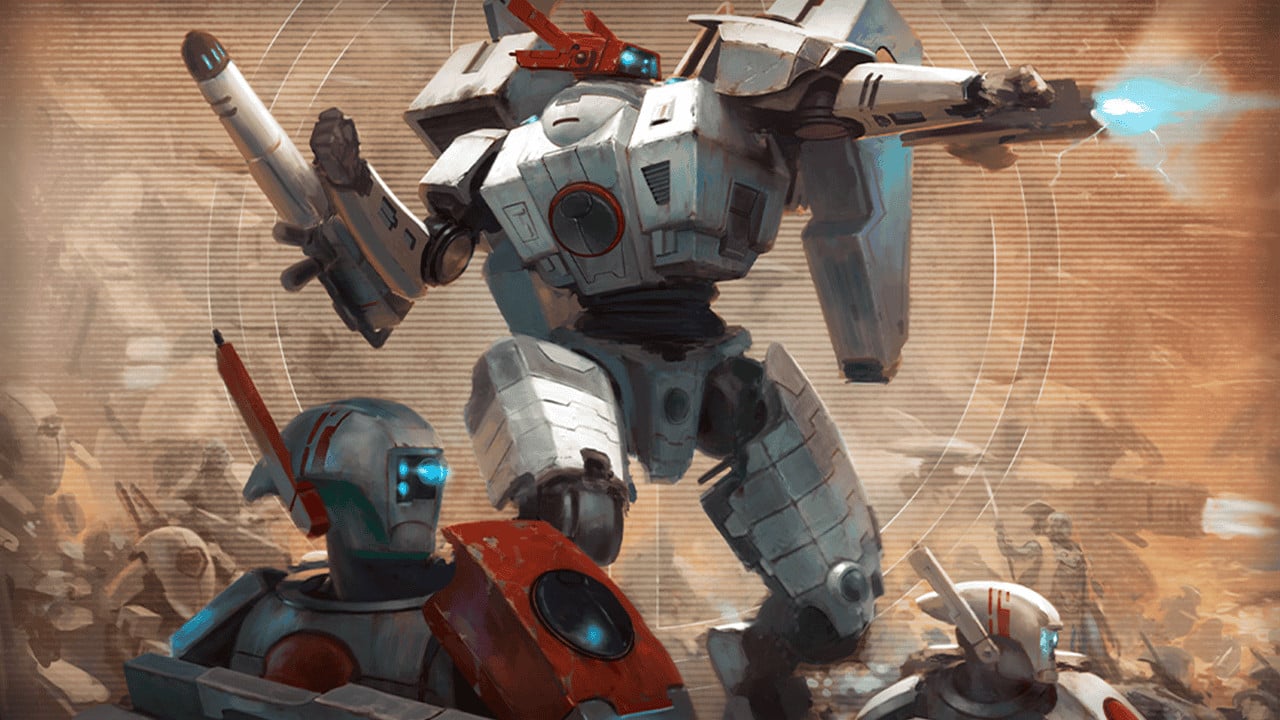
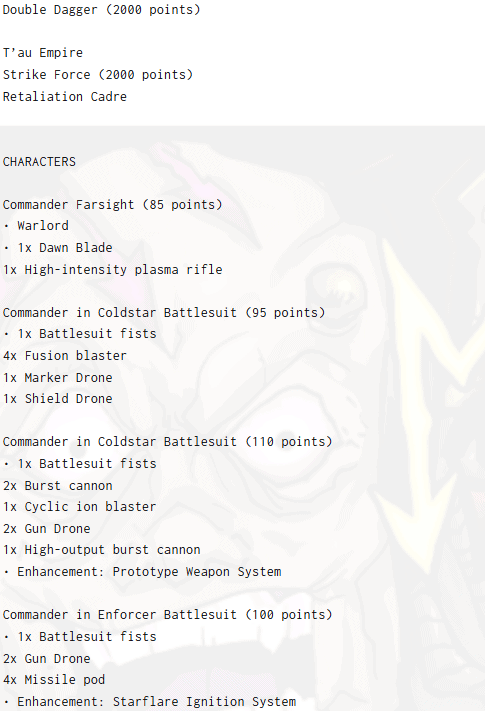
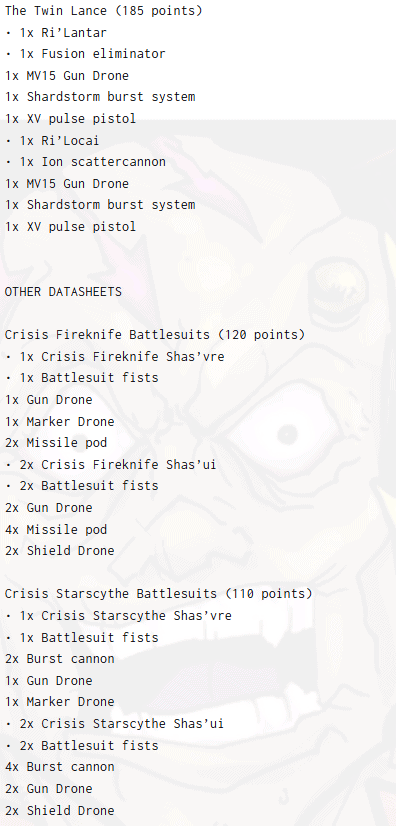
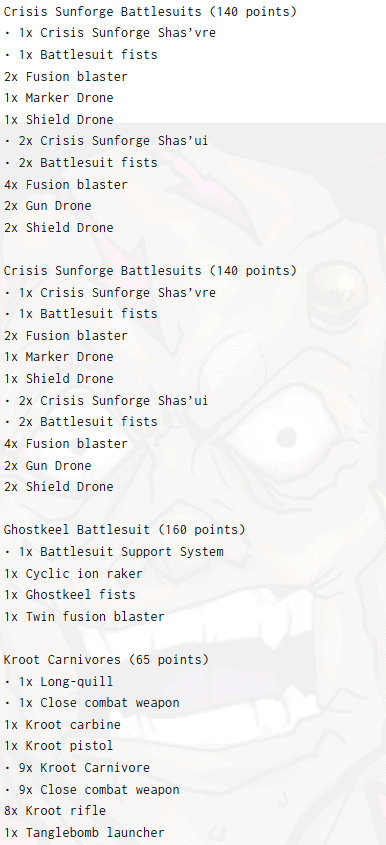
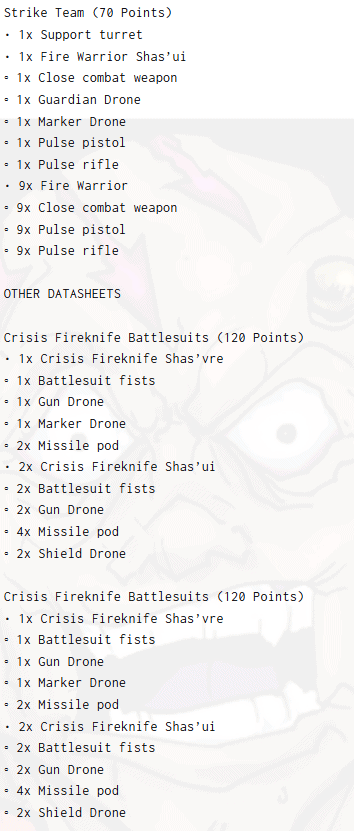
The runner-up army list was T’au Empire, and it was exactly the flavor of T’au you’d expect to land near the top of a meta where four of the top four were T’au. Robertson’s Retaliation Cadre list tries to imitate the alpha strikes of old, and it’s built around delivering one absolutely devastating turn instead of slowly grinding the opponent down.
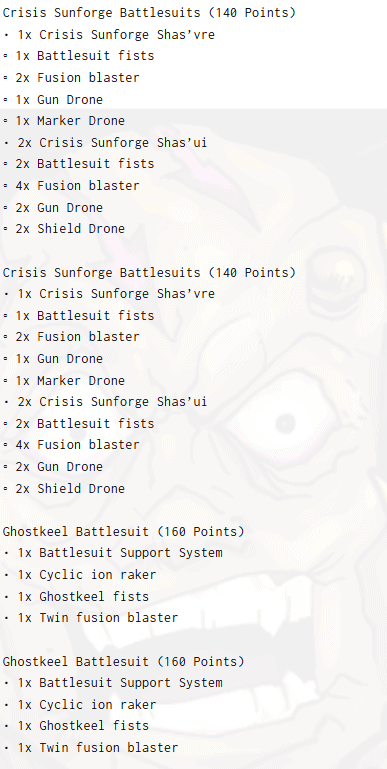
The detachment is named for what it does on the table, and Robertson’s list is pretty much a tutorial in how the Retaliation Cadre plan is supposed to work. A Coldstar Commander leads the air-drop package, with two Sunforge Crisis Battlesuit squads ready to come down on whatever T8 chassis the opponent thought was safe.
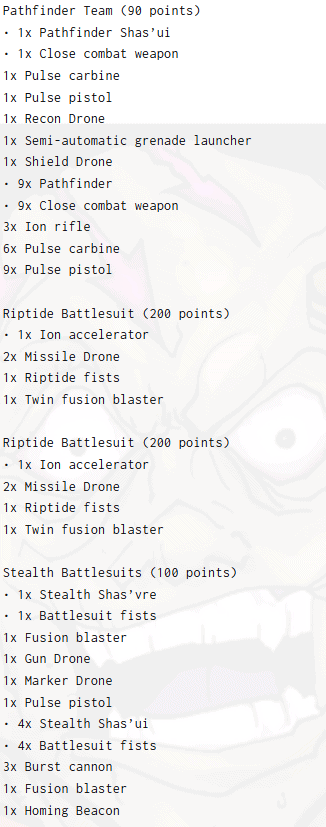
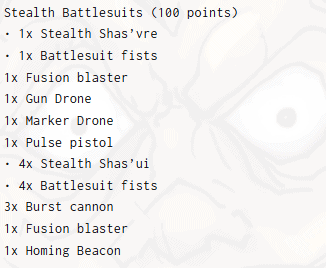
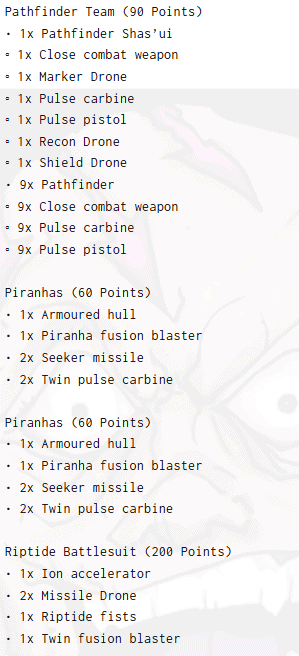
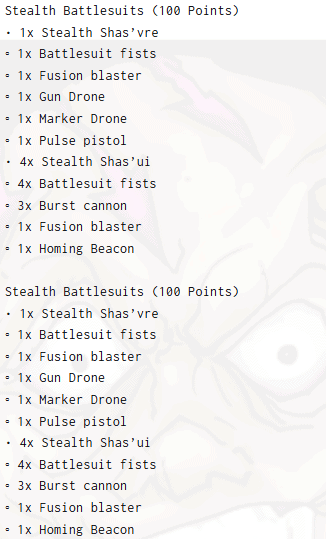
Two Riptides hold the second wave, which is what keeps this list from being a one-trick alpha pony. Once the Sunforge package lands and trades, the Riptides take over the mid-board damage role while Stealth Suits and Pathfinders keep the secondary game running.
Two Devilfish round out the transport game, which matters a lot in a Retaliation Cadre build that needs to keep its scoring units alive long enough to actually score. A Breacher squad and a Strike Team handle the close-range objective work, and an Ethereal keeps the aura support running through the middle of the table.
How Retaliation Cadre T’au Wins the Alpha-Strike Race
Robertson finished 5-0-1, and the draw was the one against Seth Piper in round 6. This paints an interesting picture, because two T’au lists running totally different detachments couldn’t crack each other and ended up trading shots into a 95-95 tie.
What that round 6 score really tells you is that Retaliation Cadre is built to delete a key target, and Mont’ka is built to take and hold positioning. When those two plans meet, neither side can finish the other off in five turns. The 95-95 closeout is exactly what happens when two T’au players know each other’s game plan and refuse to give either one a clean shot at the win.
Everywhere else, though, the Retaliation Cadre alpha strike did exactly what it’s supposed to do. Robertson’s five wins came from the same basic puzzle, which is that the opposing army has to either deploy hidden enough to dodge the Sunforge drop or bring enough redundancy to survive losing two critical units on turn two. Most army lists can’t do both.
Seth Piper’s Mont’ka T’au Played the Mid-Board Game All the Way to a 3rd-Place Draw
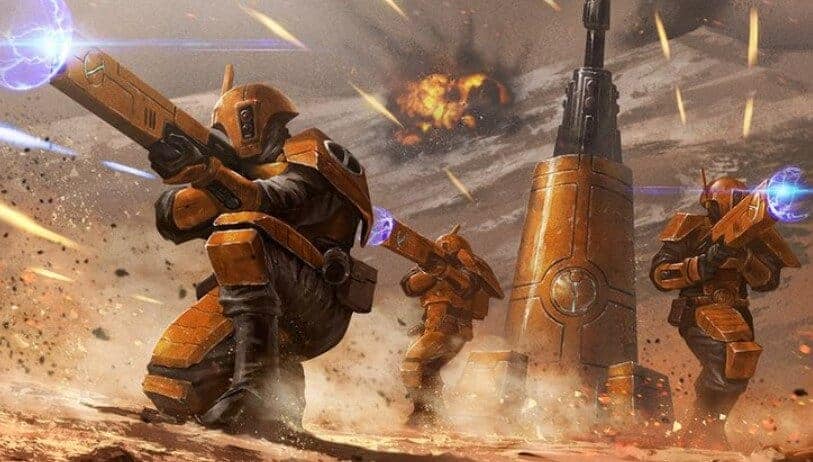
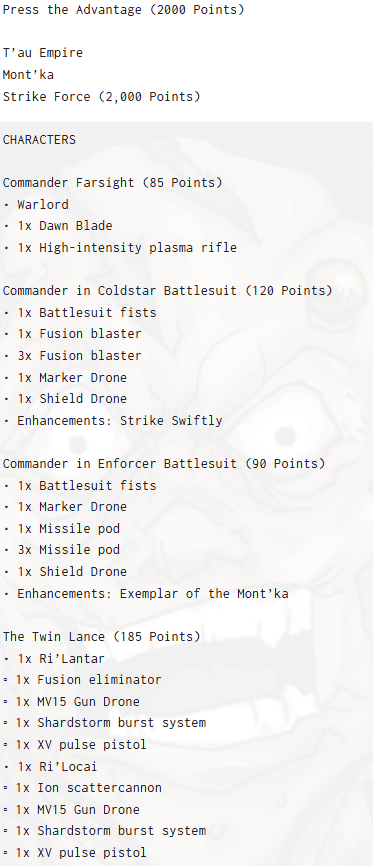
Piper’s third-place T’au army list is the other half of the round 6 draw, and it plays a totally different angle. Where Robertson’s list is about deleting priority targets in one big swing, Piper’s Mont’ka roster is about owning the middle of the table and slowly draining the opponent’s options.
The detachment rewards board control and target priority, and Piper’s list is built top-to-bottom around that strategy. Two Ghostkeels with ion rakers and fusion blasters are the mid-board enforcers, threatening backfield armor while still being too slippery to pin down with most counter-fire.
Two Sunforge Crisis Suit squads still show up because, at the top of the meta, no T’au list is leaving home without them. That being said, the difference lies in how they’re being used here: less as a pure alpha drop and more as a flexible threat unit that can deploy late and react to whatever the opponent is showing.
The fast-attack package is where this list really turns into a Mont’ka roster. Three Piranhas keep the board pressure rolling, and a Stealth Suit team adds another mid-field annoyance. A Commander in Enforcer Armor leads the package, with two ten-model Breacher squads handling the close-range scoring work and Pathfinders feeding the markerlight game.
How Mont’ka T’au Trades Space for Tempo
Piper finished 5-0-1, with the draw coming against Robertson in round 6. But the game that really tells you what this army list is built to do is round 5, where Piper closed out an 89-0 blowout heading into the final table.
That really shows you what happens when a Mont’ka list gets the deployment it wants. The Ghostkeels lock down lanes, the Piranhas tag everything that tries to push out of cover, and the Breachers and Pathfinders carve out the primary points while the Sunforge squads handle whatever priority threat has to die that turn. By the time the opponent figures out which problem to solve first, the scoreboard is already lopsided.
Overall, the 95-95 draw against Robertson in round 6 was the price of meeting the only other T’au plan that could actually answer it, but everywhere else, Piper’s Mont’ka list looked like a masterclass in making the mid-board game feel suffocating.
Final Thoughts on the Mayhem 5 Army Lists & the Warhammer 40k Meta
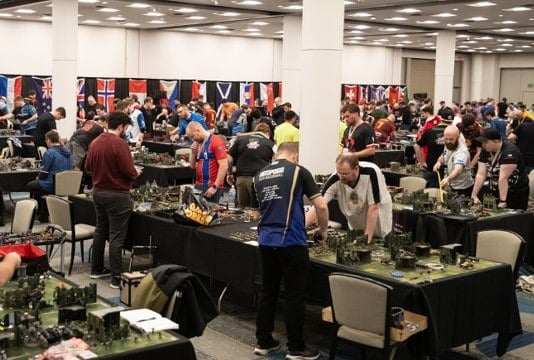
So what’s the actual Warhammer 40k meta story out of the Mayhem GT 5? Well, four of the round 6 top-four tables ran T’au Empire. It’s becoming increasingly clear that Tau might be a problem, and it lines up with the pattern we just saw at the Tennessee Open, where they also crowded the top.
But Mayhem 5 also had a small quirk, because two of those four T’au lists didn’t make the podium at all. Walter Sellars dropped a 60-99 round 6 to a Sisters list, and Riley Morris ate a 52-100 from Tyranids on another table. Two T’au lists drew each other, two T’au lists got blown out, and the only undefeated player in the room was running Chaos Space Marines.
So, while they have been prevalent lately, it was a long way from “T’au automatically wins the tournament.” They will keep showing up in top cuts because the results say they should. But Pactbound Zealots just proved at Mayhem 5 that you can win an event without solving the T’au puzzle at all, which is interesting, because between them and Guard, they may be able to handle the recent T’au resurgence.
🔗 Related Reads:
- 40k Tournament Schedule for This Year
- More Top Warhammer 40k Army Lists
- How to Play Chaos Space Marines in 40k
- How to Play T’au in 40k
- Best & Worst Meta Armies
- Latest 40k Balance Dataslate
- Munitorum Field Manual Points Updates
What do you think of the Mayhem GT 5 army lists and the four-of-four T’au showing in the round 6 top tables?