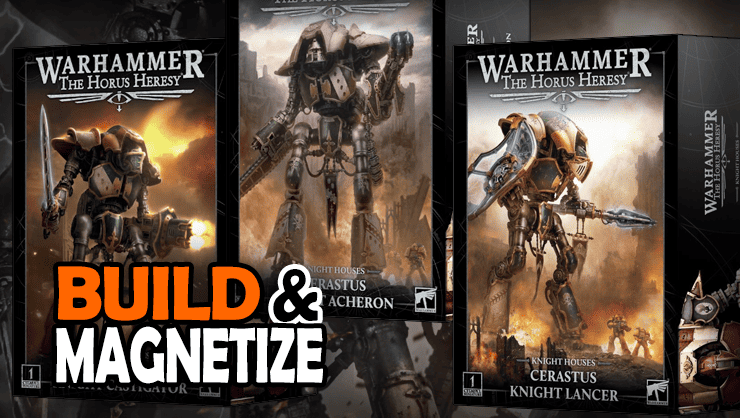
 Your guide on how to build and magnetize all 3 Warhammer 40k (Lancer, Castigator, Acheron) Cerastus Knights in this tutorial unboxing review!
How to Build & Magnetize: Warhammer 40k Horus Heresy Cerastus Knights Guide
Rob is back unboxing the new Cerastus Knights. He’ll see what it takes to get them ready for the tabletop, show you the models’ size, and tell you the GOTCHAS to be aware of when building them. Along with where to get yours, the intro, and so much more!
We will show you everything, including the sprues, bits, and, of course, the size. That way, you can decide if this is worth your hard-earned hobby dollars. Most importantly, he will show you how to make all the versions of the Cerastus Knight in one model, so you can take whatever version of the Cerastus Knight you want!
Click any of the links below to jump to the info you need the most, or just dig in from the beginning.
- Intro to Cerastus Knights Lancer, Acheron, and Castigator
- Where to Buy the Cerastus Knight Kit
- Instructions and Sprues
- How to Magnetize and Build the Cerastus Knights
- Tools You Need
- More Building Tips for the Cerastus Knights Lancer, Acheron, and Castigator
- Assembled Models
- Painting and Customizing
Introduction to Cerastus Knights
 Overview of Cerastus Knights Lancer, Acheron, & Castigator
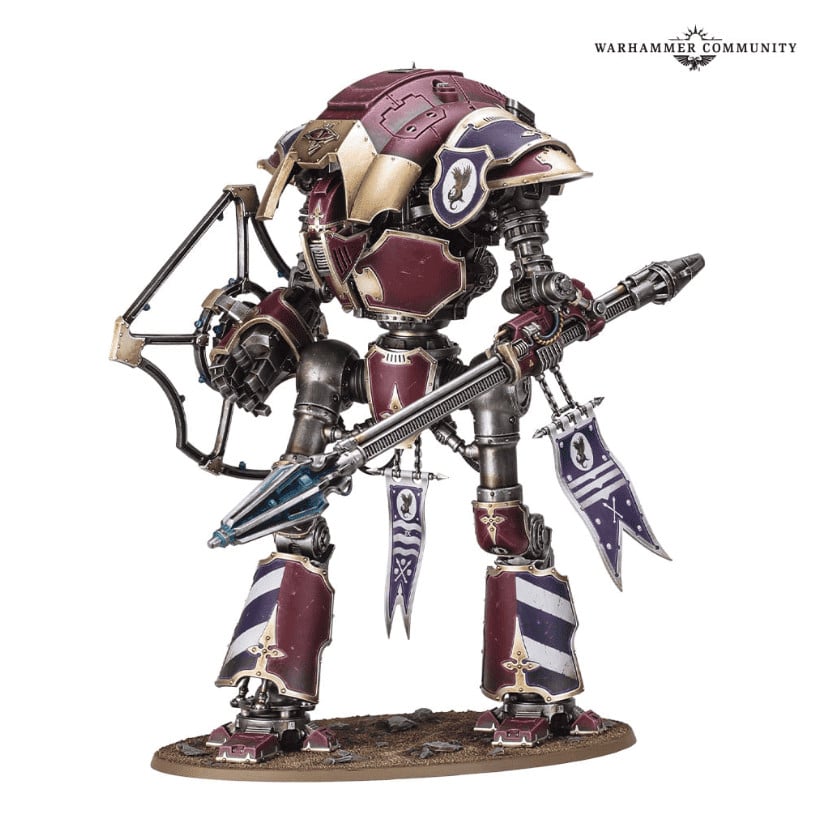
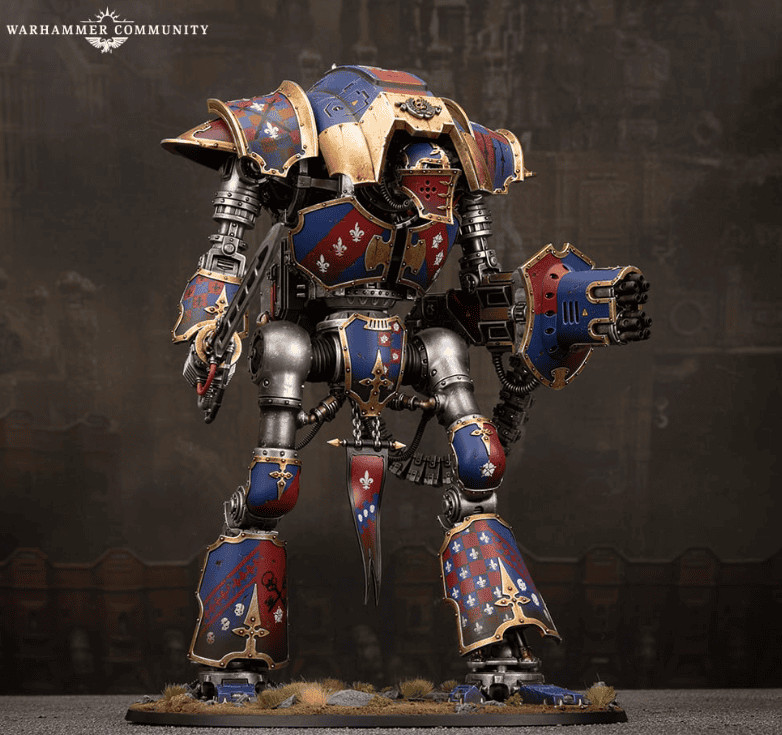
Cerastus Knights are a majestic addition to the Warhammer 40k universe, towering over other models with their imposing stature and intricate designs. These mechanical titans, available in several variants, offer hobbyists a fantastic opportunity to build, customize, and field them in their armies. The transition from resin to plastic has made these kits more accessible and easier to work with, opening up new possibilities for builders of all skill levels.
The Appeal of Plastic Kits
Why are plastic kits such a game-changer? For starters, they’re more user-friendly. Gone are the days of dealing with fragile resin pieces and the constant fear of them snapping mid-assembly. Plastic kits are robust and versatile, allowing for more dynamic poses and easier customization. Plus, they’re a bit kinder to your wallet, which means you can spend more on those fancy paints and accessories you’ve been eyeing. Whether you’re a newcomer or a seasoned modeler, plastic Cerastus Knights are the way to go.
Where to Buy the Cerastus Imperial Knight Kit: $210
Quick Order Links: | Amazon | Dicehead Games | Bazooka Games | Frontline Gaming| Element Games (UK) | Noble Knight Games | eBay| or | Games Workshop’s Store. This site contains affiliate links, and Spikey Bits earns from qualifying purchases.
The kit is quite expensive, but it’s still cheaper in plastic than it has been in resin, so that’s a plus! Rob covers the history of Knights, prices, and multi-use kits pretty in-depth in the video, so be sure to watch it below to see all that. Now, let’s get into it.

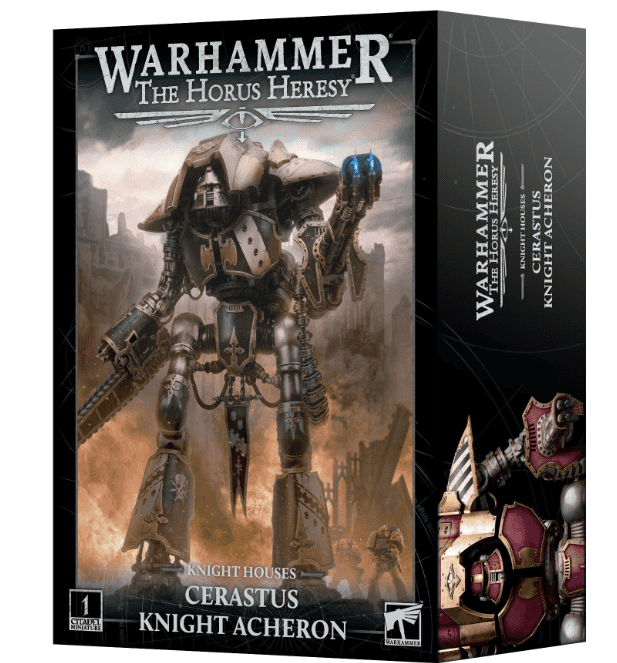
- Games Workshop - Warhammer Horus Heresy / Warhammer 40,000: Cerastus Knight Lancer
- A swift, towering Lords of War choice for Questoris Households and allied armies
- Thunder into melee and shatter mighty foes with a crackling shock lance
- Can be deployed on the battlefields of the Horus Heresy and the 41st Millennium
- Personalise your Knight with loads of posing options and cosmetic extras - This miniatures is supplied unpainted and require assembly – we recommend using Citadel Plastic Glue and Citadel Colour paints.
Last update on 2026-03-10 / Affiliate links / Images from Amazon Product Advertising API
Building Your Cerastus Knight Lancer, Castigator, & Acheron
Sprues
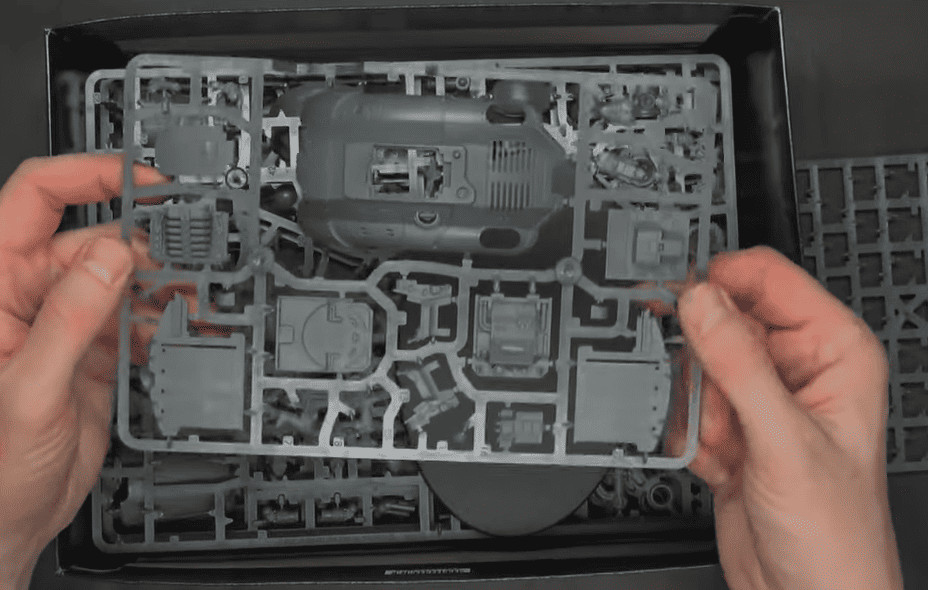 As you would expect, there are a ton of sprues in the box, but the only thing different with the lancer (or any of the three classes) is the separate weapon sprues.
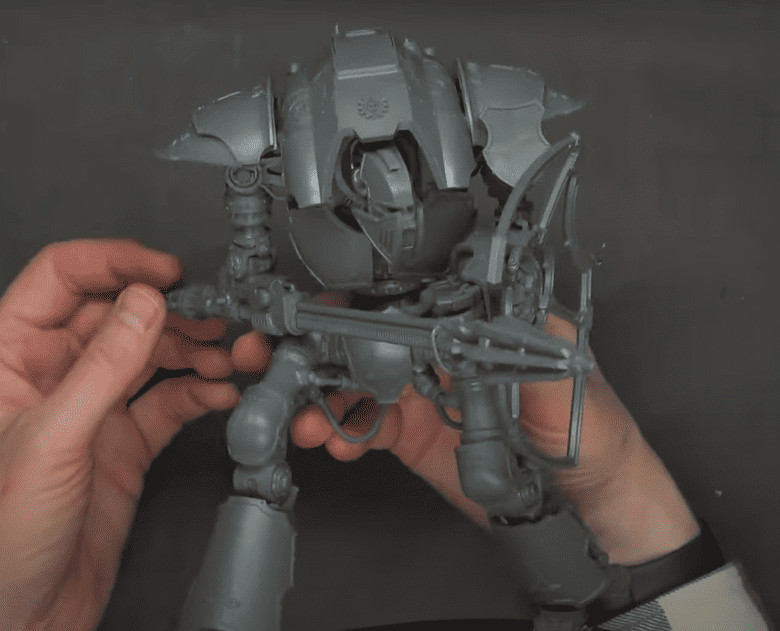
 The feet are very posable, and you can have them standing in a bunch of different ways, which is really cool. However, there are some GOTCHAS to be aware of.
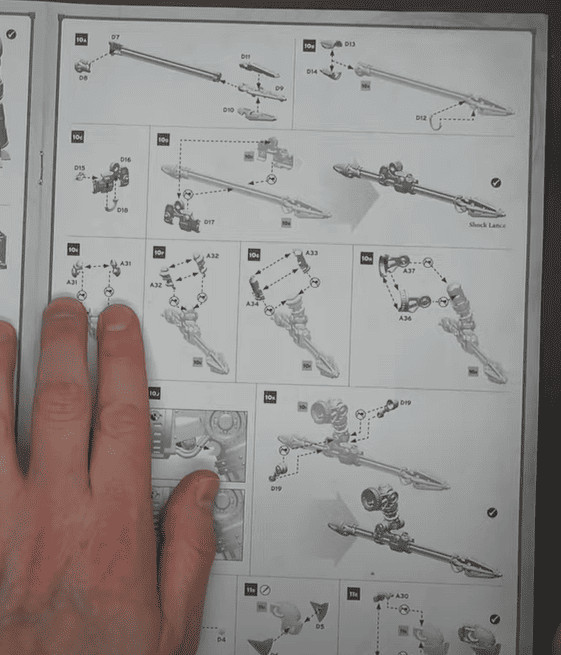
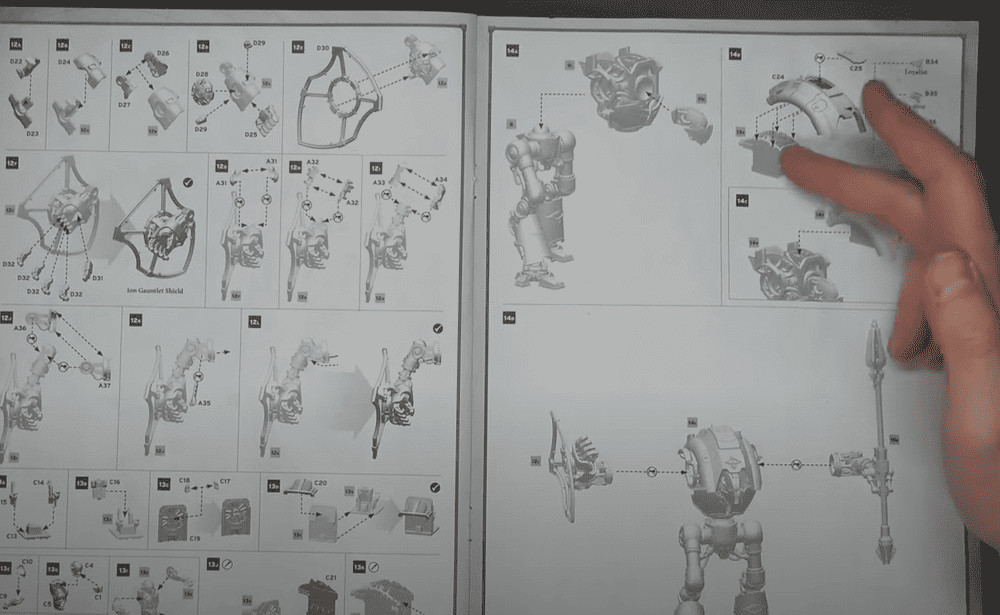
Instructions
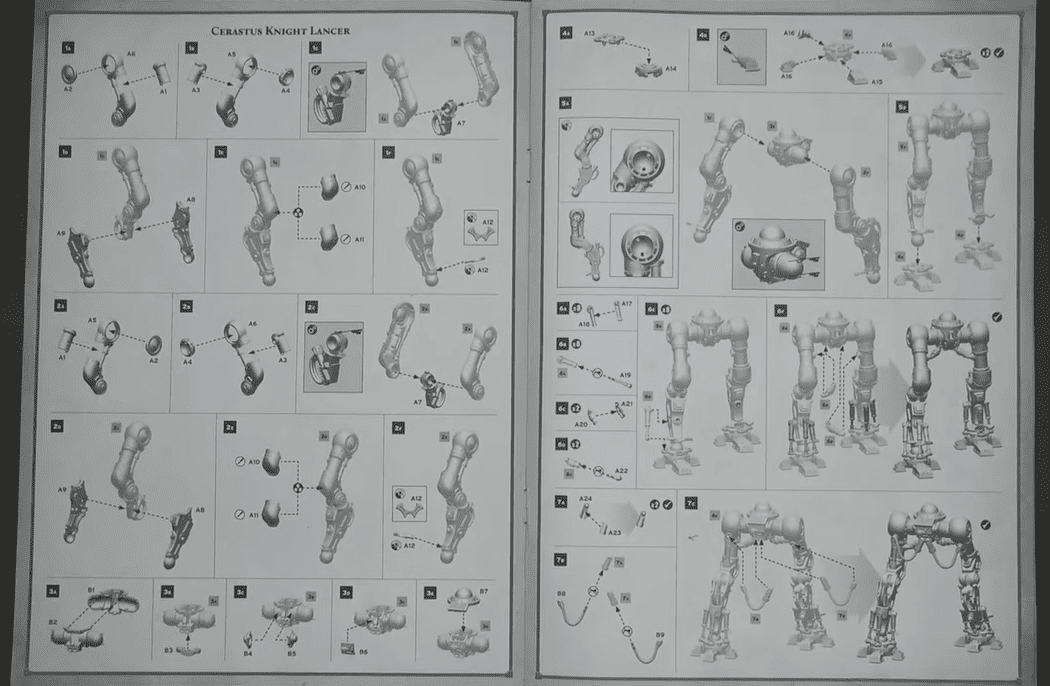 Unfortunately, they did this booklet in the style of the HH kits, which means there is a lot of detail that is hard to see. With that being said, go slow, and we’ll try to cover all the GOTCHAS.
First off, be sure to set up your legs (since you can do different poses) before you start gluing, as you might end up with problems if you don’t dry fit.
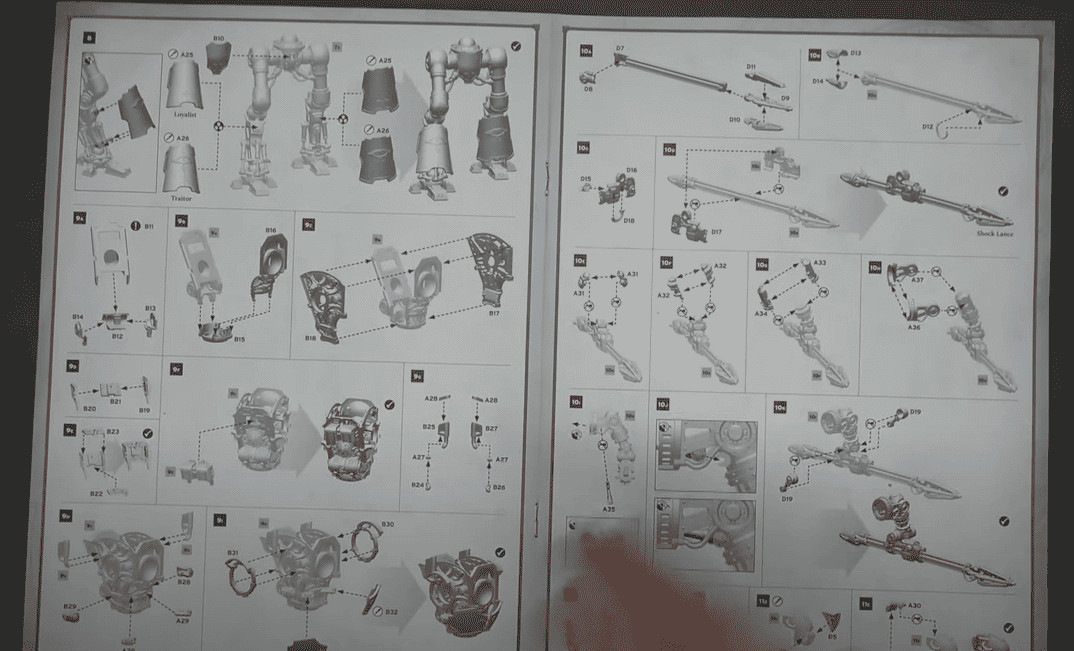 The body pieces can be pretty fiddly as there are a bunch of small pieces to them, so take your time with the smaller parts. Keep in mind that the little inside piston pieces in the armpit joints just don’t really work either, so we left them off.
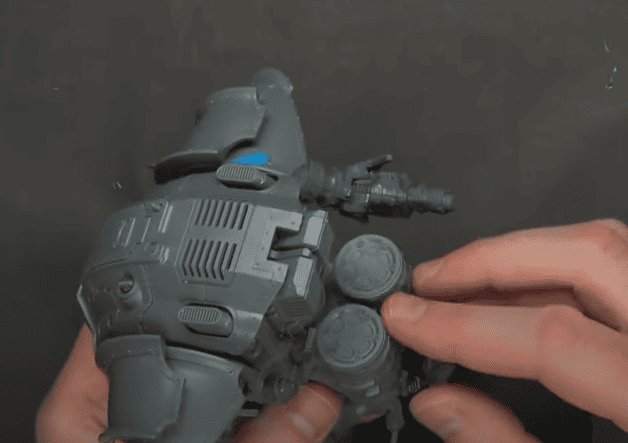
Another thing to note: you want to blue-tac on a lot of the armor and such; that way, you can paint it in sections and just hit the chassis with a metallic primer or basecoat.
The one thing you will have to compromise on if you’re making all three versions from just one box is that you will just have to pick one head and go with it for all three. So, think about what head you will want to use ahead of time.
Magnet Prep
 For magnetization, you need to pay attention to the A31 and A32 couplers. All of them will have to be magnetized for each arm, with two on each. However, once you magnetize those, you won’t have to do much else for the body, as all the weapons use the same size sockets.
 Another bonus is that you can leave the top armor carapace off and paint it separately, then put it on later. One last thing to note: all three come with different shoulder pads. You could blue-tac all three onto the chassis, or you can always pick one style and go with that.
Knigtht Cerastus Magnetization Tips & Assembly
Why Magnetize?
Magnetizing your Cerastus Knight opens up a world of possibilities. Not only does it allow you to swap out weapons and parts, but it also makes transporting your models easier. It’s a practical upgrade that adds to the versatility of your kit.
Magnetization Tips
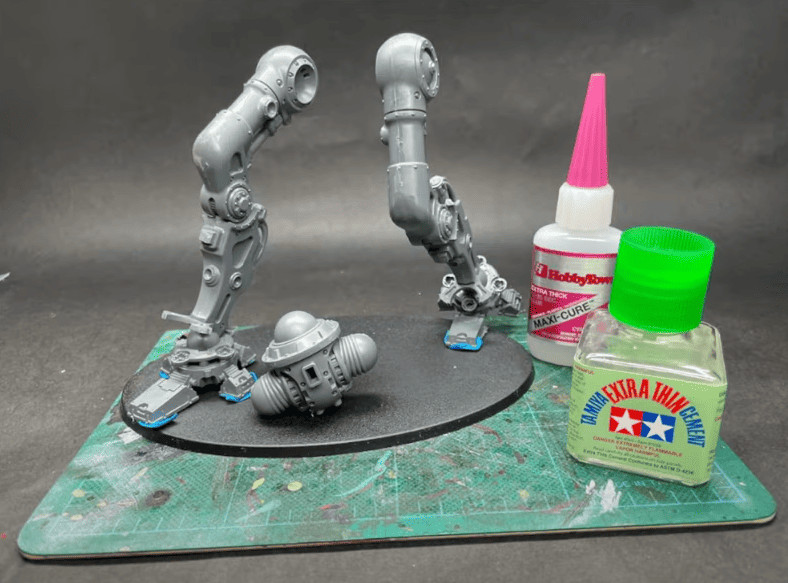 Here’s a big tip on how to get the pose you want and actually have your hands free to fix and adjust things. First, Rob uses the Tamiya Extra Thin Cement for this and some Maxi-Cure (pink cap) for the build.
So, the hack is to use blue-tac on the feet and have your waist bit ready. This way, you can move the legs around to where they need to be to make the waist fit and have the legs in the pose you want.
If you glue your feet down, you could be in trouble. Once your feet and waist fit, then you can use the Tamiya thin glue to hold it all together at the waist.
Filling the Gaps
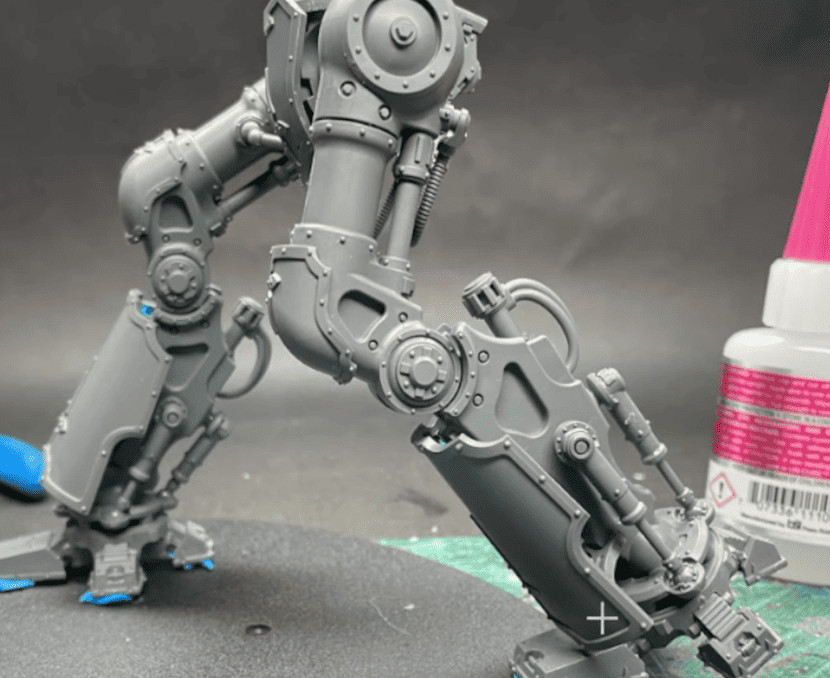 You can also use the Tamiya glue to fill gaps by putting some over the cracks, letting it dry, and then running the dull side of your knife over it. If you want to do the same pose as this, you have to clip off a couple of joint locks, but it doesn’t compromise the model’s integrity one bit.
Just watch the video for where you’ll need to do this.
Tools You’ll Need
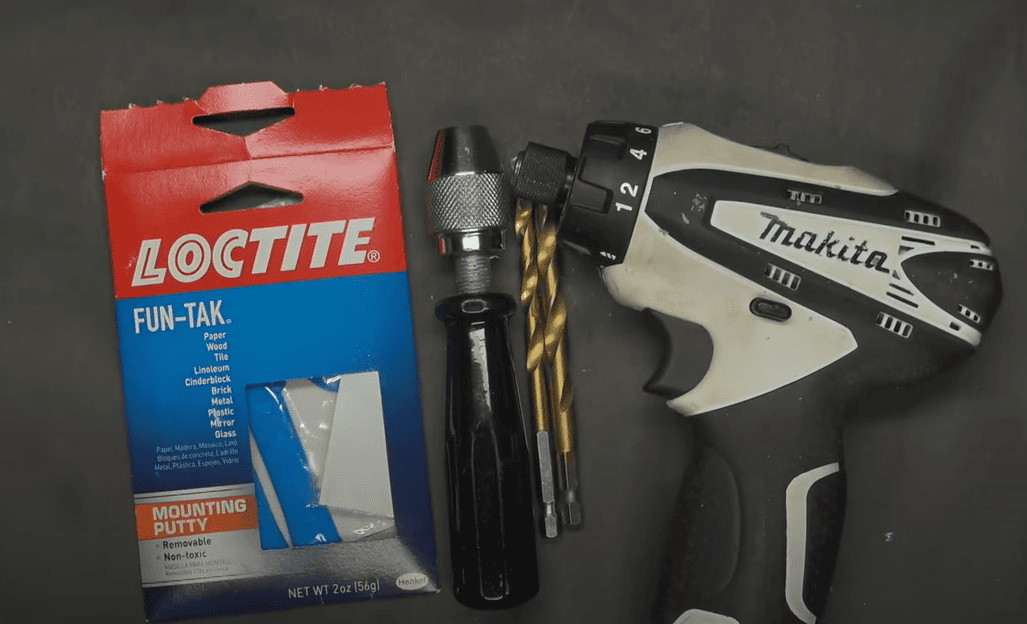 He uses a Makita quick-release power drill (keep the speed low), these two drill bits, a hand drill, and some blue-tac. You’ll also need some magnets, and we get all of ours from the Magnet Baron.
Here are the magnets you’ll need for this kit:
- Weapons (4) 1/8 x 1/16″ (double stacked)
- Weapon Mounts (4) 1/8 x 1/16″
- Arm Joints (4) 5/16 x 1/16″
Ceratus Knight Magnetization Kit From The Magnet Baron
Use coupon code Spikey10 to get 10% off your next order with them
![]() If you don’t feel like buying all your magnets separately, you can just pick up this one kit from them and get everything in one buy!
If you don’t feel like buying all your magnets separately, you can just pick up this one kit from them and get everything in one buy!
This kit contains:
- 8pcs 10mm x 3mm Disc Magnets for the arm options
- 4pcs 6mm x 2mm Disc Magnets for the base for magnetic case transportation
More Building & Magnetization Tips
Drilling Out
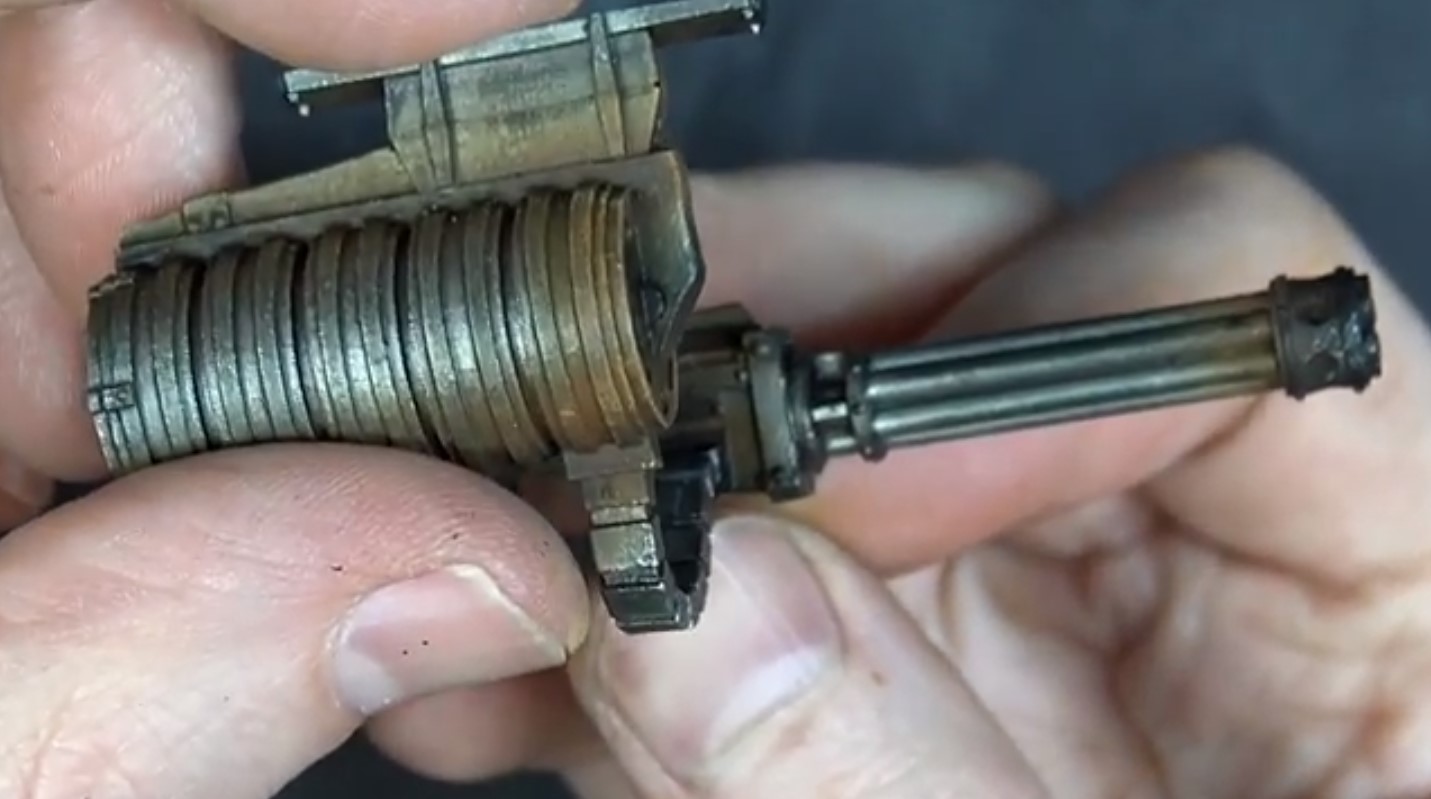
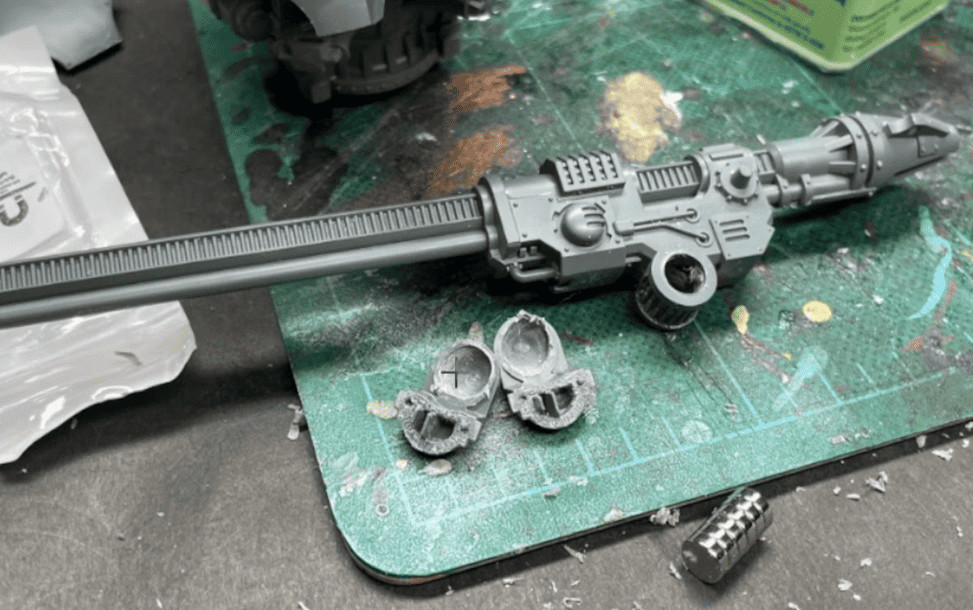 We used the 1/8″ drill bit to drill out all the weapon cylinders (do this for all the weapons). Next, you’ll have to drill out enough space in each half of the weapon mounts to fit the 1/8″ magnet. Just be very careful here, as Rob recommends making yourself a pilot hole to do this, and use the lowest speed here so you don’t drill through the other side.
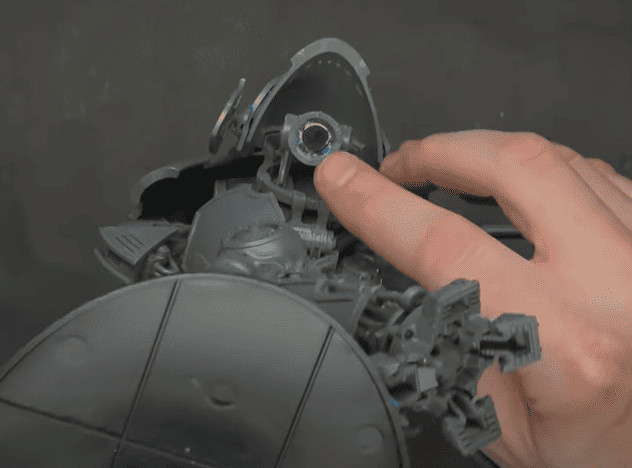
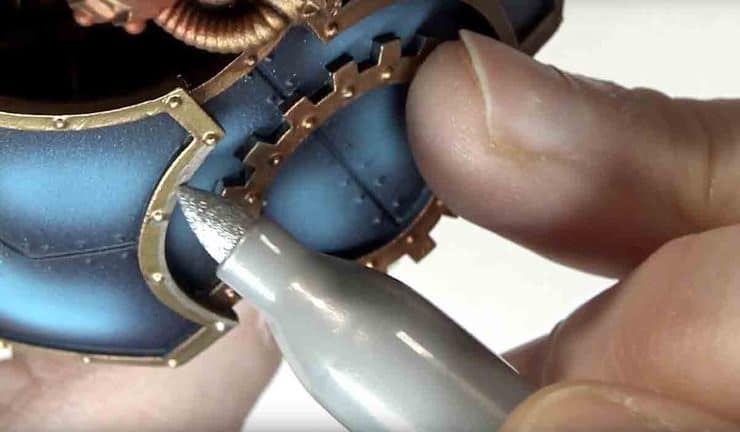
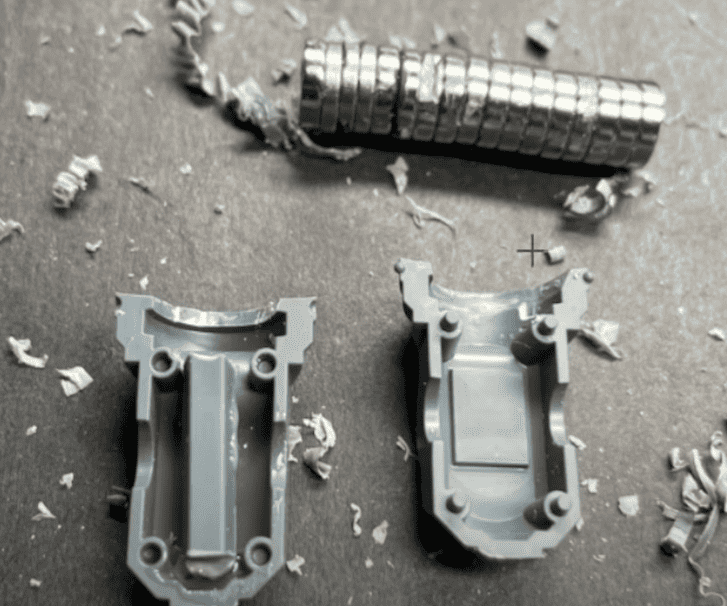 For magnetizing the arm mounts, you’ll need some clippers to take out the material covering the top of the bell-shaped bit here. Then, glue some sprues inside to support the magnet that will go in the top.
Blue-Tac
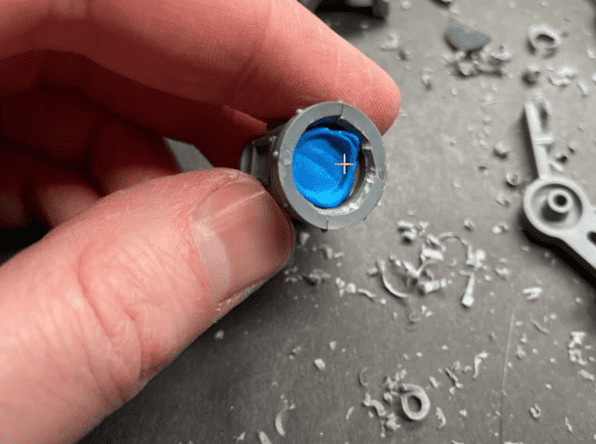 Then, once you glue those two halves together, stick a little blue-tac in there and mash it down with your magnet. This will give you a nice little flush area for your magnet, and then you can glue your 5/16″ magnet to that, flush to the top!
Assembled & Magentized Cerastus Knight Lancer, Acheron, & Castigator
 Rob wanted to give him a cool striding pose, and it looks incredible, all built up! You could put a magnet in the torso so it can spin, but Rob didn’t really feel like it was necessary.
There are plenty of magnets in here, and each arm has two magnetized parts (one where it goes into the shoulder and one where your chosen weapon connects.)
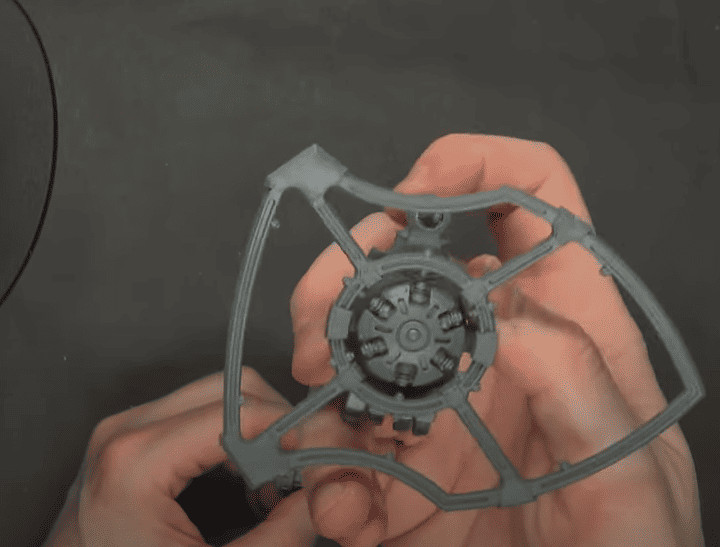
As you can see, you can just pop on the different shoulder pads and weapons and have a Castigator! Just be careful, as the giant ammo feed is a bit of a pain, but it holds the pose really well.
Acheron Variant

 For the Acheron, the flame tank backpiece holds on pretty well.
Resin Comparison
 Compared to the resin one, it looks pretty similar but is so much easier to build and cheaper, so that’s a serious plus!
Customizing and Painting Your Knight
 Painting Techniques
Now that your Cerastus Knight is built, it’s time to bring it to life with paint. Start with a solid base coat to set the foundation. Whether you prefer a classic metallic look or something more vibrant, the key is in the details. Layering and dry brushing can add depth and realism to your model.
Base Coating and Detailing
Begin with a primer to ensure your paint adheres well. Then, move on to your base colors. Metallics work great for the armor, while contrasting colors can make details pop. Don’t forget to pick out those rivets and bolts—they add a lot of character. You can even paint bigger models like these with metallic Sharpies perfectly.
Weathering and Effects
Weathering can take your Knight to the next level. Use washes to add grime and shading. Dry brushing can highlight edges and make the model look battle-worn. For more advanced effects, consider adding rust or scorch marks. It’s all about making your Knight look like it’s been through the thick of battle.
Final Thoughts
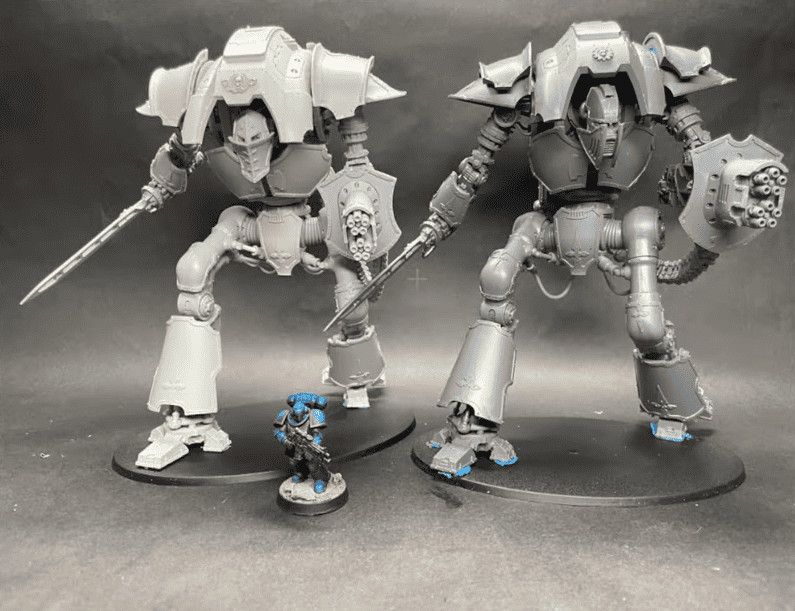 You can see from the picture that the plastic one is slightly bigger and far easier to build, as this kit goes together quite well overall. It’s nice you can magnetize all three versions, and if/when GW comes out with one big kit for all three, you can utilize it to make all of the Cerastus Knight versions!
Be sure to check out the video tutorial for all the details.
Click Here to Get Your Cerastus Knights!
What do you think of this unboxing, magnetizing guide, and build for the new Cerastus Knights Lancer, Acheron, and Castigator?