 Your guide on how to master weathering and aging models with acrylic paint to create stunning Warhammer 40K models with battle-worn effects.
Updated from 2017 on January 16th, 2025, by Rob Baer with new information and links to relevant content on weathering.
Painting Warhammer 40k models is more than just a hobby—it’s an art form. And let’s face it, nothing says “battle-hardened” like a weapon barrel or tank chassis that looks like it’s been through a thousand skirmishes.
If you’ve ever wondered how to make your Warhammer 40k models stand out with realistic weathering and aging effects, you’re in the right place. This guide will walk you through the easiest ways to use acrylic paints to give your weapon barrels that perfect worn-in, battle-worn look (perfect for those new DKoK models).
Ready to add some character to your army? Let’s get started!
Easy Steps For Weathering Warhammer 40K Models
 Painting your Warhammer 40k models is half the fun of bringing them to life. But if you want them to truly stand out, focusing on weapon barrels and weathering techniques can make all the difference.
The techniques in this guide on weathering your Warhammer 40k weapons and vehicles are simple and effective and give your models a battle-worn, realistic look. Let’s break it down.
Setting the Base: A Strong Metallic Foundation
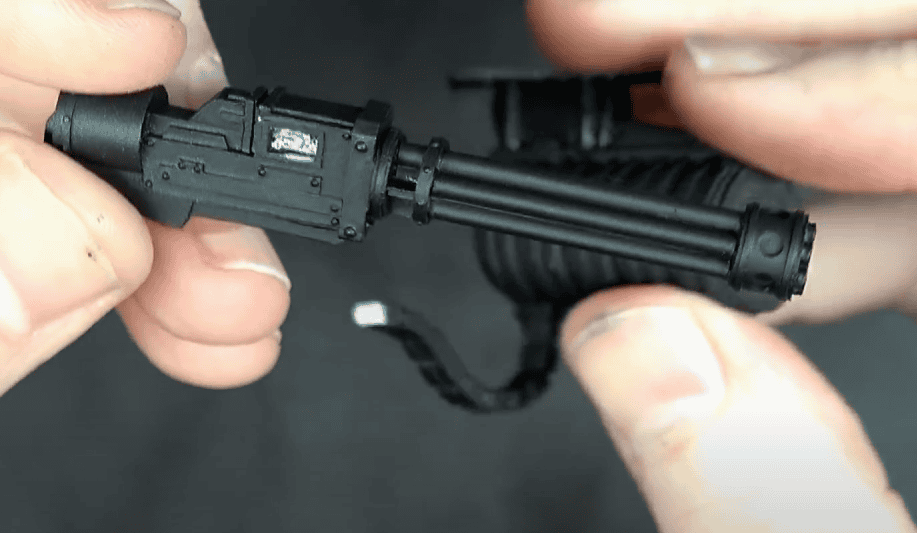
 Start with the basics: a solid metallic coat for the weapon barrel. Using Plate Mail Metal from Army Painter is a fantastic choice. An airbrush is ideal for applying this, as it ensures a smooth and even finish.
If you don’t have an airbrush, don’t sweat it—carefully layering with a brush can still get great results.
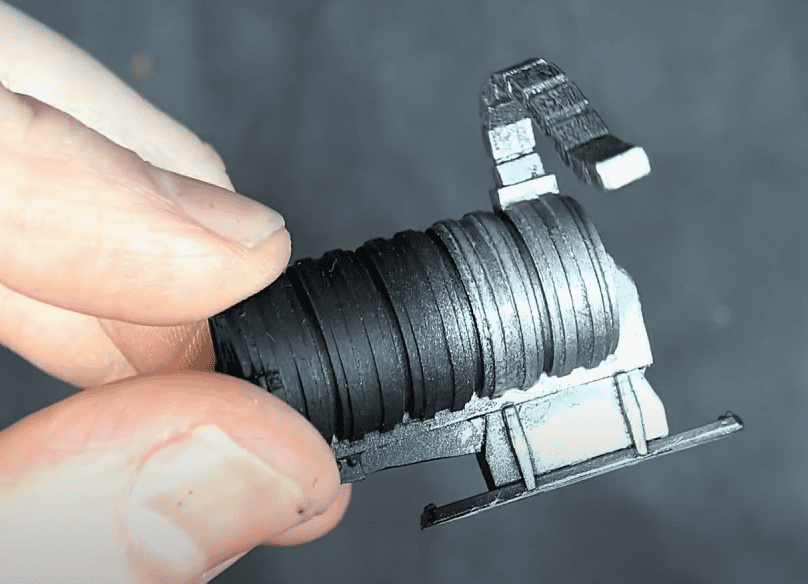
 Once your base is dry, it’s time to add depth. Mixing Nuln Oil and Agrax Earthshade in a 50/50 ratio, with a small touch of Reikland Fleshshade, gives the metal a worn, dirty look. Using a chisel brush, apply this wash top-down so gravity helps it settle naturally into crevices.
After it dries, a quick drybrush with Plate Mail Metal brings back some edge highlights, making those details pop.
Adding Weathering for That “Used in Battle” Look
 Now comes the fun part—weathering and aging your models with acrylic paint. For a truly authentic look, mix silvers, browns, and blacks to mimic the wear and tear of endless combat.
Reaper’s Harvest Brown is a fantastic choice for adding a weathered touch. Airbrushing this lightly around areas where dirt and grime would naturally accumulate—like the underside of the barrel—gives a realistic finish. This technique also works great for heat weathering on larger guns, like Punisher Cannons.
 For added contrast, go back with Vallejo Air Black. Spray it sparingly to reintroduce shadows, especially around the muzzle and other recessed areas. This makes the barrel look aged and slightly burnt, as if it’s seen plenty of action.
Sponge Weathering in Warhammer 40k for the Win
 Sponge weathering is where your Warhammer 40k models will get their personality. Using a small piece of sponge, lightly dab Ungor Flesh by Games Workshop onto areas already touched by the brown. This adds subtle highlights and makes the weathering more dynamic. Be careful not to overdo it—less is more when it comes to this step.
For blackened areas, dab Plate Mail Metal over edges and corners to create a chipped-paint effect. This technique mimics the wear and tear of paint scraping off metal during combat. It’s a quick way to make your model look like it’s been through the wringer.
The Finishing Touch: Aged and Burnt Perfection
 After all your layers are in place, step back and check your model under good lighting. The interplay between metallics, browns, and blacks creates a dynamic, battle-worn appearance that really brings out the details. It’s these finishing touches that make your Warhammer 40k weapon barrels look aged, weathered, and ready for the tabletop.
If you’ve got extra time, try adding some grime effects with thinned-down washes or by stippling with a small, stiff brush. These little extras go a long way in creating an authentic, gritty aesthetic.
Why Weathering Matters in Warhammer 40k
Taking the time to focus on weathering and aging your models with acrylic paint adds a whole new dimension to your Warhammer 40K collection. From chipped paint to realistic heat effects, these techniques give your models a story—they look like they’ve been through countless battles, instead of just rolled out of the factory.
The process is simple but effective, using tools and paints you likely already have. Whether it’s a single barrel or a massive cannon, these methods will have your models looking like they’ve seen the heart of the battlefield.
See Our Favorite Airbrushes For Miniatures Here!
Will you be using this technique the next time you weather a miniature?