Want the most likes and comments on pics of your miniatures? Check out this easy photo hack to post the best pictures of your miniatures!
To all the painters out there, we all have that one model we’re especially proud of. We slave over that model for hours and get it looking exactly the way we want it. Then of course, you want to share it with your friends on social media, right?
Well, don’t cut corners when you take pictures of your mini! There are actually a few things to look out for the next time you want to unveil your latest finished project.
Here are a few pointers and different methods of capturing the details of your models.
Taking The Right Photos To Flex Your Minis: More To it Than You Think
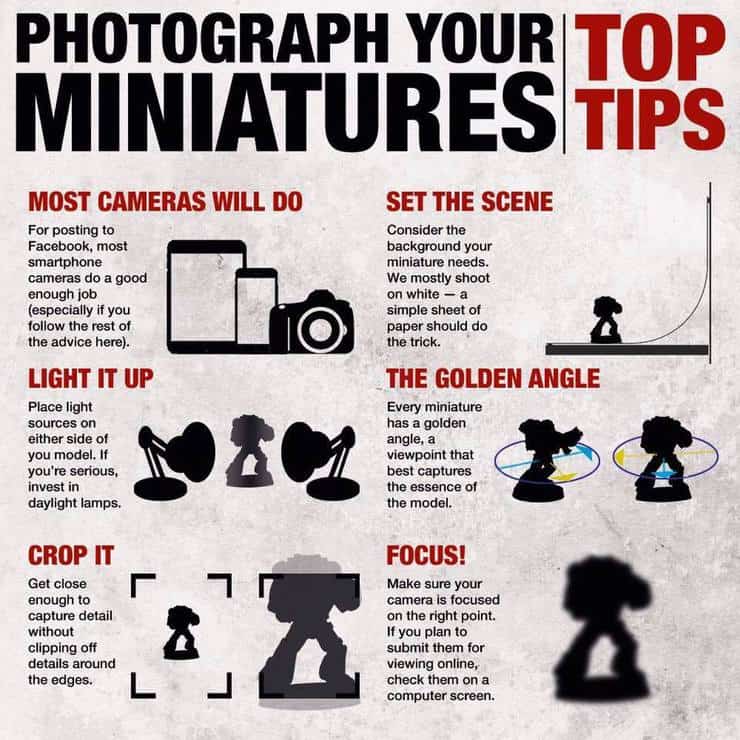 Years ago, Warhammer Community gave us this infogram showing hobbyists how to capture their models in the right light and right angles.
You’re going to want:
- A decent camera. (Any modern iPhone/Android should be fine).
- Two sources of light. This is where some people tend to neglect. Don’t try to get the right angle by holding the model right next to the light bulb from the lamp on your desk. Clear a spot off and buy two cheap lamps, set them on either side of the model and flip the switch! (You’ll eliminate so many unnecessary shadows by doing this.)
- Neutral background. You’ll want to pick something that doesn’t take away from the model. Don’t snap a pic of the model with your dirty clothes on the floor in the background. Clear a section off of your desk and set a long sheet of white paper as the backdrop!
- Focus & Crop. Make sure your camera is in focus and don’t be afraid to get up close and personal with your pictures. Really zoom in and capture the tiny details you threw in! (This is really what sets some showcases apart from the others).
A Different Hobby Photo Setup
Keep the basics that we just told you about in mind. You’ll still want two sources of light and a neutral backdrop:
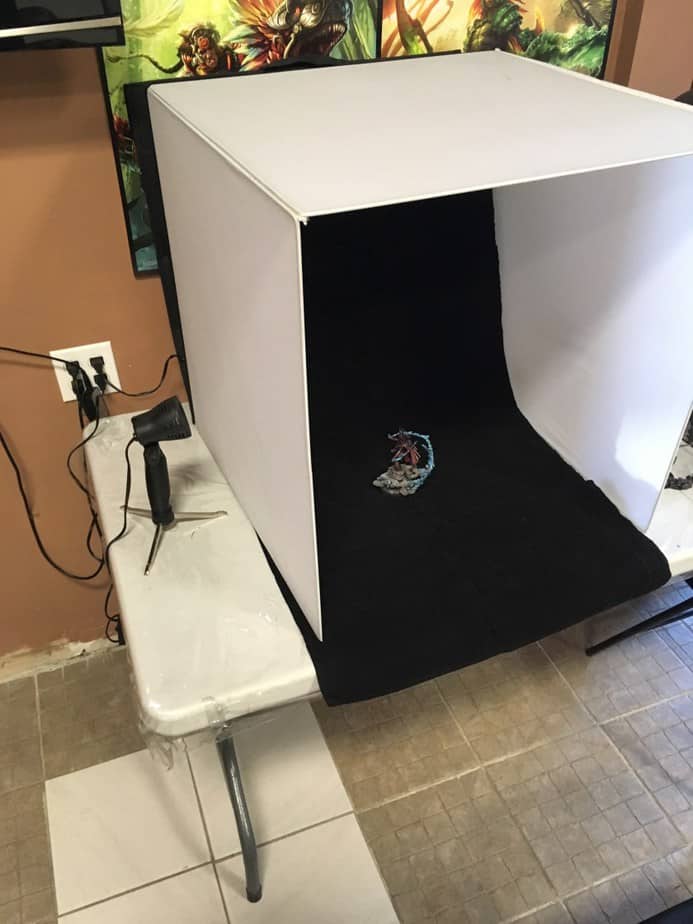 If you’re really trying to get professional, you can set up a photo box. A good one is the LimoStudio 16″ x 16″ Table Top Photo Photography Studio Lighting Light Tent Kit in a Box, AGG349. The photo box creates a little “bubble” of studio-level lighting. You set up the walls of the box and place the light sources on either side.
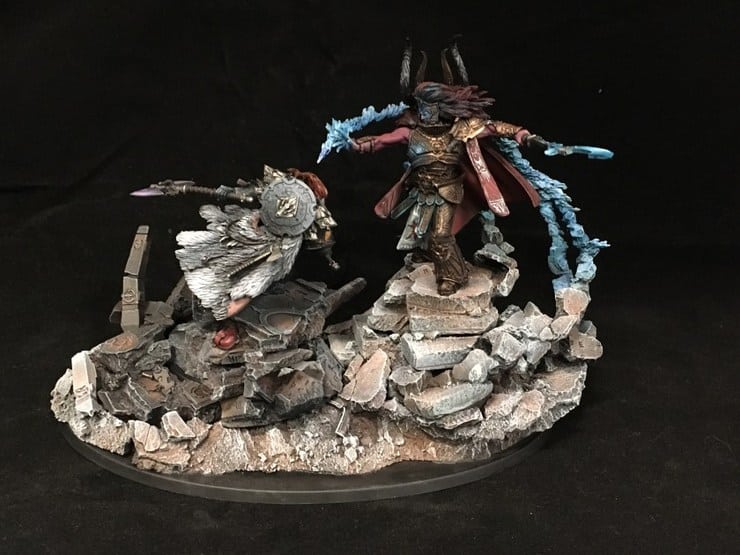 Photo from Hellfire Hobbies Photography Article
The light will still shine through and onto your model, but it won’t be as harsh, thanks to the material of the box. Remember, keep a sheet or some kind of cloth that’s a neutral color with you so you’re not taking away from the model!
Once you’ve set everything up, just make sure your camera is in focus and starting snapping all the angles of your masterpiece.
A Pocket-sized Light Source For Snapping on the Go!
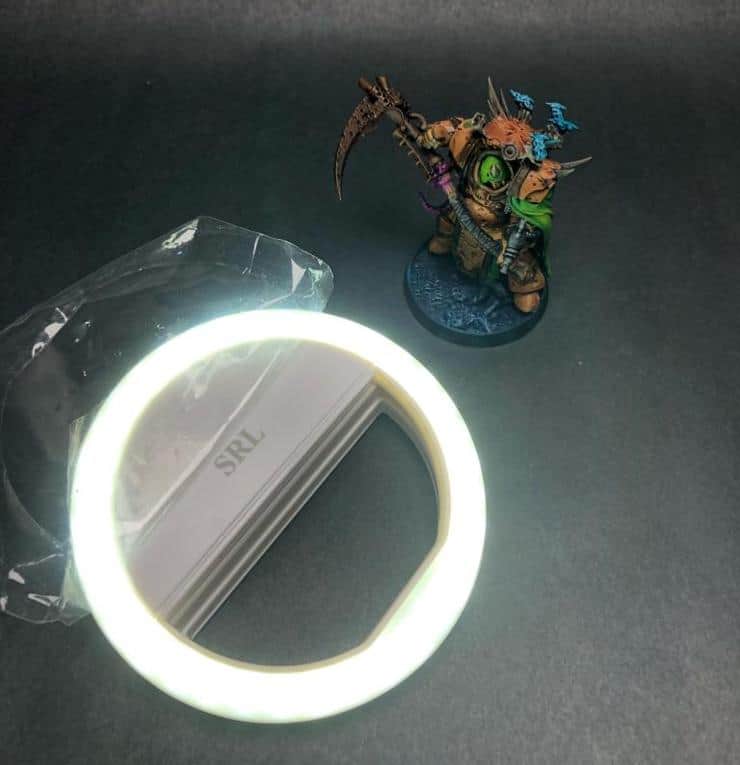 So say you’re always on the go and you don’t really have a desk-sized space where you can set up a small studio. That’s fine! You’ll just have to think outside the box. Remember, a light source is KEY. Luckily, This awesome little hobby tool is relatively cheap on Amazon, and the best part is that it clamps over any phone or tablet to help keep the light right where you need it every time.
The SRL lighting tool is perfect to keep in your hobby go-bag or in your back pocket when you’re walking around events. If you want to capture a model, just clip it around the camera of your phone, adjust the brightness setting that you need. and start snapping. While it’s not as ideal as two light sources coming from different angles, it’s definitely a huge help and better than taking a photo in ambient light.
 Before the SRL light clip
 After the SRL light clip
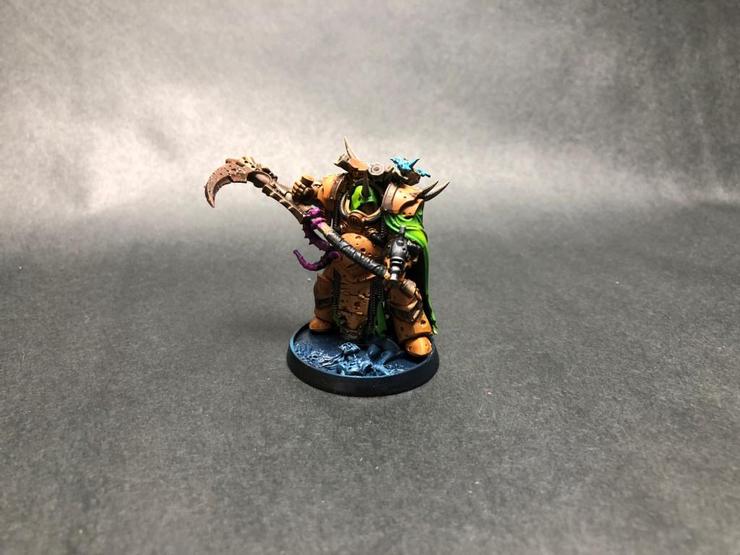
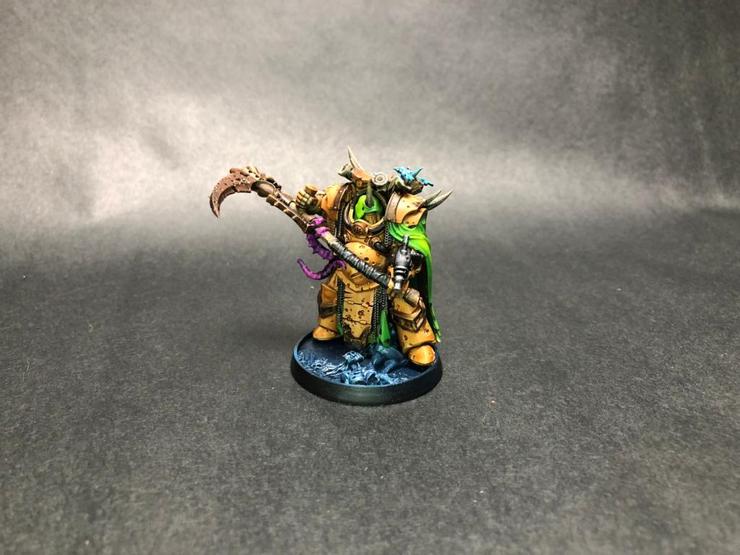
See just how much shadowing was eliminated by the light? You can actually see the full detail of coloring and wash on the plating and Terminator hood.
When Posting Pics to Facebook
 Using this example of Gotrek that we’ve posted in the past, innately, there’s nothing wrong with this picture. It follows all the steps that we talked about above. However, Facebook has an algorithm set in place that sort of “pulls out” the main points of whatever photo you upload, zooming in on the detail (which is what you see on your Facebook feed before you actually click the picture).
 One thing that’s always a great habit to get in, is to grab a picture of a “head and shoulders” shot of the model. If you notice, that’s how most of our cover photos on all of our articles are displayed. We get a close-up of whatever artwork we want to use and it pulls the attention to the viewer.
Next comes snapping a few other angles of your mini to show the full spectrum of detail.
 You can see that we’ve uploaded different angles of the mini, which look great. However, they don’t quite pull in the viewer. Even though we have the head and shoulders pic, it’s small and a little off to the side. Again, nothing really wrong with this. However, it can be better.
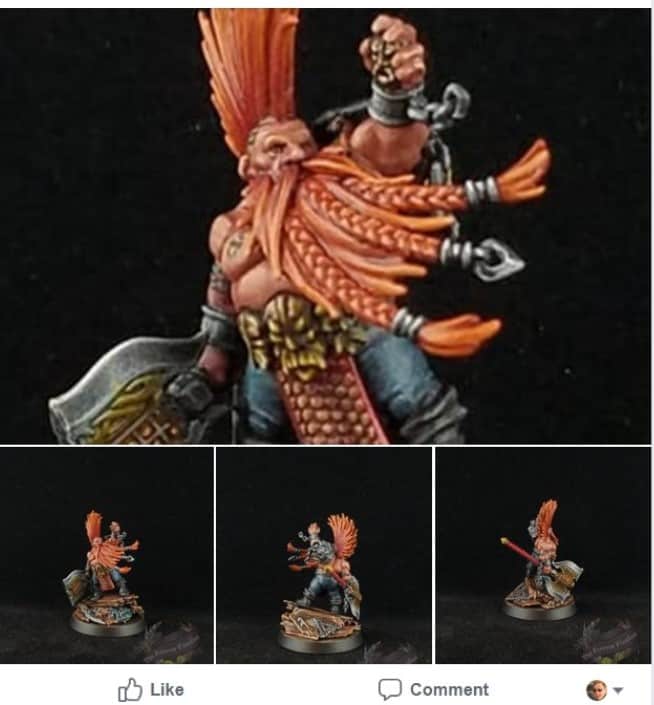 Slimming down the pictures that were uploaded, four seems to be the magic number here. You get the head and shoulders shot as the largest image to pop up on your timeline as well as a few other important angles of the mini.
We mentioned that Facebook algorithm earlier and it’s important to note that four images will not always be the magic number for your mini. However, assuming you are showing off GW miniatures which are all roughly the same scale, you should come somewhere close. It just takes a little playing around and swapping a few pics out here and there.
The goal of all of this is to help do your finished models some added justice when you flex them online! Hopefully, this has helped you and we look forward to seeing some of your favorite minis shared!
What are some tips you’d share with a new painter wanting to take pictures of their model? Do you have a space dedicated to taking pics of your finished minis?
Let us know in the comments of our Facebook Hobby Group, and make sure you enter the latest monthly giveaway for FREE today!