
Struggling with how to paint flesh tones? Get pro tips from Monument Hobbies on underpainting, layering, and shading to bring miniatures to life!
Painting flesh tones on miniatures can feel like trying to mix the perfect cup of coffee—too much of one thing, and it’s a disaster. Go too pale, and your warrior looks ghostly. Too dark in the wrong spots, and it’s a mess. The good news? There’s a method from Monument Hobbies that actually works, and it doesn’t involve guesswork.
This is where underpainting, layering, and shading come in. With the right approach, skin tones won’t look flat or lifeless—they’ll have warmth, depth, and realism. The trick is knowing where to place each color and letting the layers do the work for you.
So, if your last attempt at painting a face ended in frustration, stick around. This method keeps it simple, effective, and—most importantly—repeatable.
How to Paint Flesh Tones on Miniatures Without Losing Your Mind
Miniature painting is an art form that can drive you a little bit mad. One minute, you’re layering up some smooth blends and base colours, feeling like a master of the craft. Next, your tiny warrior’s face and skin colour look like it spent a weekend sunbathing on the surface of the sun. Miniature painting skin tones are about as tricky as writing your own codex.
Too pale, and your figure looks lifeless. Too warm, and it starts resembling a tomato. But with the right approach, you can make skin color tones pop with depth and realism.
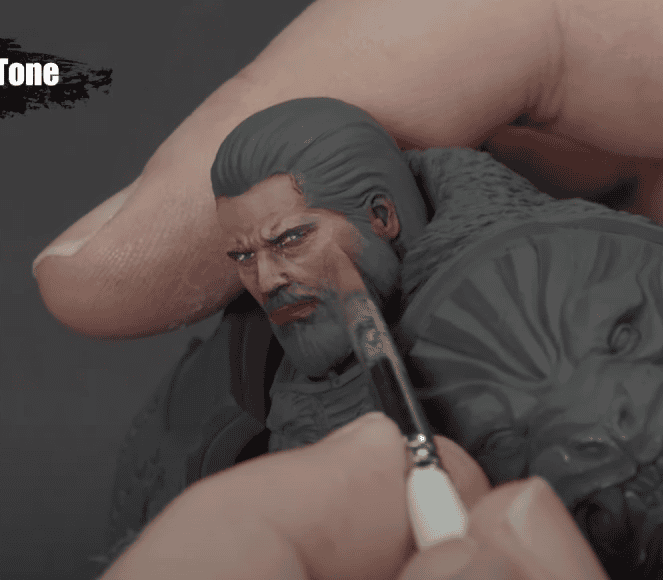
Let’s break it down into a step-by-step method that actually works without any unnecessary headaches for miniature face painting! Before we start, this tutorial is from Monument, so all the paints used are from them! So be sure to snag any of the linked paints in the video and give us a high-five in support! Every qualifying purchase helps Spikey Bits keep the lights on and the fun going.
Start With a Strong Foundation
 Before even thinking about the actual skin tone, lay down a solid base. And no, we’re not talking about a flat beige that looks like a plastic doll’s complexion. The trick to rich, vibrant skin is underpainting.
A good underpainting adds depth, movement, and natural variation to the final look. The colors we’re working with? Royal purple, red oxide, bright yellow-green, and an advanced flesh tone. Sounds wild, but trust the process.
- Royal purple: This goes in the shadows. Think beard lines under the eyes, around the ears, and along the neck. This cool undertone keeps shadows interesting rather than muddy.
- Red oxide: Perfect for areas that naturally flush—cheeks, nose, inner ears, temples, and across the brow.
- Bright yellow-green: This is where things get weird, but in a good way. This color is for the fatter, warmer areas—cheeks, forehead, maybe a bit on the chin. It looks ridiculous at first, but once layered with skin tones, it creates a natural warmth.
 Now, if you’re staring at a model covered in purple, red, and green splotches, wondering if this was a mistake, you’re exactly where you need to be with your base color.
How to Paint the Faces of Miniatures: Step 2
 Now comes the part where people usually panic, as this is where you start putting the actual flesh tone on top, but Monument keeps things easy! The key here is thin, controlled layers. If the skin paint is too thick, all that lovely underpainting gets buried. Too thin, and you’ll be at this for hours. Find a balance where the colors peek through, but the skin still looks, well, like skin.

- Thin your paint to a consistency where it just barely tints what’s underneath. You want transparency, not full coverage (this works when you paint eyes as well).
- Apply in layers, not all at once. Start in the shadows and work toward the highlights.
- Let each layer dry before adding another. Nothing ruins a smooth blend faster than overworking wet paint.
Shadows and Highlights: Why One Color Won’t Cut It
 Here’s the secret: flesh tones should never be just one color. The best skin has cool shadows and warm highlights. It’s why using just “dark flesh, mid-tone flesh, and light flesh” often falls flat. Whether you are going for darker skin tones or lighter skin tones, just remember, there is variance; don’t do just one color like a yellow ochre.
Instead:
- Use a cool undertone for shadows. That royal purple or even a deep blue works wonders.
- Keep highlights warm. A slight yellow or peach tone on the highest points of the face adds realism.
- Stipple in variation. A little extra red around the nose, some warmth near the ears—tiny adjustments make a big difference.
Fixing Mistakes Without Starting Over
 Even the best painters make mistakes. Maybe the shadows are too dark, or the highlights feel chalky. Instead of scrapping hours of work, a simple glaze can fix it.
- If shadows feel too harsh, glaze a slightly diluted flesh tone over them to soften.
- If the skin looks washed out, a touch of red oxide glazed over the cheeks brings life back.
- If highlights went too bright, blend them back with a mid-tone glaze.
Glazing is like seasoning a dish—you can always add more, but it’s hard to take away.
Final Touches That Bring It All Together
 Once the face is looking natural, take it up a notch with some finishing touches:
- Lips: A subtle pink glaze keeps them from blending into the rest of the face.
- Scar details: If the model has scars, a mix of red oxide and a flesh tone works beautifully.
- Five o’clock shadow: A light glaze of purple or blue-grey across the jawline gives a realistic stubble effect.
FAQs for How to Paint Flesh Tones
 How to Make a Skin Tone with Paint?
Mixing a good skin tone isn’t about grabbing a single color and calling it a day—it’s about balance. Start with a base of red, yellow, and white. Too pink? Add more yellow. Too orange? A touch of blue or a hint of green cools it down. If the mix looks too pale, a small amount of brown or burnt sienna brings it back. The key is layering. Skin isn’t one solid color, so don’t be afraid to tweak it as you go.
How to Make a Skin Tone with Acrylic Paint?
Acrylics dry fast, so mixing the right skin tone can feel like racing against the clock. Start with a warm base (and mixing a few skin tones)—red, yellow, and a little white. Need a richer tone? Add burnt umber. Too dark? Lighten it with white, but don’t overdo it, or it’ll look chalky. A drop of blue can help tone things down if it gets too warm. Acrylics can shift a bit as they dry, so test a small amount before covering an entire miniature. Thin layers work best, and remember—skin has natural variations, so perfection is overrated.
Final Thoughts On How to Paint Flesh Tones
 Painting flesh tones on miniatures isn’t about finding a magical color. It’s about layering, balance, and knowing how to control saturation and contrast. If things look weird at first, you’re probably doing it right. The trick is patience, thin layers, and knowing when to stop before things get overworked.
With a bit of practice, you’ll start to see how these techniques transform flat, lifeless skin into something full of depth and character. So grab your brush, thin that paint, and start painting. Your miniatures are about to start looking a whole lot better.
Get Your Paints From Monument Here!
What do you think about this method, from Monument, on how to paint flesh tones?