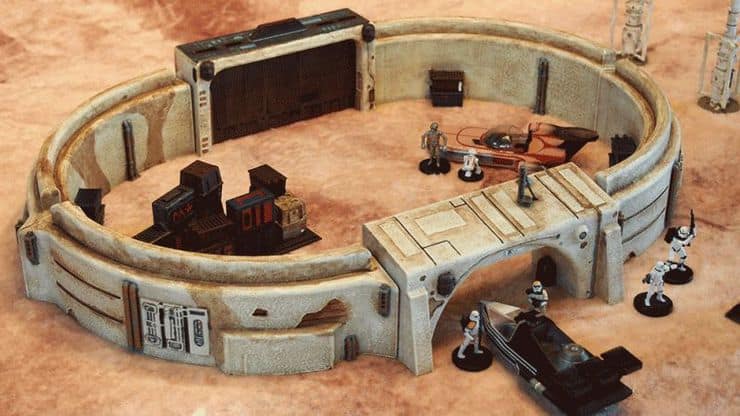
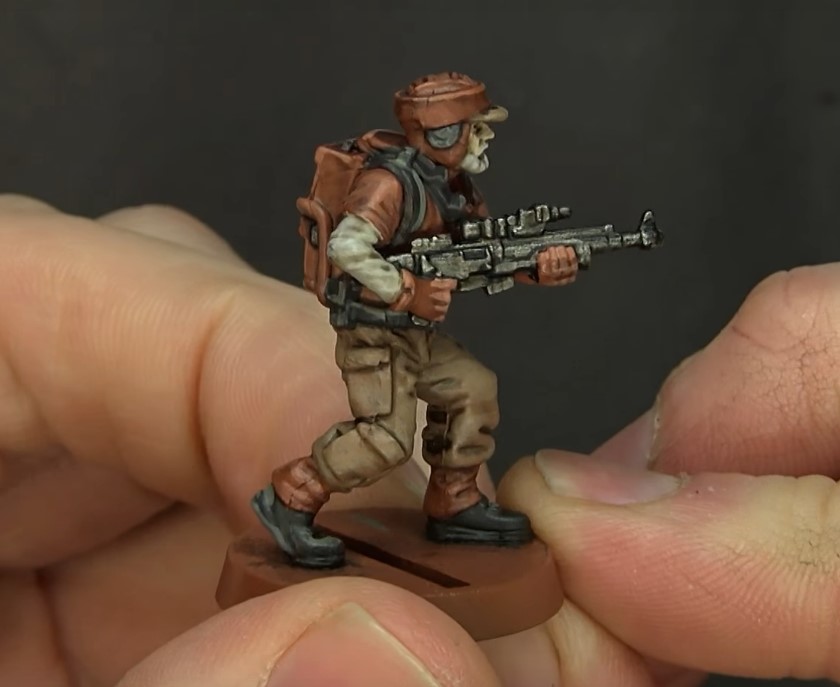
 With this easy painting tutorial, learn how to paint Star Wars: Legion Rebel Troopers with a cool desert look!
Star Wars: Legion models come unassembled and unpainted. Each box assembles pretty easily, with push-fit models requiring glue to stay together and minimal mold lines to clean up, which is nice.
Here is our quick seven-step guide to painting Star Wars Legion Rebels to prepare your forces for battle!
How to Paint Star Wars: Legion Rebel Troopers
Before we get into the steps for painting Star Wars: Legion Rebel Troopers, let’s check out the paints used in this video. You can click the links below to grab your own!
- Fur Brown
- Monster Brown
- Stone Golem
- Corpse Pale
- Necromancer Cloak
- Matt Black
- Gun Metal
- Strong Tone
- Castle Grey
- Tanned Flesh
- Vallejo Coarse Pumice
- Matt White
- Anti-Shine Matt Varnish
Step 1: Assembly and Primer
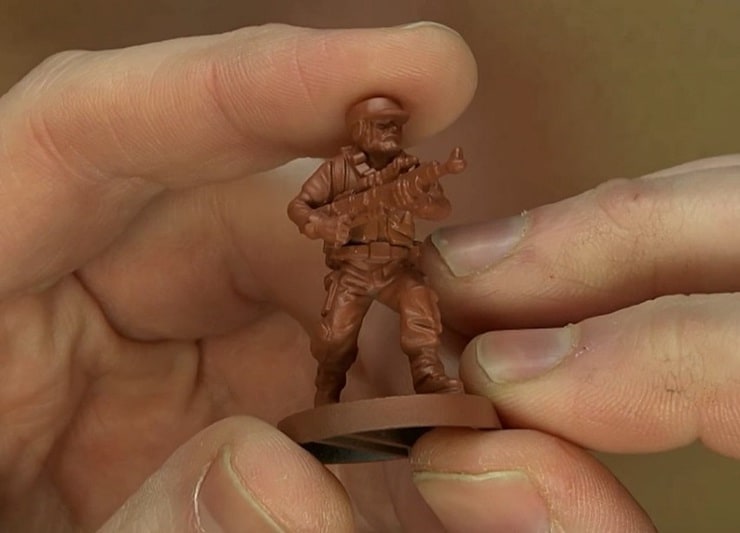 The models must be assembled and glued down to a base before painting. For assembly, the arms slot easily into the torsos, and glue is highly recommended to keep them in place.
If you have extra bases and want to do some nice terrain work on the permanent bases, then it is recommended to glue the models to different ones (we’ll transfer them back later in the tutorial). Otherwise, a little drop of superglue on each foot will glue them down just fine.
For priming, this tutorial uses the Army Painter system, starting with Fur Brown, as it has a fantastic color match to other paints in the line. Just remember to never prime inside unless you have a good ventilation system! Always prime minis in a highly ventilated area, preferably outside.
To prime, spray in short, controlled bursts while moving the can in one direction across the model. Keep the nozzle a good distance away from the miniature to prevent clumping on the mini. Let the mini sit for a few minutes until dry, then flip and spray the other side!
Step 2: Base Coats
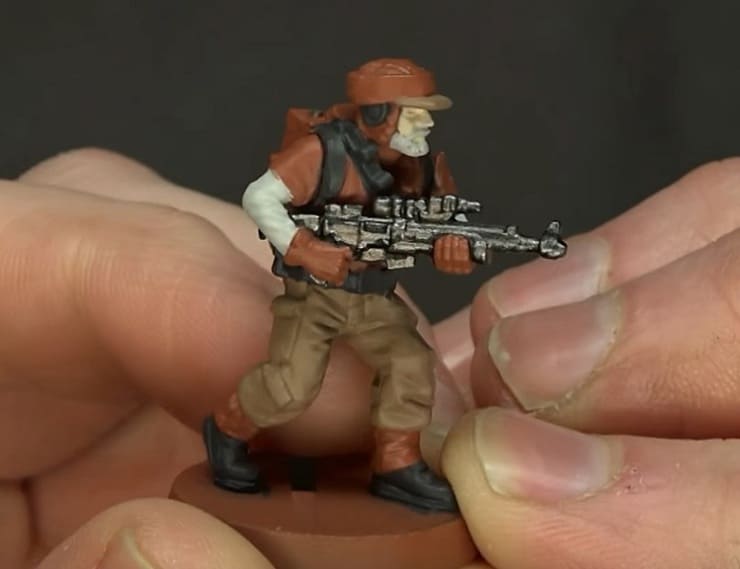 The next step is to base coat and block in colors with smooth, even painting in one or two coats. The first color used here is Army Painter Monster Brown, blocking in the fatigues and brim of the hat. Army Painter Stone Golem is next, blocking in the sleeves and beard. Corpse Pale is added to the face to block in the flesh tone. Necromancer Cloak is used to block in the boots and some of the pieces on the backpack.
The gun is blacked out with Matt Black from Army Painter, contrasting with Gun Metal on the edges.
Step 3: Gloss Spray and Wash
 Using the same skills as priming, spray down the model with a gloss or semi-gloss spray. The gloss coat is done before the wash to allow the wash to flow easier. Before moving onto the wash, be sure to let the model dry. For washing the model, put some of the wash either in a water bottle lid or on a palette for easy access.
Apply the Strong Tone to everything using a brush that will hold plenty of the wash. Push the wash into the recesses, getting it into crevices. The gloss coat will help prevent the wash from building up on flat surfaces. If there is excess, dab it away with a damp brush or sponge.
Step 4: Highlights
 Time to build those highlights back up! Using Monster Brown, which was the base coat, apply thin coats over flat areas that catch the light.
This will help build a little highlight, contrasting with the wash’s areas. The same step goes for Stone Golem on the sleeves and beard. Castle Grey is used as a highlight for Necromancer Cloak, picking out the raised edges and places light will shine and catch. Tanned Flesh will be used to highlight the Fur Brown, picking out and bringing up those highlights.
Step 5: Basing with Coarse Pumice
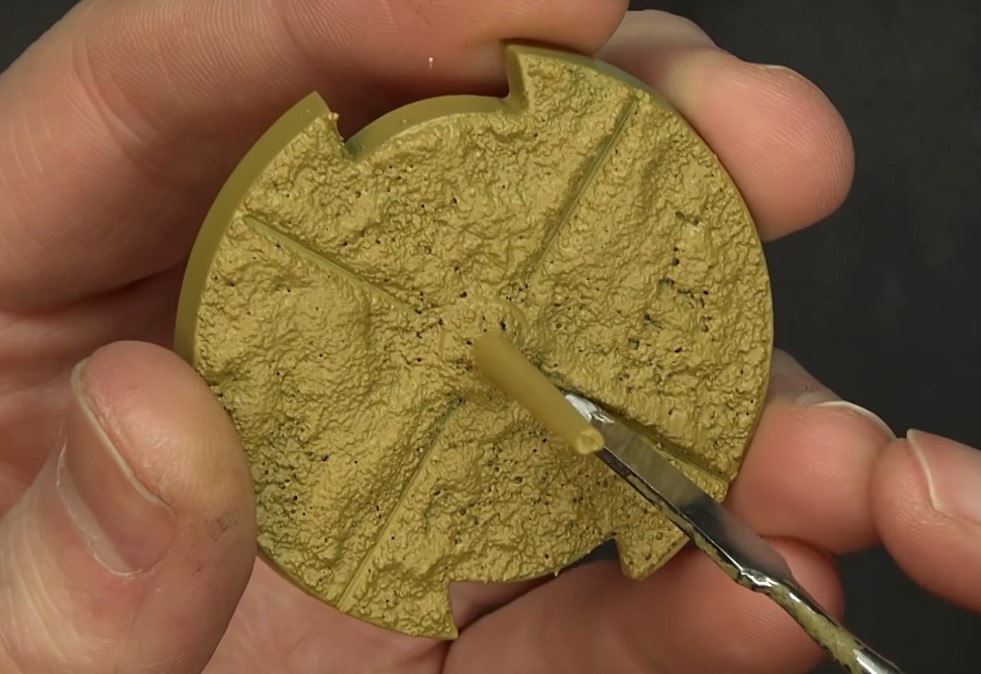 Vallejo Coarse Pumice is a great texture for your bases. You can also use sand mixed with PVA (Elmer’s white) glue to get the same texture-type effect. Apply onto the base with a flat spreader, then apply a primer once the texture is completely dry.
You can use the same tool to notch out the firing marks when the texture starts to set for vehicle bases or other bases with firing arcs.
This is easy with Star Wars: Legion models, as the firing arcs are set into the base itself. The bases are then primed with Desert Yellow.
Step 6: Drybrushing
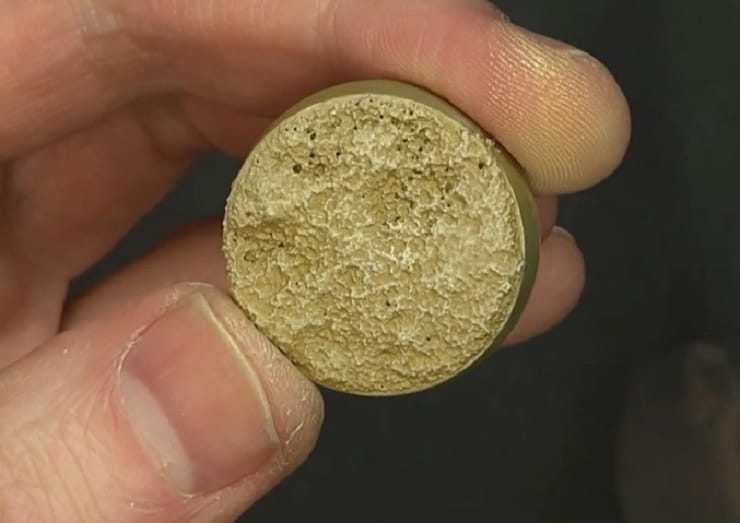 Drybrushing on textured bases is fantastic for applying highlights quickly across the raised edges of the base. Using Matt White, get some on the brush and brush some of the paint off, so the bristles aren’t too loaded.
Then, move the drybrush over the base in a single direction with gentle pressure. The paint will deposit onto the upper edges of the texture and apply a layer of highlight with very little work.
The Desert Yellow, in a dropper bottle, is also applied via drybrush. This will build texture and apply highlight and contrast as well. Finally, apply another layer of white. Be sure to keep going in one single direction each time, or the texture will be odd.
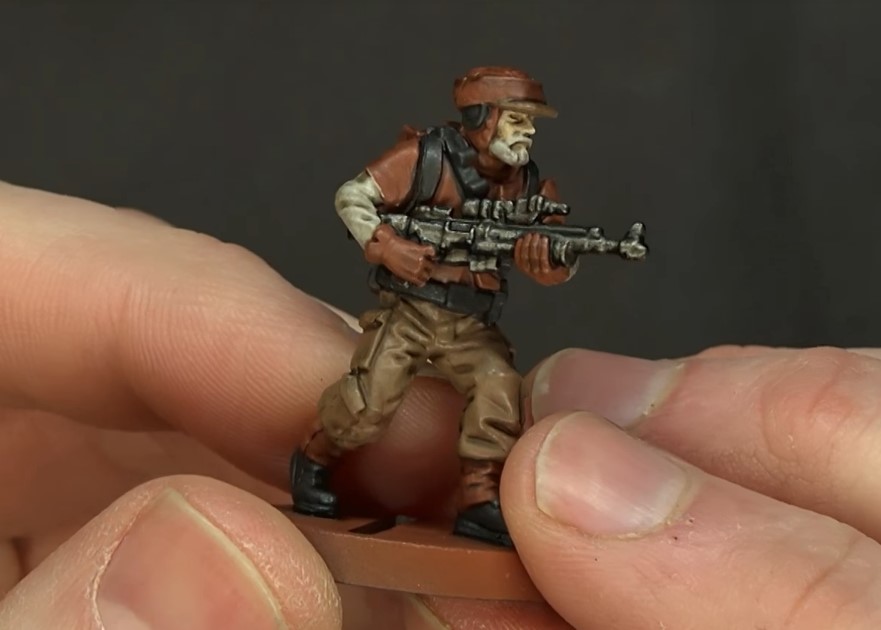
Painting Star Wars: Legion Rebel Troopers Final Step
 The easiest way to get the miniature off the previous base is to carefully use a hobby knife to slice the feet straight off the base. Press the knife against the base and, angling slightly down, apply firm pressure AWAY from yourself towards the model.
If you used a small drop of glue to apply the model, the foot will pop right off the base fairly easily. Always cut AWAY from yourself to prevent injury (stitches from X-Acto knife cuts aren’t fun). To attach the miniature to the base, use a little hobby glue.
Then when the miniature is on the base, paint the lip of the base black or brown. Seal the miniature and base with Anti-Shine Matt Varnish by the Army Painter.
Finally, add final details in the way of grass Tufts to bring out the character of the desert landscape.
There we go! Using the Army Painter system, seven easy steps to easily paint up Rebel Troopers with desert fatigues or uniforms!
What’s your favorite way to paint or color scheme for Star Wars Legion Rebel Troopers?
Let us know in the comments of our Facebook Hobby Group, and make sure you enter the latest monthly giveaway for FREE today!
Get ad-free access to our videos, a monthly crate of miniatures, and support some of the best creators out there for as little as $6 a month on Patreon!

This post contains affiliate links, as an Amazon and eBay Associate Spikey Bits earns from qualifying purchases.