 Need more light? Check out this step by step tutorial on how to build a light halo for your hobby desk so you can officially say goodbye to shadows!
For the beginner miniature wargaming hobbyist, it is very easy to head down to any local office supplies store and purchase a few desk lamps to increase the light in your new hobby workspace.
However, after learning more about painting and the importance of working in optimal lighting, those two simple desk lamps may begin to hinder your painting after some time. Any slight movement may cast a different shadow, creating room for inconsistencies in our painting, and ultimately decreasing the potential for great artwork.
After growing increasingly frustrated with the poor lighting I was using while painting, I set to the internet to find a better lighting solution. I found a few blog posts on how to build a strange thing called a light halo: an ingenious light setup that provides the ability paint with absolutely zero shadows. As a tech nerd, I looked at those plans and knew there were ways to improve on them. In this tutorial, I will walk through how I built my version of the hobby light source that truly illuminated my painting process.
Materials Used:
- 2 LED Light Strips $9.59 each
- 1 Power Supply $9.99
- 1 Y Power Splitter $5.99
- RF Controller $2.11
- 1 Aluminum Bar $5.78
- 1 Epoxy Adhesive $5.47
- Gorilla mounting tape (optional) $5.78
The first thing you need to do is to establish the size of your hobby space. My desk is a standard 4’x 3’ desk, so I wanted to illuminate as much as possible so I went to my local hardware store and purchased two, 6’ pieces of flat bar aluminum.
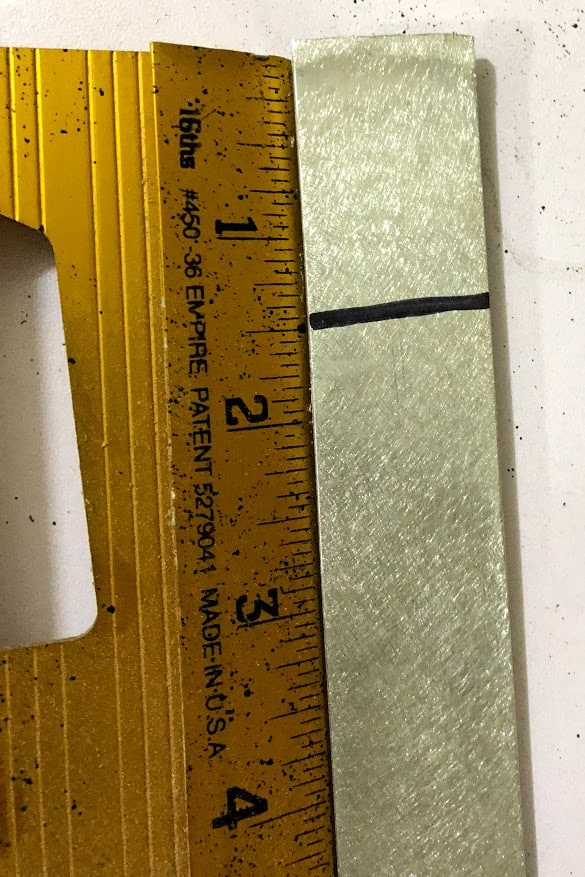
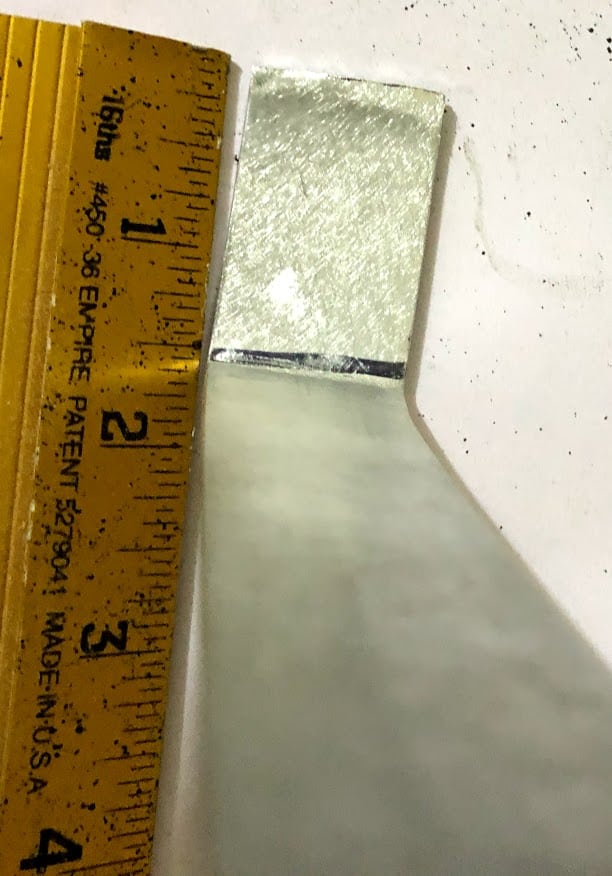
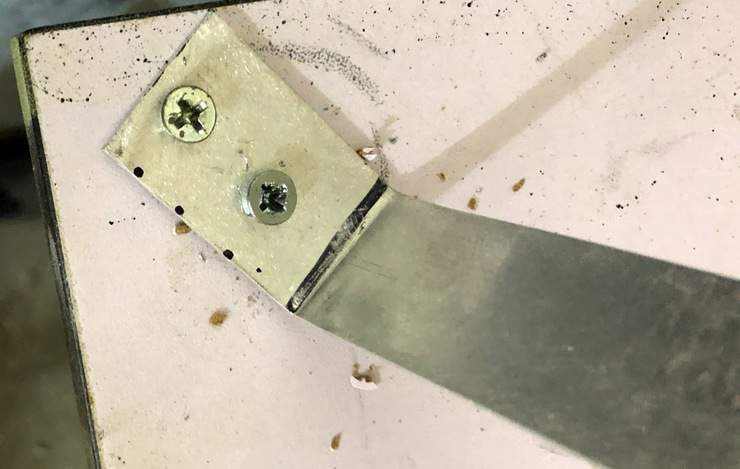
Next, take each bar and measure 1.5 inches from each end, and make a mark with a pen or marker. Use pliers to create end tabs by bending each marked end at a 90-degree angle. Both tabs should be pointing in the same direction.
After creating the tabs, you will need to decide the best option for mounting the light halo to your workspace. My hobby desk is pretty permanent so I opted to drill it into the desk I was using. If you can’t drill into your desk or want something less permanent Gorilla Brand Semi-Permanent mounting tape under the tabs will work just fine. The best practice to permanently mount the halo to the desk is to drill two holes into each tab, about a half inch apart, then drive two wood screws of appropriate length for the thickness of your desk into those holes. If you choose to use the Gorilla mounting tape, be sure to stick the tape to the bottom of the tabs first before sticking it to the desk.
Once your bars are mounted, it is time to apply the LED lights to the inside of the halo. This step must be done after mounting the bars, so the lights match the curve of the halo. The LED lights linked at the beginning of this tutorial do come with their own adhesive strip on the back, but for a stronger hold, I recommend using Gorilla Brand Two-Part Epoxy. Once mixed, apply the epoxy to the back of the strip and clamp it in place to the inside of the light bars until dry. Over time, as the lights heat up the provided adhesive eventually loses the ability to adhere. The epoxy is a great long-lasting solution.
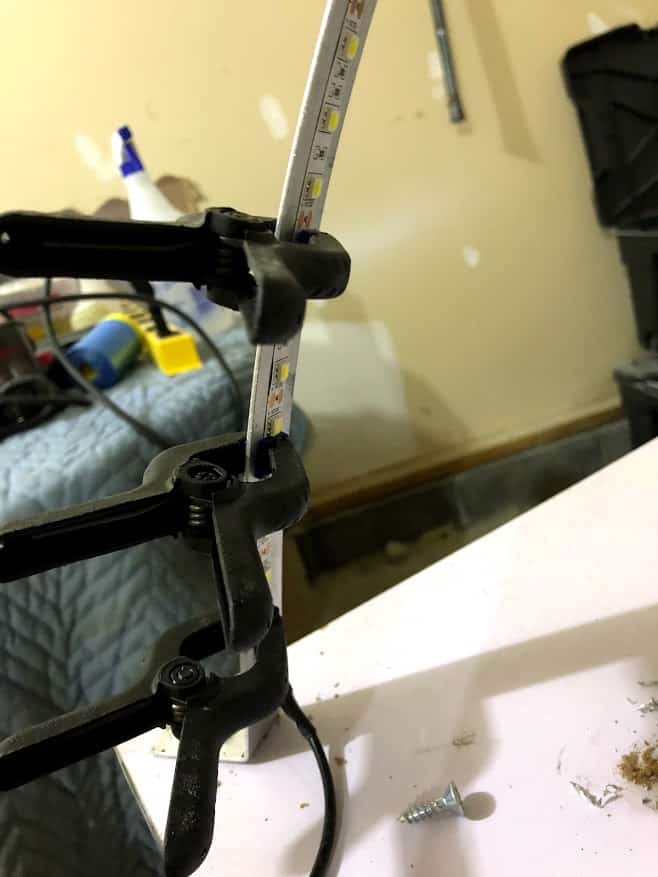
If your lights have been mounted in the X pattern, you will have some overlap at the top. Some of the LEDs on the upper ring will be sandwiched between the two bars. To prevent the lights from being crushed, I recommend putting a piece of pluck foam between the bars.
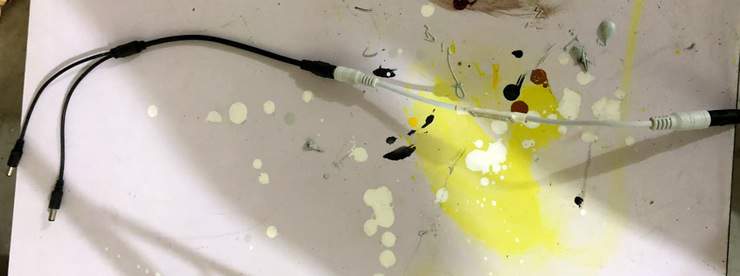
Lastly, plug both light strips into the Y power splitter and the remote control unit, then into the power supply.
Now sit and enjoy your new shadow free painting experience! If you enjoyed this tutorial and would like to see how to take your light ring to the next level, please let me know in the comments!
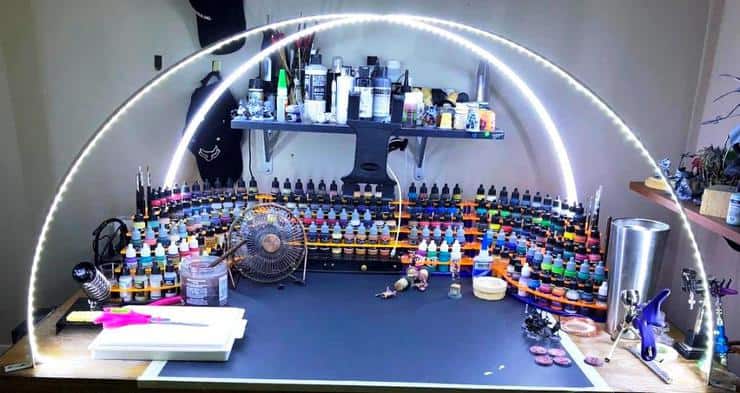
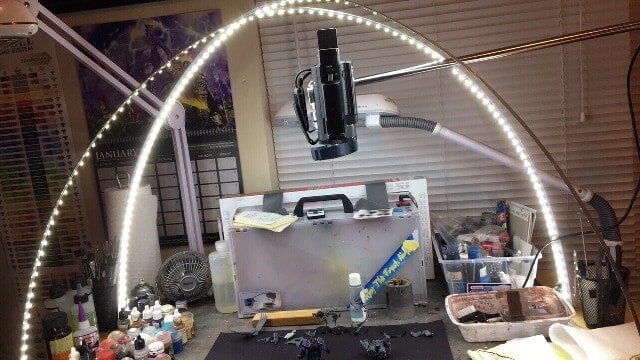 Rob’s Light Halo made by using this tutorial
Learn 3D Printing While Working From Home
This post contains affiliate links, as an Amazon Associate Spikey Bits earns from qualifying purchases.