I’m here today to talk about hobbying on a budget. There are some techniques out there that can make your models pop for cheap! Let’s look at dry brushing.
I see myself as an avid hobbyist that’s still on a tight budget. That means I don’t have the luxury of being able to afford an airbrush like you see people use in all of the Twitch Streams or Youtube tutorials. It’s frustrating to watch a video on someone painting a model you want to learn how to paint and they’re using a tool you don’t have access to.
Luckily, there are a few techniques out there to get you close to the same effect that an airbrush could give you.
Poor Man’s Airbrush: an Easy Guide to Dry Brushing

The first thing you’ll need is an old brush that has some worn-out frills. They actually make dry brushing brushes too. But if you don’t feel like spending the money, old brushes work just fine.

Next, you’ll need to get whatever kind of paint color you want. Dab A VERY SMALL AMOUNT onto your brush. Have something handy like a paper towel close by to start wiping off all the excess paint.

You’ll want the paint left on the bristles to be about like that on the paper towel before you start brushing the model. A little goes a long way. You don’t want too much on your brush and end up giving your model awkward streaks instead of that iconic dry brush look.
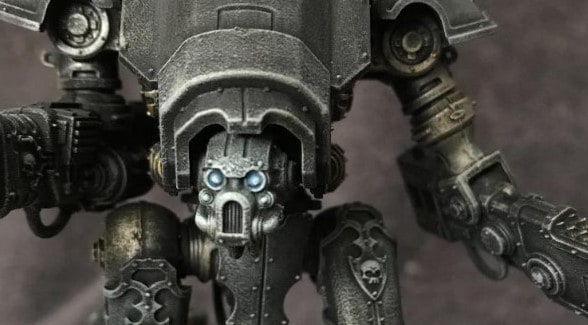
A Totally Dry Brushed Model
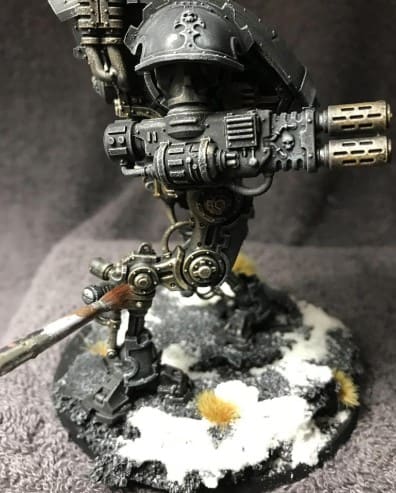
Start light and begin with the edges. You can brush the same spot longer to get a deeper coloring to the area. Here is a model that I’ve been working on. This Armiger is 100% Dry Brushed to give you an idea of the effect it has on the model.

- The model was primed black and had a dry brush of Eshin Grey over all of the armor plates.
- Then, Ironbreaker was dry brushed over the inner-metalworks of the armiger.
- After that, a very light dry brushing of Retributor Armor was slapped on over the Iron Breaker that just got put on.
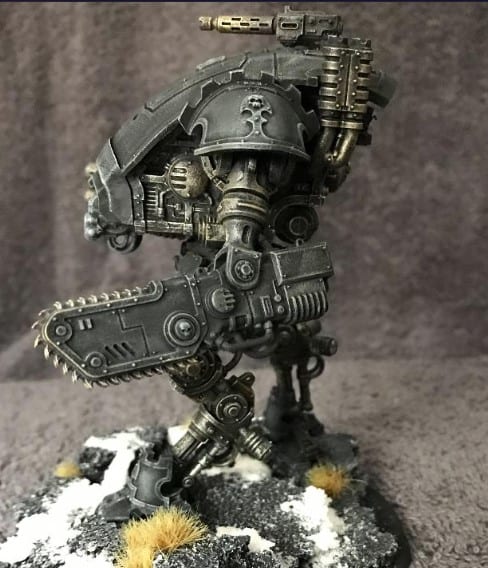
The Heavy Stubber barrel, Thermal Spear, and Chainsword teeth were all dry brushed with a mix of Retributor Gold and Ironbreaker.
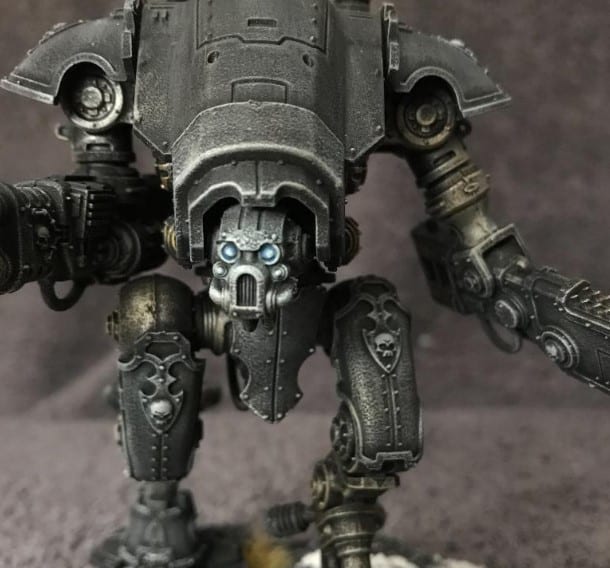
- For the eyes and glow effect, Teclis blue was dry brushed just over the eye-lenses.
- Then the blue was mixed with White Scar to get a custom bright-blue hue. That was dry brushed over the edges of the faceplate and eyes to get a “glow vibe”.
Dry brushing takes a little bit of practice at first. But once you get comfortable, you can really begin to pull off some crazy effects with a paintbrush that costs less than $1.
You can start mixing different colors together and get almost the exact same effect than an airbrush could give you with just a little bit of patience and know-how.
Have you ever experimented with dry brushing? Do you use dry brushing in place of airbrushing too? Let us know in the comments of our Facebook Hobby Group.

More hobby hacks and guides for all of your hobby needs!