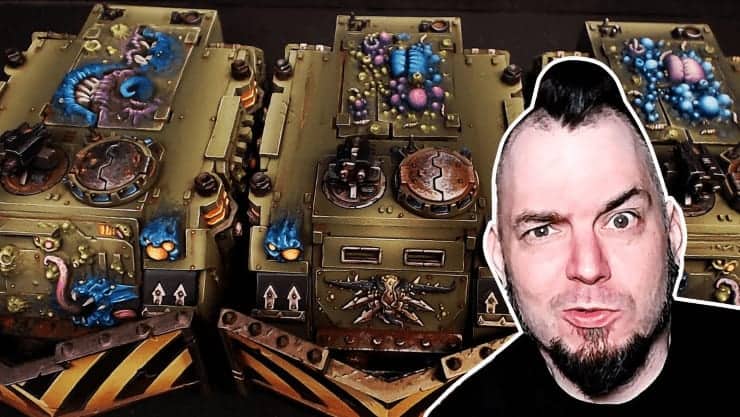
 Kenny from Next Level Painting is back to help with how to paint Death Guard Rhinos in a fast and efficient batching technique!
Today Kenny helps us tackle a bunch of Death Guard Rhinos. This video is all about getting your units to a battle-ready standard. If you want to see how to fully finish the minis off, you can go see the rest on his Patreon here! Or if you want to see his previous tutorials, you can check them out here!
He’s going to be using techniques from his awesome 101 painting curriculum, which is a set of three easy lessons to get your minis on the tabletop fast and looking good! Get your paints and brushes out and let’s go!
How To Paint Death Guard Rhinos: Next Level Painting
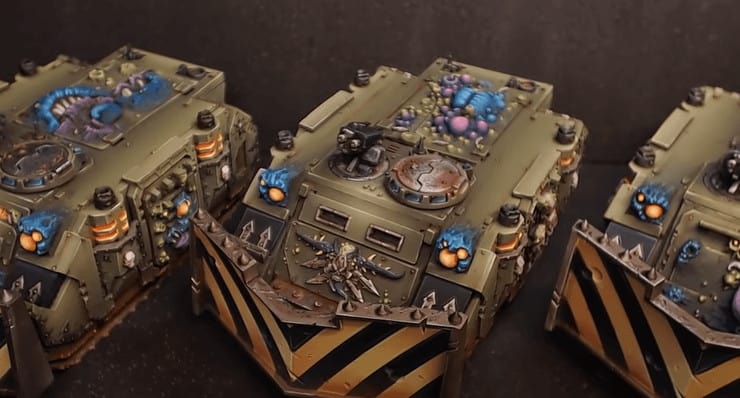 This is the goal we’re going for! Just remember though, if you want to go all the way to this level, you can watch the full version on his Patreon. The sweet tops he has for the Rhinos, which really adds a lot of detail, he got them from Spellcrow.
Priming
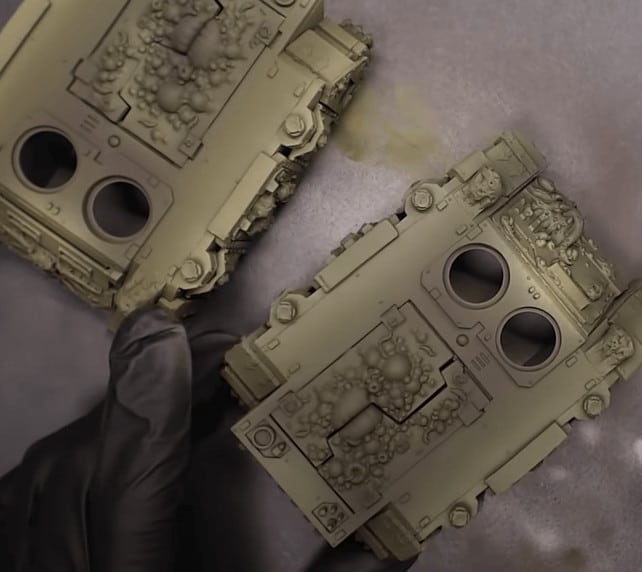 He Starts with the Monument Black Brown Primer. Then he goes back with the airbrush and lays down a layer of Black Brown on top, it’s a little lighter so gives some great shadows. Then he adds in some Yellow Green into the same mix and hits the majority of the mini but leaves some of the shadows. He then adds in more and more of the Yellow Green and does thin layers until it gets to the color he wants. Eventually working in some Bright Warm Grey.
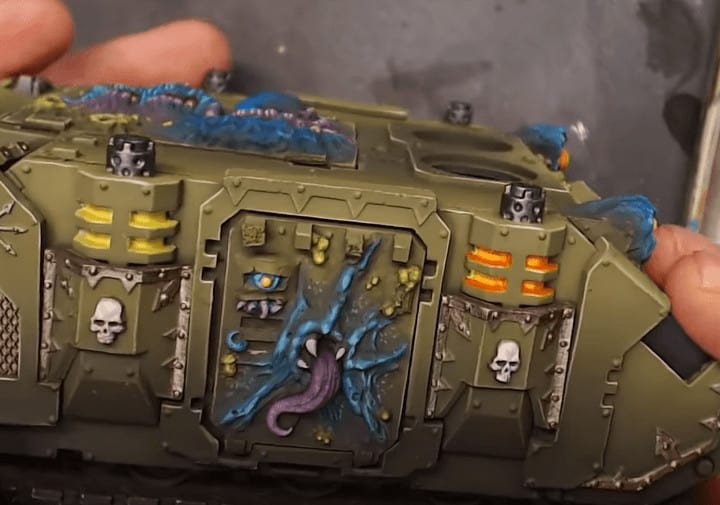
Blending
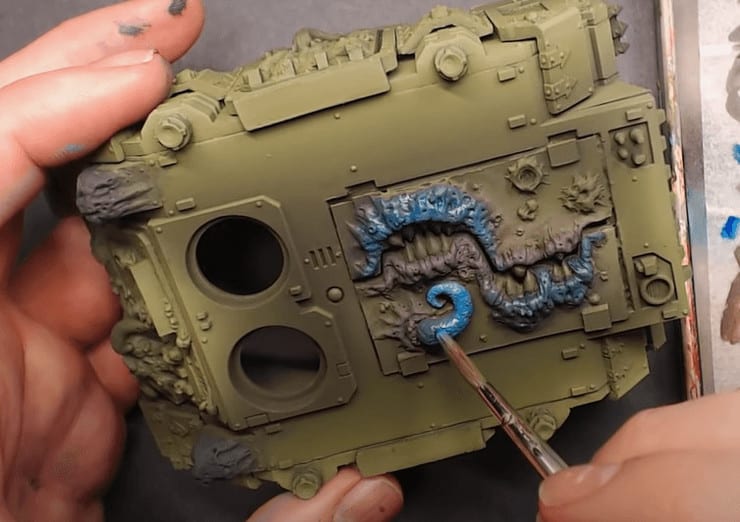 He breaks out his wet palette for this next stage. He lays down all the colors from above and some of the blues he likes, some purple, and white. First, he mixes all his colors from above and brute force blends them onto the mini on all the raised areas, like the growths coming out of the tank.
Then he starts to mix together the different colors with the brown and green and hits all the areas he wants to be more highlighted. Then does the same thing for his purple coats, with a semi-opaqueness, and keeps it very light.
He lets this creep onto the areas around the highlighted areas so it feels like they are mutated into the mini. just keep grabbing lighter and lighter layers the further you move up to the top.
 Since he’s doing three at once, this is going to take some time, but don’t rush here or the effect won’t come out correct. If you find your paints are too wet, you can take a paper towel to get the excess off. To get the details even better, he then switches to a more normal edge highlight style.
He does this for the lightest colors and hits the topmost parts of the growths. For the purple areas, he adds in some thin red, which dries more like magenta, with a pin wash technique and uses this to lay down the shadows and tie the growths into the armor more.
Finishing the Top Off
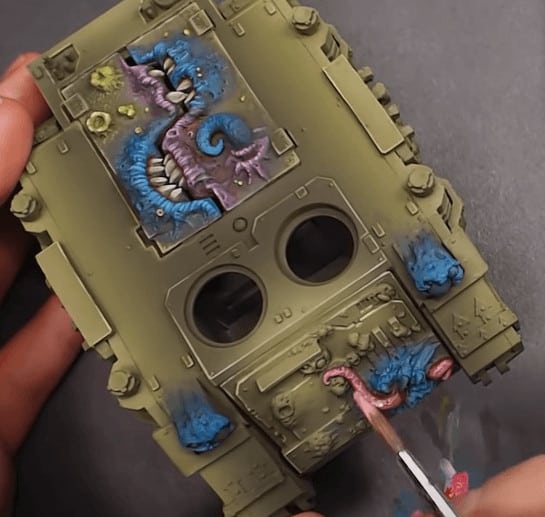 He mixes some yellow and brown for the first coat. Then he just adds lighter and lighter colors as he goes higher and higher into the highlight process. He uses Ivory to make his lighter, but you could always use white if you want. For his brightest highlight, he goes to the Ivory and does a nice edge highlight here. Next, he hits all the boils with some brighter yellow-green to make it stand out.
To finish this stage off, he does an edge highlight all around the sharp edges to just make them stand out a little more. If you want, you can also stipple around the edges to give it that little extra oomph.
Hitting the Other Details
 For the metal, he throws down some silvers onto his wet palette and hits all the armor with a few quick coats. This part is super simple, just make sure to get good coverage with a color mix you like. He lays down the same colors on the skulls with the same paint he did for the teeth. Next, he wants to do some flame-style color on all the lights and exhaust ports.
He first lays down the white, then hits the whole area with yellow. Next, some orange and borders the areas with yellow. While it’s still wet he adds some of the yellows back in to blur the lines together and give it that flame feel. It’s all about having it blended.
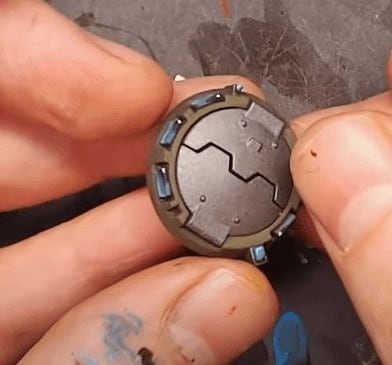 For all the extra features on the Rhino, like the guns, he paints them separately. He starts off with dark silver and paints the trim black. For the lens, he does a quick lens effect. Start with a dark blue and go lighter towards the bottom corner. Then he mixes some black into the top corner down all the way to white in the bottom corner.
Washing
 He uses The Army Painter Dark Tone and washes all the nuts and bolts, not all the silver trim. Next, he breaks out the Mister Hobby Oil Wash. He puts that on where he wants there to be rust, then takes their solvent and does straight brush strokes all in the same direction. This will make it look like the wash is running down the mini.
Weathering
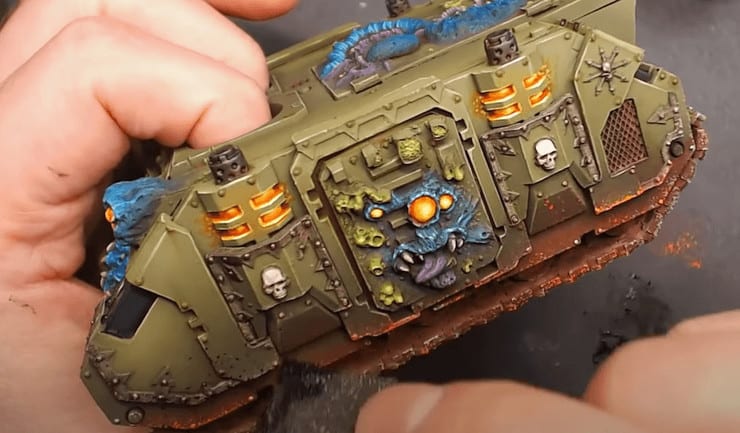 He breaks out some 99% Isopropyl Alchohol and some Brown Pigment paint. He mixes them together and hits all the treads. Once that layer is on, he then goes to just the straight pigment paint and does another layer on the treads.
Next, he takes some stock metallics with a sponge and hits the bottom of the treads and lower sections of the tank. He just speckles this on until he has the weathering effect he wants. To finish it off, he takes some orange and then black and hits over the same areas with the sponge as he did with the metal.
Finished Tanks
If you want to see how to take it to the next level with all the highlights and how to paint the dozer blades, check out Kenny’s full video on them on his Patreon!
Join The 101 Painting Curriculum From Kenny
This post contains affiliate links, as an Amazon Associate Spikey Bits earns from qualifying purchases.