 Every Ork pilot wants “more dakka” on their Dakkajet and the rules allow for it, but there’s no standard way of doing it in the kit.
Once again, it’s up to us Meks to come up with a way to squeeze an extra pair of guns onto our models.
I’ve seen people do this a number of ways, the simplest being to use the wing root extensions for the other Ork Bommer kit variants that allow you to easily attach another pair of guns.
Another is to put guns in the intakes for the smaller side engines, but I consider that aviation heresy! Personally, I didn’t care to take either of these routes for my own Dakkajet. I didn’t want to increase the wingspan of my Dakkajet and being a bit of an aviation buff I definitely didn’t want to plug up the engine intakes with guns as that just destroyed their look for me.
So I came up with a simple conversion solution of my own that also had the added fun of making mine a bit unique.
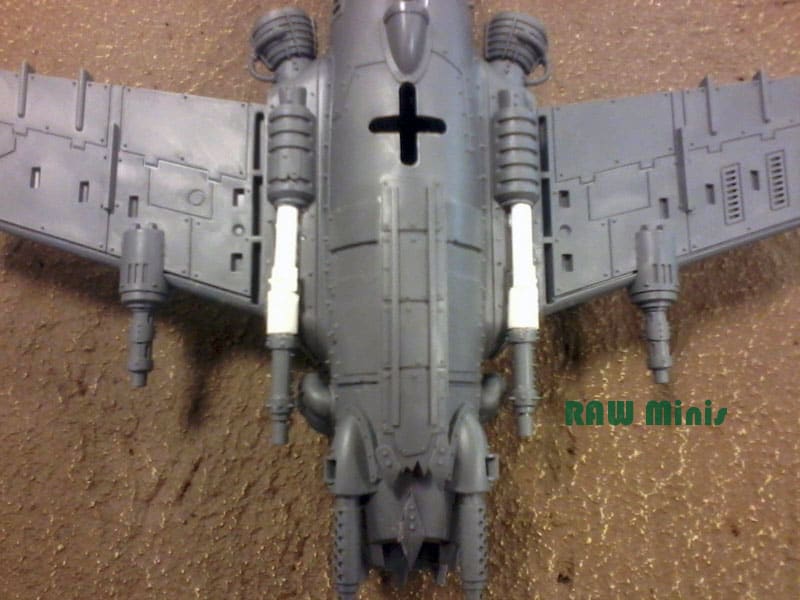
My first step in this conversion was to glue the basic wing roots, the ones used on all the kit variants, upside down relative to the instructions. This had a number of desirable advantages. First it allowed my wings to angle upward. Second, it put those nice little lightning bolts that appear on the wing roots on top of the model instead of on the bottom. Third, it left the two drum-like features on the bottom. Since those drums are not used in the exhaust system for the Dakkajet variant it allowed me to use them as ammo drums for my extra pair of guns.

The next thing to do was to build extensions from the ammo drums to the base of the guns. I did this using some plastic tubing. Evergreen Scale Models and Plastruct both sell plastic card, rods and tubing for hobbyists.
They are essential supplies for a lot of scratch building and converting. On top of parts of the tubing near the gun root I added some hand cut plastic card plating and rivets. This gives the plain tubing a bit of texture and detail as well as reinforcing the attachment of the guns.
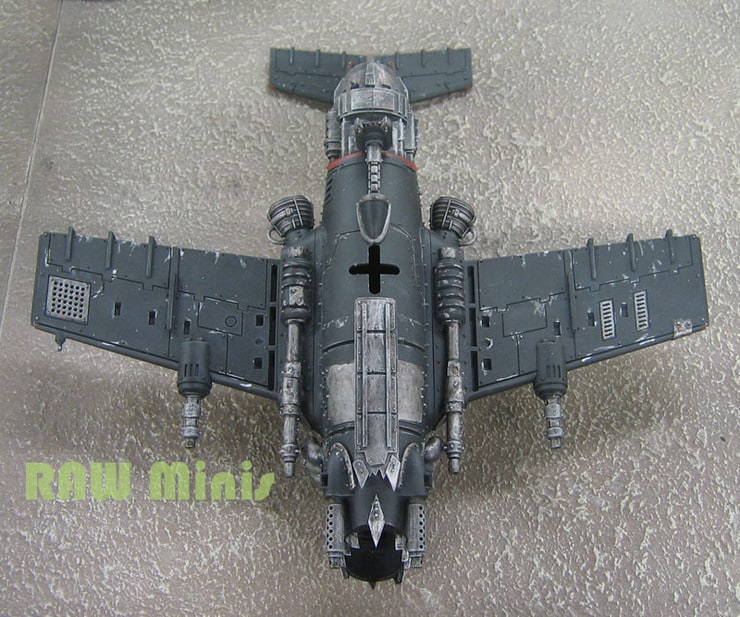
This first photo below shows the conversion work before painting while the next photo shows the same conversion work after painting. I kept the painting on the underside of the model fairly quick and simple, after all, it’s not going to get looked at very much and I’ve lots more models to paint.
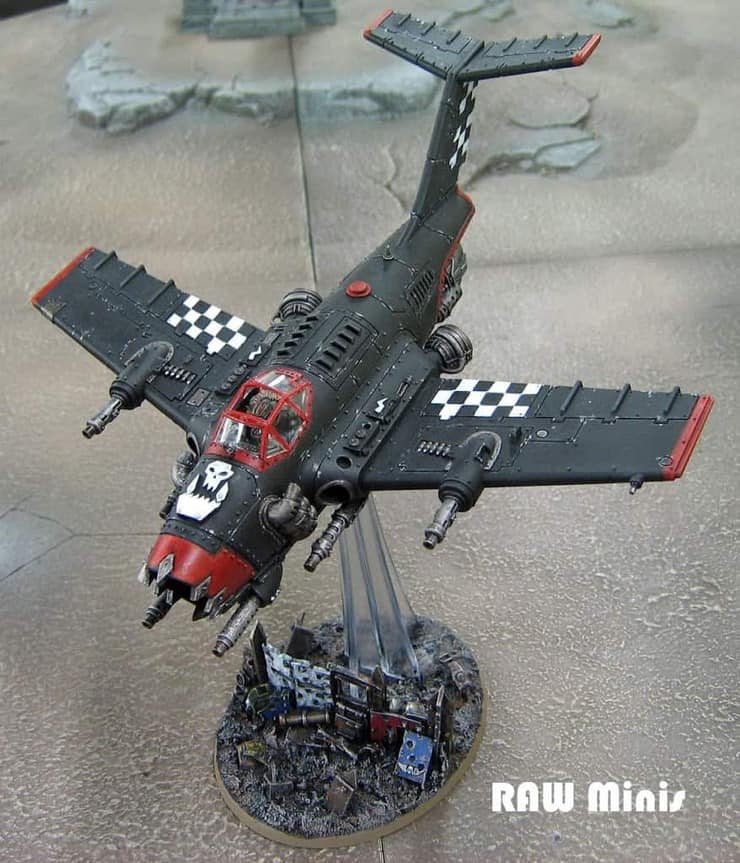
The photo below shows the finished model. Unlike the underside, more significant time and effort went into painting the more visible parts of the model. There are hand painted checks on the wing flaps and rudders and “go fasta” red stripes on the wing tips and horizontal stabilizers.
Much of the edging between plating was accentuated with what appear to be scratches and weathering rather than traditional edge highlighting. All my 40K flyers have scenic bases as the large bases are a great palette on which to add features that complement the model sitting on top of them.
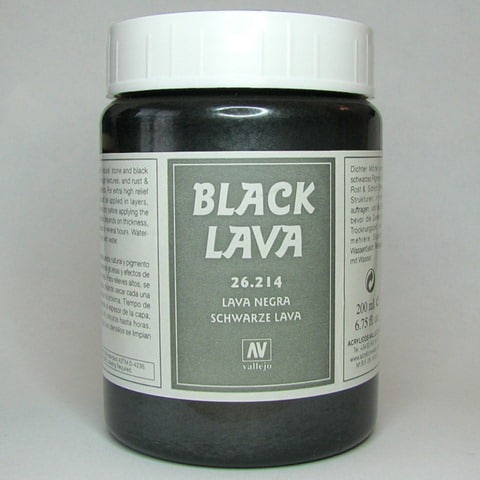
This one was decorated with part of an Ork Barricade and some off cut bits from various GW kits. The texture on the base was done with Vallejo Black Lava textured paint.
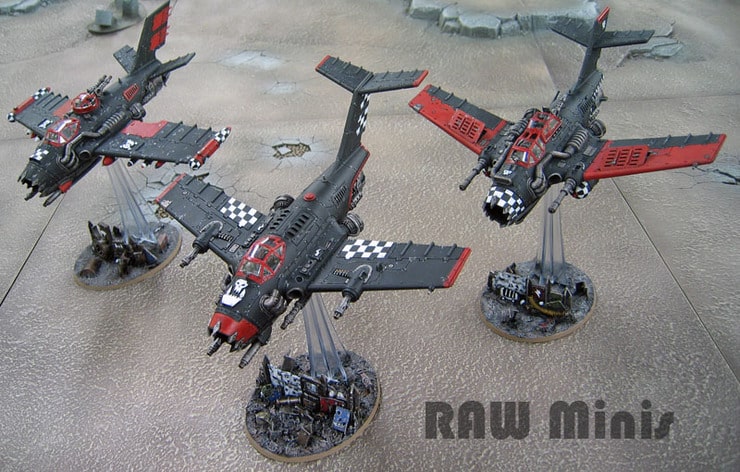
In my opinion the Ork Bommer model is one of the most exciting and versatile kits GW has produced in a long time, so I also built and painted a Burna Bomma and Blitza Bomma as I wanted one of each variant. You can see my whole Ork Air Force “flying together” above.
This is my second appearance on Spikey Bits counting the recent article on my Khorne Helbrute conversion. and I will be contributing regularly to Spikey Bits starting with this article. Till next time, keep building and painting!
Trivia Question: Of all the silly, fun and implausible features of the Ork Bommer kit one feature is blatantly superfluously Orky. Which modeled feature is it? Hint: What makes it go? I’ll post the answer in the near future in the comments below if no one gets it.