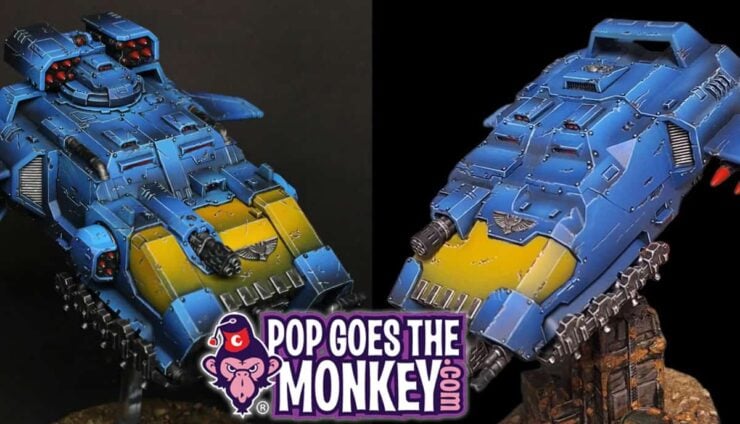
 There is a huge market for wargaming miniatures such as Warhammer, and we show you how to design and 3D print your own custom models like a pro.
Given the current state of the world during quarantine, you may have gotten into 3D printing. Even when you’ve got your equipment all set up, there’s still a learning curve to get through when it comes to taking your ideas from paper into real life.
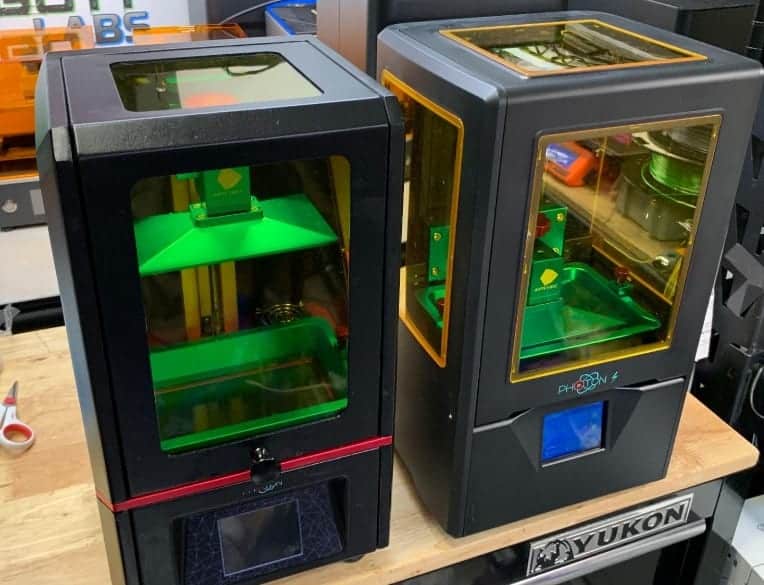 ANYCUBIC Photon UV LCD 3D Printer (left) and Photon S (right). Image the SLA channel
This was a guest post we published a few years back, by then Shapeways’ Community manager Andrew Simon Thomas. As we mentioned, Shapeways is an online consumer printing service and marketplace, that has been a popular destination for bits and we were psyched when they rolled out some how-to tutorials– like this guest post on how to create your own miniature.
Whether you want to use your own shiny new 3D printer, or Shapeways to make your ideas come to life, this tutorial should help. Maybe you’ll even want to sell your creation to other interested hobbyists as well… Hopefully, these tips will be helpful in getting you started!
If you want to see more about printing models yourself at home, we did a great video recently on that as well:
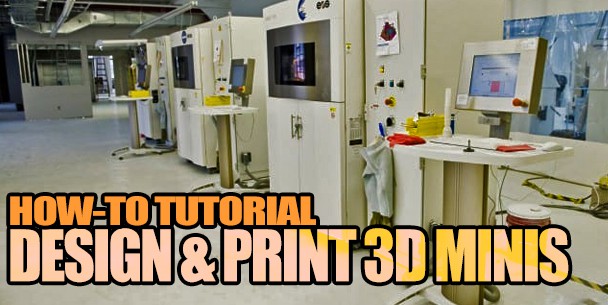
How to Design & 3D Print Your Own Custom Miniatures
Buckle up because this post is going to be packed with steps. We are going to break each main phase down so it’s a bit more palatable but if you’re going to read all of this from start to finish, you may want to grab a coffee.
First, we’ll focus on planning and getting familiar with Blender. Later we’ll refine the design using Meshmixer, Sculptris, Blender (again), then upload your file for printing.
You may want to download each program now using each of the embedded links.
Remember 3D designing is always a learning process. This tutorial is about learning these new tools and the process for making a miniature, but there are other tutorials out there that will teach you the ins-and-outs of the programs themselves. If you make a mistake, you can always use the undo button (control z for windows, command z for macs) and remember to save often in case you need to go back. Take it easy, be patient, and have fun!
Taking Your Ideas & Making Them Reality
 1. Look at inspiration: You likely already have a character created for your campaign, and if you’re a talented artist, you may have a drawing ready to go. If not, scan for cool source material in your favorite movies, shows, video games, or comics. Unless you plan to sell your miniature. Otherwise, all these forms of entertainment and other artists’ work are all fair game, but it’s a lot cooler to use these as points of inspiration rather than just straight copying your favorite characters.
 2. Start with a sketch: Draw a picture of your character. Andrew drew on gridded paper to help keep the proportions consistent. Draw out as many sketches as possible to help predict the maximum amount of design considerations before moving on. Don’t worry if drawing isn’t your thing. Try your best, and be specific about the look of the body, clothes, and gear. By making important design decisions early, you can avoid having to restart your design from scratch.
 3. Open Blender and start by updating the user preferences: If this is your first time using Blender, don’t be intimidated by all the buttons. We’re only going to use a small portion of what Blender can do. First, we want to change a few preferences to make things easier. Go to User Preferences and change the select to be the left button click. If you’re on a laptop make it so that we’re using the number keys at the top of your keyboard by checking Emulate Numpad.
If you want to really dig in and learn everything Blender has to offer, check out Andrew Price’s free YouTube tutorials.
 4. Import your drawing into Blender to use as a reference for your miniature.
Hit N on your keyboard to open a new panel menu. We’re going to call this window the N menu for the rest of this tutorial as it’s pretty useful and we’ll be using it often. First scroll down, check and open Background Images, hit Add Image, click Open, find, and double click your image file.
 Now you need to put the image into the scene. To do this, go to the Axis drop-down and select Top view, then hit 5 and 7, which makes the image visible in the background. Hitting 5 allows you to toggle in between perspective and orthographic mode (showing objects without perspective, making it easier to judge sizes and relationships of objects). Clicking 7 shows the image from the top.
 I also make the image transparent by lowering the opacity to 0.25. Then I select Front to ensure the image sits over the objects in the scene so both are visible.
 Finally, slide the image over—you’re going to do this by using the number counters in the gif above. They’re the number counters directly under the sketch, fit, and crop buttons.
5. Thinking symmetrically: Time to start blocking in all the body parts. Start just with the forms that are in the center of the body and work outward. Going up from the pelvis, up to the chest and then the head is a safe bet. For the limbs, only work on one side of the body. You can always mirror the other half later.
Start by Blocking in the major shapes: Using the sketch as a guide, take the default cube that blender opened with change it by using transformations to have it fit the sketch.
There are three ways you can transform an object: move, scale, and rotation.
 To scale, you have two options. With the first option, you can hit S on your keyboard and move your mouse to scale in all dimensions or hold the center mouse button to choose just one. The other option is to use is to scale each dimension on the top of the N panel menu. Transforming this way is nice because it gives me some values to know exactly how much you alter it. You can transform the location (move) and rotation in these ways as well.
 Let’s start by sculpting the pelvis. To do so, scale the X and Y and then move the view (hold the middle mouse button or MMB, and scroll. (See this page) for instructions on how to emulate an MMB with 1- or 2-button mouse designs). Do this so you can see the other side of the cube and change the Z dimensions.
 Now for the chest. Duplicate the box we used for the pelvis by pressing Shift and D. Then click without moving the mouse. You want it to stay perfectly in line with the other box so all you need to do is move it straight up by clicking the green arrow on the transform gimbal and dragging up. Then all you have to do is rescale it to fit the dimensions of the chest area.
 Repeat the process for the head. Make sure to scale it down so that it is about the depth of his neck.
 Next, make just one of the arms. Hit Shift and A to open the menu to add new objects to the scene. Go to Mesh, choose an isosphere (one of the present options called primitives) and it loads at 0, 0, 0 in the scene. I scale it down to the appropriate size for his shoulder.
The isosphere, the cube, and other shapes are called primitives, they’re the simplest shapes we can use but we’ll be changing them to be a little more complex with just the primitive shape, using cubes and spheres. I scale the sphere down and move it upwards to become his shoulder.
 Now, duplicate the chest, move, and scale it down to create the upper arm. Remember to always rotate the view with the middle mouse button to check the size and location from all angles, sometimes it’s hard to really know just from one view.
 For the lower arm, you’re going to make it a bit larger because it will turn into his gauntlets later on. An important key to remember- make the primitives the max size they need to be because as you make detail you’ll generally be shrinking the shape.
 Then you’re going to select both parts of the arm and duplicate them. To select multiple objects hold Shift and left-click (deselect the same way). Duplicate the part by hitting Control C for Windows or Command C for Macs.
 You can also rotate the larger block and turn it into the thigh. Rotate by hitting R and dragging the MMB or by imputing the degree of rotation in the N menu. Once they are rotated 90 degrees, move them into place based on the image.
 Finally, duplicate the lower leg, move, and scale it to be about the size of his shoe. You should now have a nice block man ready.
Refining the Shape of Your mini
 6. Refining the forms: Now add a subdivision modifier to the primitive that represents the chest. You can do that on the rightmost menu by hitting the wrench icon and selecting “Modify” from the dropdown menu. Andrew chose the subdivision surface. The number of faces on the primitive will increase, causing the shape to appear smoother. By selecting View you can adjust the level of smoothness, but for now, you can just keep it at level one.
 Now, go into edit mode by hitting Tab on the keyboard and you’ll see the overall shape along with the subdivided version. A menu will appear on the left side of the screen with options on how you can edit the mesh, open the topmost Tools tab. In the 3D view, notice that each subdivision is averaging out the points between vertices, smoothing the form. This is a super useful way to add detail but keep the forms flexible as you iterate.
On the left side of the screen, you’ll see that the menu has changed to a bunch of options related to edit mode. Click Loop Cut and Slide to add a new line into the model. Click once near an edge to add the loop, then move your slide up and down with your mouse and click again to set the location. Notice that as you move it around, it changes the shape of the model based on the subdivisions.
Add the new Loop cuts to the locations where you want the shape of the object to change. Think of the lines as defining where the top of a mountain, or bottom of a valley would go. Moving the lines closer to the edges makes the corner sharper, and moving it away makes it softer. This is an easy way to quickly get closer to the shapes of the body you want to make. Take your time with these and hit undo (control/command z) if needed.
Shaping the Torso & Hips
 Once the Loop Cut is in place, switch to selecting vertices and start selecting the points to move them around. Again, this changes the shape of the part.
 Through this process, you’re just adding loops to add more vertices to move. Keep the number of cuts down for the sake of simplicity to change the form. Try to make the most out of each vertex moved, and only loop cut again once you have put all the available vertices where you want them to go. Loop cuts are powerful but be sparing with them. The more you add the more limited your control. You can always hit “undo” (Ctrl Z) if you didn’t get it right the first time. Switch between selecting vertex points, edges, and faces by clicking the icons on the bottom toolbar.
 Next, move onto the pelvis. The goal with the pelvis is to make it clearly shaped like the hips, which you can visualize as looking like a bag tipping forwards.
 Each time you move to a new part you may want to add the subdivision modifier, move around the vertices to change the shape, and, as needed, create new loop cuts to have more points to refine the form.

 TIP: You can select or deselect multiple points by holding shift, and you can box select them by holding Shift and B.


Shaping the Arms & Neck
 On the arm, add a loop cut near the inner side of the glove to give it a harder edge.
 Then Andrew selected the face and click insert faces from the add section of the edit mesh menu to create a new face in the center of the other one. Once it is in the right spot, hit Extrude (under Add on the edit mesh menu) to push a new face inwards. This will give the glove a sense of thickness and make it feel like the arm is going into it.
 Finally, tweak the neck so that it tilts forward towards the chest. I’ll add the actual head later in Sculptris.
 7. Duplicate and Mirror: Duplicate the arms and legs and mirror them to the other side. In the Object menu, select all the objects that make up the right limbs and select Duplicate Part ( can also use Shift + D), but leave it where it is. From the same menu, choose mirror and select across the X-axis.
 Now that the parts of the limbs have been mirrored, you’ll need to move them into the right place. You can do this by guesswork, but if you want it to be perfect, you can do some very simple math. Selecting the objects shows you their location in the N menu. By comparing the locations values at the top of the N menu I make them the same number but opposite value in the X-axis. To do this, simply copy value the X location of the right arm and paste it into the location for the left arm, but change the negative value to a positive so that they are in exactly the same place but on the opposite side of the X-axis (change +1.25 into -1.25). Repeat this for each part that was mirrored.
 8. Posing the Character: We’ve been working in a T-pose, but now it is time to give this dude some energy! Andrew used that annoying little circle that moves everywhere (it is actually called the 3D cursor) to set the pivot.
 You’ll need to set the pivot as close to the “base” of the body part so that it rotates and seems to still be attached to the body. To do this we need to switch to rotate by the 3D cursor, use the dropdown right beneath the 3D view area. Then click near the should to set the pivot point, and rotate in each dimension until you’re am happy with the results.
 When you’re working on the legs make sure to select all of the parts of the limb and work from the hips first. Only after you’re happy with the whole legs position should you move to the knee and give it a bend. Next, move the foot at the ankle so that it is parallel to where the ground would be. Sometimes the rotation isn’t perfect, so you have to move the parts into place. That’s ok, just switch back to the transform gimbal and slide the parts around.
 9. Repairs, and Prepare to Sculpt: If you mirrored parts as we suggested in this tutorial, we need to get them all to be “right-side in” before you import your model into Meshmixer. This is because when we mirrored those parts, it also turned the direction the face goes (called a Normal) inside out. If you didn’t mirror any parts, skip to just exporting.
For those that mirrored, select all the faces on a part in edit mode (Tab) and select the Shading/UVs tab on the menu. With faces selected under Normals, you can click “flip direction” This should turn the selected parts a darker color. Do this for each of the parts you’d mirrored during your design.
Once done select all of the parts you want to export, head to File, and choose Export as an obj. Make sure you click the checkbox for “selection only”.
 10. Import into Meshmixer: Next I need to solidify the mesh to make it easier to work within Sculptris. To do this Andrew imported the repaired model into Meshmixer and go into Edit mode. Andrew chooses to solidify and makes sure he’s pleased with the settings. This will make it so that all the parts get combined into one large mesh, easier to sculpt. Once you’re done, export as a .obj again.
Putting in the Fine Details
 11. Sculptris and beyond: Open Sculptris and import the mesh you’ve solidified here. Sculptris is a cool program because you can treat the 3D mesh as if it were a piece of clay. Digital sculpting is similar to traditional sculpting in that we’re no longer following a step by step system for making adjustments, but going by “feel” and making incremental changes. Take your time and have fun with it. Remember to work from largest to smallest forms (start with the whole finger before the fingernail) and save early and often so you can go back if you don’t like what you’ve done.
This is all done using primarily 4 tools with a variety of settings.
Tools settings: Every tool shows a “radius” by which it will affect that portion of the mesh. We recommend starting large as possible and working down to the smallest as you resolve the parts of the sculpt.
Strength: This is how easily you’ll affect the mesh when you use a tool. We recommend starting stronger and making bigger changes in the beginning, then refining as you go. Remember most of this process is iterating, you’re making a decision and then refining it (or fixing totally necessary mistakes as you go. Hold Alt on your keyboard to switch from adding to subtracting.
Draw: This allows you to add or remove the thickness of the materials. This is great for when you’re building up new forms and maintaining the integrity of older ones.
 Inflate: To enlarge or shrink areas of the mesh. This is similar to draw but it enlarges the space rather than adding onto it.
 Flatten: Very useful for making areas smoother and adjusting the surface.
 Smooth: Sort of a 3D version of erase, it evens out the mountains and valleys on the surface of the mesh.
 Crease: This is really useful for drawing lines and indents into the mesh, think of it like drawing a pencil across clay.
 Move: Grab a part of the mesh and shift it over. Nice for making big changes to the mesh.
Throw on a Base
 12. Add the accessories: Now you’ve got a sculpted figure with some details and personality. Finish him with some bits and accessories. First, add a base (Shift+A) by creating a cylinder, scaling, and moving it into location.
 Then give him a shield so he can protect himself. For shields, use the base to start. Duplicate it and move it into position.
Designing the Weapons
 Inset the front face and extrude inwards so that there’s a lip around the edge for more detail.
 Andrew added some torus, which is a donut shape-like loop to act as straps so that it looks like the shield is attached to his hand. Again, he wanted them to overlap but not so much so that the straps stick through the other side of the shield.
 Finally he added a box to create the sword. From here, scale it down so that it’s the correct size. Then duplicate the box and rescale it to be the hilt.
 Andrew adds a subdivision surface modifier (see Refining the forms from earlier if you haven’t) to each to give it some more shape. Add more loop slices for good measure.
 I move the vertices on the end of the sword to make the pommel and move the whole sword into position.
 13. Upload and print! Now you’re ready to export the model and upload it to Shapeways. Just head to Shapeways.com and log in (create an account if you haven’t already!). Hit upload and select millimeters as your scale. Once the model has been uploaded, you can always rescale it if you think it’ll be too big or small for your printer.
 Now you’re ready to order your mini on Shapeways! A typical 28mm scale miniature will be about $3 to print in white strong and flexible nylon (good for prototyping) and $10 in FUD and BHDA (the ideal materials for painting miniatures).
Thanks for sticking with us in this step-by-step process of turning your ideas into reality. Hopefully, this has been helpful to up and coming 3D printing artists!
Editor’s note: another great resource is the YouTube channel Maker’s Muse, that dude is legit and knows the ins and outs of 3D editing and design.
Essential List of 3D printing Hobby Supplies & Products
What was your first 3D printed mini? What kind of 3D printer do you have?
Let us know in the comments of our Facebook Hobby Group, and make sure you enter the latest monthly giveaway for FREE today! You can also support us on Patreon and get ad-free access to the site, plus a ton of minis that helps support some of the best creators out there!