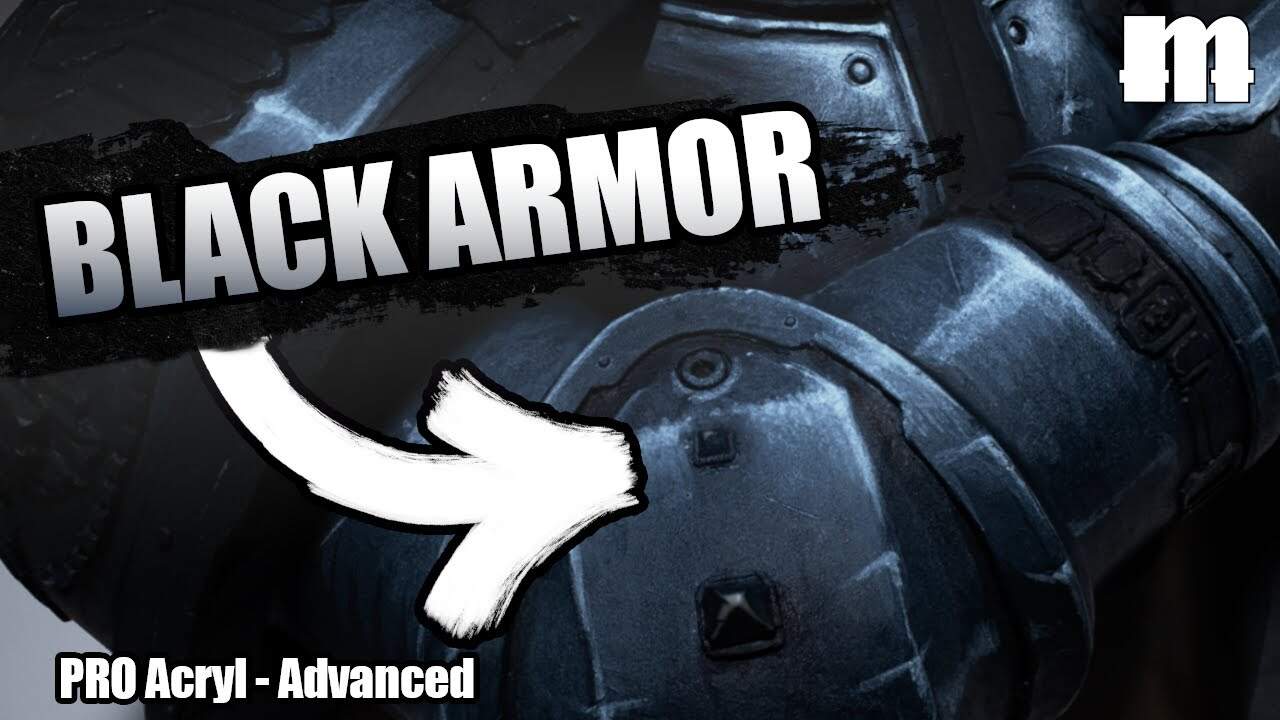
Skip the boring bits and learn how to paint black armor for 40k miniatures using bold colors, NMM tricks, and just enough shine to turn heads.
Tired of your black armor looking like you just forgot to highlight it? Let’s fix that. In this guide, we’re skipping the boring gray-on-gray routine and jumping straight into how to paint black armor in 40k that actually pops. Luckily, there’s a method from Monument Hobbies that actually works, and it doesn’t involve guesswork.
We’re talking rich purple shadows, cold blue highlights, and non-metallic metal tricks that’ll make your minis look sharp enough to cut through a plasma blast.
Grab your Payne’s Gray, white blue, and a brush with a point—this is how you make black armor shine without a drop of metallic paint.
So You Wanna Paint NMM Black Armor, Huh?
Let’s talk about one of the most deceptively frustrating things in miniature painting: making black armor look shiny without using metallics. You’d think black would be easy. Just slap on some black paint and call it a day, right? Wrong. So very wrong.
Now let’s get you out of that club with some actual useful steps, a few weird color choices, and maybe a little bit of magic (read: patience and glaze water).
 Before we start, this tutorial is from Monument, so all the paints used are from them! So be sure to snag any of the linked paints in the video and give us a high-five in support! Every qualifying purchase helps Spikey Bits keep the lights on and the fun going.
Why Painting Black Is Hard
 Here’s the catch — black is actually just very dark gray in miniature painting. Why? Because without strong contrast, black armor turns into a flat slab of sadness. What you need is bold shine and interesting shadows to fake that glossy, hard surface that catches light just right.
This is where non-metallic metal painting comes in. You’re using matte paints to create the illusion of light bouncing off a reflective surface. And when you get it right? Chef’s kiss.
Step One: Go Purple or Go Home
 Start painting black armor in the shadows, and make them interesting. Grab a dark purple — something rich, not cartoony. The goal is to have a cool shadow that isn’t just a lifeless void. Purple adds depth without screaming, “I’m painting a grape.”
Use it only in the recesses and the deepest parts of the armor — under shoulder pads, along panel lines, under the pecs. Don’t overdo it. You’re seasoning, not saucing.
Step Two: Payne’s Gray
 Now that your shadows are vibing, it’s time for the real MVP: Payne’s Gray. This color is the reason black armor can actually look like armor instead of a black hole. It’s blue-ish, it’s classy, and it lays the foundation for the reflective qualities we’re aiming for.
 Brush this over the rest of the armor, leaving the purple alone. You’re building your midtones here — the part of the armor that’s “black” but also reflecting just enough light to have form.
Step Three: Add Some Ice
 Now take that Payne’s Gray and slowly start mixing in a white blue paint. Not sky blue, not neon pool party blue — something pale and cold.
Add a touch of this to your Payne’s Gray and start finding where the light hits — tops of shoulders, biceps, helmet crests, etc. Use broad, sketchy strokes at first. Don’t worry about blending yet; we’re just figuring out where the shine should go.
Step Four: Punch the Highlights
 Here’s where you take that white blue and stop thinning it so much. Maybe just a dab of water — this needs to pop. Carefully dot or line the brightest spots where the light would reflect the strongest. Think: edge of a shoulder pad, crest of a knee, center line of a curved arm.
You’re not highlighting everything. You’re adding strategic sparkle. If you do it right, these tiny spots of brightness will make the rest of the armor look even darker. It’s sorcery.
Step Five: The Magic Wash
 Now that everything’s looking shiny but maybe a little too blue-gray, it’s time to drag it back into black armor territory. Mix a bit of black wash with a small amount of Payne’s Gray (or water down some Payne’s Gray paint) and glaze it over the whole thing. Yep, even the highlights.
The goal here isn’t to shade — you’ve already done that. The goal is to tint everything back toward black without killing the contrast. Think of it like putting a pair of sunglasses on your armor.
Do a pass. Let it dry. If it’s still too blue or too bright, do another. Just don’t rush it.
Step Six: Bring It Back
 After the wash, some of your highlights will be a little muted. Perfect. Now you can go back in with a tiny brush and re-hit the brightest points with your white blue, carefully. Less is more.
These little punches of light now have a darker background to bounce off of, which makes them sing. With that, you pretty much have 40k painting black armor down!
Bonus Round: Texture & Scratches
 If you’re feeling fancy (and we know you are), you can add tiny scratches, edge wear, or subtle stippling. Short, controlled lines in your highlight color can mimic surface wear. Just don’t go full spaghetti noodle with the brush — keep it deliberate.
These textures help sell the material. You’re not painting latex. It’s armor. It should look like it’s seen some things.
Final Thoughts on Miniature Painting Black Armor
 Painting NMM black armor is like learning guitar solos — frustrating at first, but incredibly satisfying once it clicks. The trick is knowing that black isn’t just black. It’s purple shadows, bluish midtones, and sharp cold highlights wrapped in a moody wash.
Take your time, sketch your shapes, glaze with intention, and don’t panic when things look ugly in the middle. That’s part of the process.
Get Your Paints From Monument Here!